
Want to add some flair to your home with a custom bookshelf? Building your own bookshelf is a fun DIY project. It’s perfect for beginners or seasoned woodworkers, with easy-to-follow plans for a beautiful piece.
Our DIY bookshelf plans help you make a unique piece that shows off your style. We’ll show you the tools and materials you need and guide you through different designs. Get ready to enjoy your new custom bookshelf!
Key Takeaways
- Easy-to-follow DIY bookshelf plans for all skill levels
- Customizable designs to fit your personal style
- Essential tools and materials needed for the project
- Step-by-step guides for a successful build
- Tips for adding a personal touch to your bookshelf
👉👉 Click here to get access to all TedsWoodworking plans »
Why Building Your Own Bookshelf Makes Sense
Building your own bookshelf can make you feel proud and add a personal touch to your home. When you build your own bookshelf, you’re not just making storage. You’re creating something that shows your style and fits your space perfectly.
Benefits of DIY Bookshelves
DIY bookshelves have many advantages over buying one. Here are some key points:
- Personalization: You can design the bookshelf to fit your specific needs and style.
- Quality: By choosing your own materials, you can ensure the bookshelf is made to last.
- Sense of Accomplishment: Completing a woodworking project can be incredibly rewarding.
Cost Comparison: DIY vs. Store-Bought
One big reason to do a DIY bookshelf is the cost savings. Here’s a comparison:
- Material Costs: By sourcing materials yourself, you can often save money compared to buying a pre-made bookshelf.
- Customization: You can choose materials and designs that fit your budget.
- Value: A handmade bookshelf can add value to your home.
A basic store-bought bookshelf might cost between $50 to $100. But, by choosing your materials and building it yourself, you can make a similar or even better-quality bookshelf for $30 to $70, depending on your material choices.
Customization Possibilities
When you build your own bookshelf, you can customize it in many ways. Consider the following:
- Size: Design the bookshelf to fit perfectly in your chosen space.
- Style: Choose a design that complements your home decor, from modern to rustic.
- Features: Add special features like drawers, cabinets, or adjustable shelves.
By taking on a woodworking project like building a bookshelf, you’re not just creating a piece of furniture. You’re making your home better and improving your DIY skills.
Essential Tools and Materials for Bookshelf Projects
Before starting your bookshelf project, gather the right tools and materials. Having everything ready will make the process easier and more fun.
Basic Woodworking Tools You’ll Need
To begin your easy bookshelf designs project, you’ll need basic woodworking tools. You’ll need a tape measure, square, pencil, safety glasses, and a circular saw. A drill press and hand saw are also key for precise cuts and holes.
Don’t forget a sander to smooth wood surfaces and a clamping system to hold pieces while glue dries. These tools will help you achieve professional-looking results in your bookshelf patterns project.
Recommended Wood Types for Bookshelves
The wood type you choose greatly affects your bookshelf’s look and durability. Solid oak or pine is great for a classic look. Maple or cherry wood is better for a modern style.
Think about the weight and stability you need for your bookshelf. Thicker, denser woods like oak are best for larger or taller bookshelves.
Hardware and Fasteners Guide
The hardware and fasteners you use impact your bookshelf’s function and look. You’ll need shelf pins or brackets for shelves. Use screws or nails that fit the wood type for the frame.
Adjustable shelf pins are good for flexible shelf setups. Decorative hardware, like knobs or handles, adds style if you have doors or drawers.
Understanding Bookshelf Plans and Measurements
To make a bookshelf that fits your space, you need to know the basics. This includes understanding bookshelf plans and measurements. These are key for a DIY project to succeed. Let’s look at the important things to think about when using free bookshelf plans.
Standard Bookshelf Dimensions
Bookshelves usually range from 30 to 72 inches tall, 24 to 36 inches wide, and 12 to 18 inches deep. These sizes are a good starting point for your project.
How to Adapt Plans to Your Space
To fit free bookshelf plans to your space, measure the area for the bookshelf. Think about the height, width, and depth for a good fit. You might need to change the plans to fit your space’s unique features.
Weight Considerations and Shelf Span
When building your bookshelf, think about how much weight it will hold and the shelf span. A longer shelf span might need extra support to avoid sagging. Use strong materials and think about the bookshelf’s weight capacity to keep it stable.

👉👉 Click here to get access to all TedsWoodworking plans »
Popular Bookshelf Plans for Beginners
Choosing the right bookshelf plan is key for beginners. We’ll guide you through some popular and easy designs. Building your own bookshelf saves money and lets you customize it.
Simple Floating Shelf Design
Floating shelves are great for beginners. They need minimal materials and are easy to install. They add extra storage without taking up much space.

Basic Three-Tier Bookshelf
A three-tier bookshelf is perfect for beginners. It offers lots of storage for books and decorations. You can adjust its size and design to match your space and style.
No-Tools Required Options
If you’re new to DIY or don’t like power tools, there are options for you. You can make a bookshelf with materials that need little to no tools.
Concrete Block and Board Shelving
This design uses concrete blocks and wooden boards for a modern bookshelf. It’s easy to put together and doesn’t need special tools.
Crate Bookshelves
Building a bookshelf with wooden crates is creative and tool-free. You can stack the crates for a unique storage unit with a rustic feel.
| Bookshelf Type | Skill Level | Tools Required |
|---|---|---|
| Simple Floating Shelf | Beginner | Drill, Level |
| Basic Three-Tier Bookshelf | Beginner | Saw, Drill, Hammer |
| Concrete Block and Board Shelving | Beginner | None |
| Crate Bookshelves | Beginner | None |
These bookshelf plans are ideal for beginners starting their DIY journey. Whether you pick a simple floating shelf or a traditional three-tier bookshelf, you’ll make something beautiful and useful for your home.
Intermediate Bookshelf Designs
Now that you’ve learned the basics, let’s dive into some intermediate bookshelf designs. These projects will boost your DIY skills and let you create unique pieces that show off your style.
Ladder Bookshelf Plan
A ladder bookshelf is both stylish and practical. It offers lots of storage without taking up too much space. Building one requires making precise angled cuts and ensuring it’s sturdy for stability.
Corner Bookshelf Design
Corner bookshelves are great for making the most of unused corner space. They fit snugly into corners, providing a clean and organized storage spot. When designing, think about the height and depth to match your space perfectly.
👉👉 Click here to get access to all TedsWoodworking plans »

Built-In Bookcase Basics
Built-in bookcases blend seamlessly with your home’s design, adding a touch of sophistication. Begin by measuring your wall space carefully and designing the bookcase to match your room’s style.
Here’s a comparison of the three intermediate bookshelf designs:
| Design | Skill Level | Space Requirement |
|---|---|---|
| Ladder Bookshelf | Intermediate | Compact |
| Corner Bookshelf | Intermediate | Corner Space |
| Built-In Bookcase | Advanced Intermediate | Wall Space |
Each design offers a unique way to beautify your home with functional bookshelves. By picking the right project, you can enhance your DIY skills and feel proud of creating something yourself.
Advanced Bookshelf Plans for Experienced DIYers
If you’re a seasoned DIYer, it’s time to try advanced bookshelf plans. These projects will challenge your skills and make you feel proud of your work.
Barrister Bookcase Design
The Barrister bookcase is a classic that looks elegant. It has stackable sections for customizing its height and layout. Building one requires precise joinery techniques and attention to detail.
Revolving Bookshelf Plan
A revolving bookshelf is a unique and useful addition to any room. It needs careful planning and execution, mainly for the rotating mechanism. You must consider the weight and balance for smooth operation.
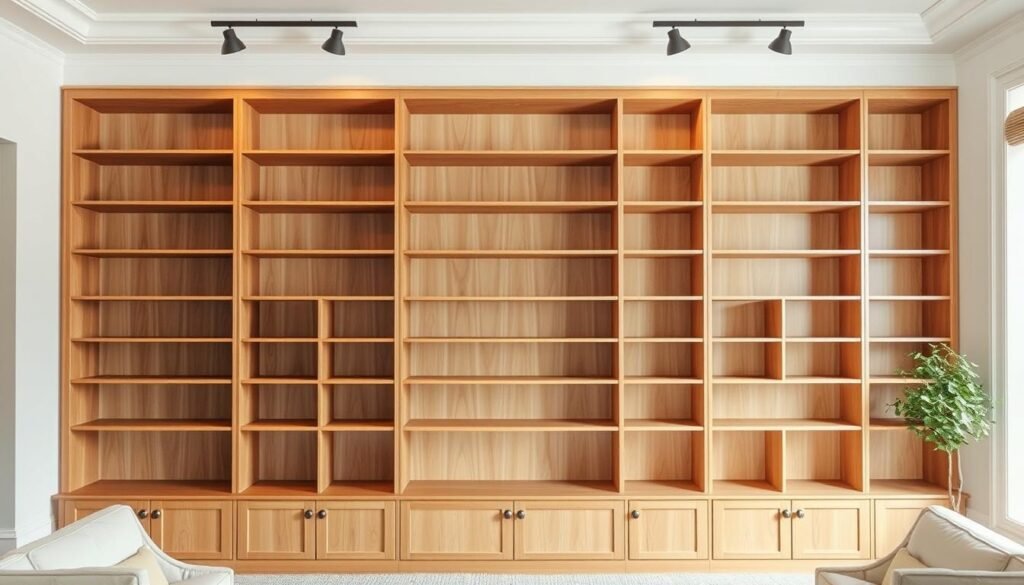
Floor-to-Ceiling Library Wall
Building a floor-to-ceiling library wall is a bold statement. It demands careful planning, precise measurements, and lots of materials. The result is a stunning display of your woodworking skills and a cozy reading nook.
| Project | Skill Level | Time Required |
|---|---|---|
| Barrister Bookcase | Advanced | 20-30 hours |
| Revolving Bookshelf | Advanced | 30-40 hours |
| Floor-to-Ceiling Library Wall | Expert | 50-100 hours |
These advanced woodworking projects are a chance to show off your skills. With careful planning and execution, you can create beautiful, functional bookshelves. They will be the envy of any DIY enthusiast.

You may also like
👉👉 Click here to get access to all TedsWoodworking plans »
Step-by-Step Guide to Building a Classic Bookshelf
Building a classic bookshelf is a fun DIY project. It adds both function and style to your home. This guide will help you make a beautiful and sturdy bookshelf, whether you’re new or experienced.
Preparing Your Materials
First, prepare all the materials you need. Choose the right wood, gather tools, and have hardware and fasteners ready.
- Choose a high-quality wood that suits your design and budget.
- Gather basic woodworking tools such as a saw, drill, and sander.
- Ensure you have all the necessary hardware like screws, nails, and brackets.
Cutting the Wood Pieces
Accurate cutting is key for a successful bookshelf. Measure carefully and use the right saw for each cut.
Remember, measure twice, cut once!
You’ll need to cut wood for the shelves, sides, and back panel for a classic bookshelf.
Assembly Process
Joining the Frame
The assembly starts with the frame. Use strong joints and make sure the corners are square.
A strong frame is the foundation of a stable bookshelf.
Installing the Shelves
After the frame is built, install the shelves. Make sure they’re evenly spaced and securely attached.
Use shelf pins or brackets for support, if you’ll have heavy books.
| Shelf Thickness | Max Shelf Span | Recommended Support |
|---|---|---|
| 3/4 inch | 30 inches | Shelf pins |
| 1 inch | 36 inches | Brackets |
| 1.5 inches | 48 inches | Heavy-duty brackets |
Finishing Touches
The last step is adding the finishing touches. Sand the bookshelf to smooth out edges, then apply your chosen finish.

👉👉 Click here to get access to all TedsWoodworking plans »
Let the finish dry as instructed before placing the bookshelf in its final spot.
Customizing Your Bookshelf Plans
Customizing your bookshelf plans is where the fun starts. It lets you add a personal touch to your creation. You can make a simple bookshelf into a stunning focal point in your home.
Adding Decorative Elements
One easy way to customize your bookshelf is by adding decorative elements. Think about adding intricately carved details, ornate trim, or decorative metalwork for elegance. You can also use different finishes or stains to match your bookshelf with your home’s décor.
Incorporating Doors or Glass Panels
Adding doors or glass panels can make your bookshelf look better and be more functional. Doors keep dust off your books, while glass panels add sophistication. You can pick from wood, glass, or metal to match your style.

Built-In Lighting Options
Built-in lighting adds ambiance and highlights your favorite books or items. You can install LED strips, puck lights, or fairy lights for a warm glow. This is great for displaying valuable or rare books.
👉👉 Click here to get access to all TedsWoodworking plans »
Multi-functional Bookshelf Ideas
Why just store books? Turn your bookshelf into something more like a desk, storage, or even a hidden compartment. This is perfect for small spaces where you need to make the most of your space.
By adding these custom features, you can make a bookshelf that truly shows off your personality and style. Whether you want elegance or functionality, the options are endless with custom bookcase plans.
Finishing Techniques for Your DIY Bookshelf
To finish your DIY bookshelf, you need to apply a protective finish. This step is key to making your bookshelf both useful and good-looking. It’s all about how to make a bookshelf that stands out.
Sanding and Preparation
First, sand your bookshelf well. Use coarse-grit sandpaper and then finer grits for a smooth finish. This step gets rid of any flaws and readies the wood for staining or painting.
Staining vs. Painting
Choosing between staining and painting depends on your desired look. Staining brings out the wood’s natural beauty, while painting gives a bold, solid color. Think about your room’s style and what you prefer.
Protective Coatings and Sealants
After staining or painting, add a protective layer. You can use polyurethane, varnish, or wax. Each offers different protection levels and sheens.
| Finish Type | Protection Level | Sheen |
|---|---|---|
| Polyurethane | High | Glossy/Matte |
| Varnish | High | Glossy |
| Wax | Moderate | Matte/Satin |
By using these finishing methods, you can make a stunning bookshelf. It will be a great addition to your home, thanks to free bookshelf plans.

👉👉 Click here to get access to all TedsWoodworking plans »
Safety Considerations and Best Practices for Bookshelf Plans
Safety is key when making DIY bookshelves. We’ll show you how to stay safe while working. It’s important to avoid accidents and keep your workspace safe.
Proper Tool Handling
Handling tools right is vital for DIY bookshelves. Always read the tool’s instructions first. Get to know how it works before you start.
Keep your tools sharp and in good shape. Dull tools can be dangerous. Always wear safety glasses and gloves to protect yourself.
- Use push sticks or safety devices with power tools to avoid injuries.
- Make sure your work area is bright and clear to avoid tripping.
- Keep kids and pets away from your work area to prevent accidents.
Securing Bookshelves to Walls
It’s important to keep your bookshelf from tipping over. This is very important if you have kids or pets. Use anti-tip brackets or straps to keep it stable.
Tips for Securing Bookshelves:
- Choose the right wall anchor for your wall type.
- Make sure the bookshelf is level before you secure it.
- Check if the bookshelf is stable after securing it.
Child and Pet Safety Features
Adding safety features to your bookshelf can help prevent accidents. Soft-close drawers or doors can prevent finger pinching. You can also add safety stops to prevent shelves from being pulled out too far.
By following these safety tips, you can enjoy your DIY bookshelf safely. Always check your bookshelf and workspace for any dangers.
Conclusion: Bringing Your Bookshelf Plans to Life
Building your own bookshelf is a fun project that mixes creativity with usefulness. We’ve looked at many DIY bookshelf plans, from easy ones for beginners to more complex ones for experts. By using our guides on customization, finishing, and safety, you’re ready to make a beautiful bookshelf that fits your style.
Now, it’s time to start making your bookshelf. With the right tools and materials, you can make a useful piece of furniture that makes your home look better. Whether you’re experienced or new to woodworking, we encourage you to start your DIY adventure.
As you build your bookshelf, you’ll not only make a place to store things but also show off your personal taste. So, be creative, stay safe, and enjoy making your bookshelf come to life.
✨ Want to Build Your Dream Bookshelf Yourself?
Don’t waste hours figuring out dimensions, joinery, or design.
📘 I highly recommend TedsWoodworking — a massive library of 16,000+ detailed woodworking plans!
With just a click, you’ll get:
- 📐 Step-by-step bookshelf blueprints
- 🪚 Accurate cut & material lists
- 🔨 Beginner to advanced-friendly designs
- ✅ Printable PDFs ready to use instantly
👉👉 Click here to get access to all TedsWoodworking plans »
😅 Don’t Have Time for DIY?
No problem! If you’d rather skip the tools and get straight to decorating, we’ve got you covered.
Here are some of the best-selling, highly rated bookshelves available on Amazon — stylish, sturdy, and easy to assemble:
👉 Check out our top Amazon bookshelf picks »
FAQ
What are the essential tools needed for building a bookshelf?
How do I choose the right wood type for my bookshelf?
Can I customize the dimensions of the bookshelf plans to fit my space?
What are some safety considerations when building a bookshelf?
How do I finish my DIY bookshelf to achieve a professional look?
What are some creative ways to customize my bookshelf?
Are there any beginner-friendly bookshelf plans available?
How do I ensure my bookshelf is stable and secure?
Affiliate Disclosure
Some of the links in this article are affiliate links. If you click through and make a purchase, I may earn a small commission — at no additional cost to you.
This helps support my work so I can continue creating helpful woodworking tutorials and product reviews.I only recommend products and services that I have thoroughly researched and believe could provide real value to my readers.
Thank you for your support!