
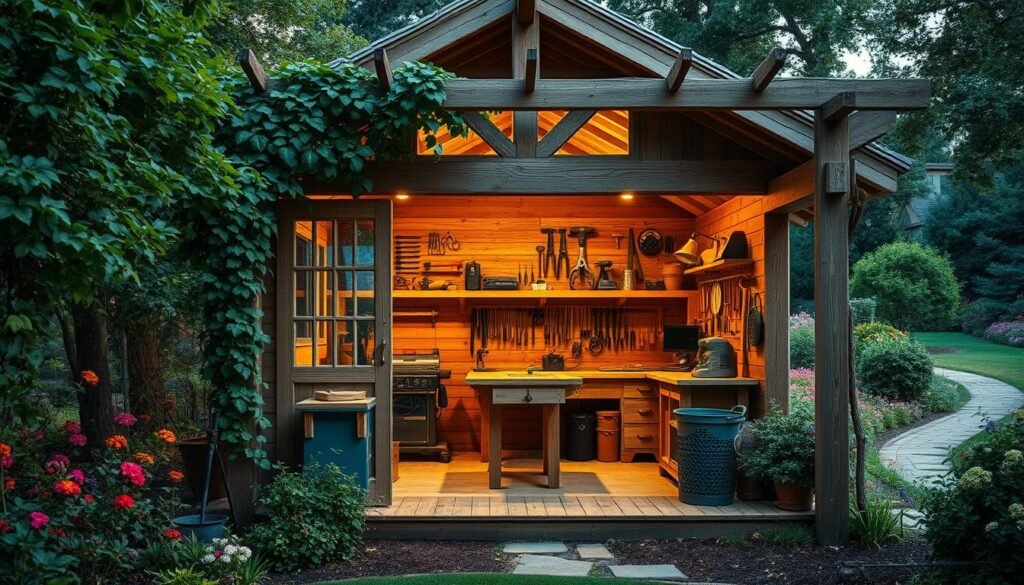
Imagine stepping into your own backyard workshop. Here, creativity has no limits, and your DIY dreams come true. We’re here to help you create the ultimate space for your projects.
A dedicated DIY shed boosts your productivity and turns your woodworking passion into a sanctuary. It doesn’t matter if you’re an experienced craftsman or just starting. A well-designed workshop can change everything.
We’ll show you the benefits, planning, designing, and building of your own woodworking shed. By the end of this guide, you’ll know how to make a space that’s both functional and fun.
👉👉 Start your woodworking journey with Ted’s 16,000 plans »
🌿 👉 Browse top-rated woodworking shed and get inspired on Amazon »
Key Takeaways
- Learn how to plan and design your ideal DIY shed.
- Discover the benefits of having a dedicated backyard workshop.
- Get step-by-step guidance on building your woodworking shed.
- Find inspiration for creating a functional and enjoyable workspace.
- Understand the importance of a well-designed shed for your projects.
The Benefits of a Dedicated Woodworking Shed
For many woodworkers, a dedicated shed is more than just a workspace. It’s a place where creativity flows freely. Having a separate area for woodworking makes your work more efficient and effective.
Creating Separation Between Home and Workshop
A dedicated woodworking shed helps keep your home and workspace separate. This separation reduces distractions and keeps your area organized. It also cuts down on dust and debris in your home.
Year-Round Project Possibilities
With a dedicated shed, you can work on projects all year, no matter the weather. This is great for those living in areas with extreme weather.
Temperature Control Advantages
In a dedicated shed, you can control the temperature better. This protects your tools and materials from extreme temperatures. Proper insulation and climate control help achieve this.
Dust and Noise Containment
A separate shed also keeps dust and noise contained. This makes your woodworking less of a disturbance to others. Using dust collection systems and soundproofing materials can enhance this.
Enhanced Tool Security and Organization
A dedicated woodworking shed lets you organize your tools securely and easily. By using tool storage solutions effectively, you keep your tools safe and accessible.
Planning Your Woodworking Shed Project
Planning your woodworking shed project is key to success. A good plan helps avoid mistakes and meets your needs.
Assessing Your Space Requirements
Think about the size you need for your shed. Consider your tools now and what you might add later.
- List your current tools and their dimensions.
- Consider the size of the projects you typically work on.
- Plan for future tool purchases and possible project size increases.
Current and Future Tool Inventory
Make a list of your tools and their space needs. Think about future tools and how they’ll fit in your shed.
Project Size Considerations
Think about the size of your projects. If you work on big projects, you’ll need more space.
Determining Budget Constraints
Setting a budget is important for your shed project. Think about the cost of materials, tools, and permits.
Budgeting Tips:
- Research material costs to estimate your total expenditure.
- Consider the cost of tools and equipment you may need to purchase.
- Factor in the cost of obtaining necessary permits and approvals.
Obtaining Necessary Permits and Approvals
Get the right permits and approvals before you start. This includes local building codes and HOA rules, if any.
Local Building Codes
Check with your local government for building codes and regulations.
HOA Restrictions
If you live in a neighborhood with an HOA, check their rules on outbuildings like sheds.

👉👉 Start your woodworking journey with Ted’s 16,000 plans »
🌿 👉 Browse top-rated woodworking shed and get inspired on Amazon »
Designing the Perfect Woodworking Shed Layout
Creating the perfect woodworking shed layout needs careful planning. A good layout boosts your productivity and makes your workspace safe and fun.
Optimal Dimensions for Different Needs
The size of your woodworking shed depends on your needs and available space. A small shed, like 8×10 feet, fits a workbench and some tools. For bigger projects, a 12×16 feet shed offers more room for machines and work areas.
| Shed Size | Ideal for | Workbench Space | Tool Storage |
|---|---|---|---|
| 8×10 feet | Small projects, hobbyist | Single workbench | Limited tool storage |
| 12×16 feet | Large projects, professional | Multiple workbenches | Adequate tool storage |
Workbench Placement Considerations
Your workbench is the core of your woodworking shed. Place it near a window for natural light. Make sure there’s enough space around it for comfortable work. A workbench with built-in storage keeps tools handy.

Tool Storage Planning
Good tool storage keeps your workspace tidy. Use wall-mounted cabinets, pegboards, and tool chests. Store tools based on how often you use them.
Electrical and Lighting Requirements
Good lighting is key for woodworking. Check your power tool needs and ensure you have enough outlets. Mix natural and artificial light for a well-lit workspace.
Power Tool Needs Assessment
Make a list of your power tools and their power needs. This helps figure out your shed’s electrical needs, like outlets and circuit capacity.
Natural and Artificial Lighting Balance
Use windows and skylights for natural light. Add LED or fluorescent lamps for extra light during all hours.
Essential Materials for Building a Durable Woodworking Shed
Building a durable woodworking shed starts with choosing the right materials. The longevity and functionality of your shed depend on the quality of the materials you select. In this section, we’ll explore the essential materials you’ll need to build a sturdy and reliable woodworking shed.
Framing Lumber Selection
When framing your shed, you have to decide between pressure-treated and standard lumber. Pressure-treated lumber is resistant to rot, decay, and insect damage. It’s ideal for the foundation and framing that will be in contact with the ground or exposed to moisture.
Pressure-Treated vs. Standard Lumber
Standard lumber is a cost-effective option for parts of the shed that are not exposed to moisture. But, it’s more susceptible to damage from rot and insects. Let’s compare the two in a table:
| Feature | Pressure-Treated Lumber | Standard Lumber |
|---|---|---|
| Moisture Resistance | High | Low |
| Cost | Moderate to High | Low to Moderate |
| Durability | High | Moderate |
Siding and Roofing Options

For siding, you can choose from a variety of materials, including vinyl, wood, and metal. Each has its pros and cons. For example,
When it comes to roofing, you’ll need to consider factors like durability, weather resistance, and cost. Asphalt shingles are a popular choice due to their affordability and ease of installation.
Flooring Materials Comparison
The flooring material you choose will depend on your budget and the level of durability you need. Options include concrete, plywood, and oriented strand board (OSB). Each has its advantages and disadvantages.
Hardware and Fasteners Guide
Don’t forget about the hardware and fasteners you’ll need to assemble your shed. Galvanized or stainless steel fasteners are recommended to prevent rust and corrosion.
👉👉 Start your woodworking journey with Ted’s 16,000 plans »
🌿 👉 Browse top-rated woodworking shed and get inspired on Amazon »
Step-by-Step Construction of Your Woodworking Shed Foundation
Building a woodworking shed begins with a solid foundation. This is key for its longevity and function. A well-planned foundation keeps your shed stable and secure, making it safe for your projects.
Site Preparation Techniques
Before starting, prepare the site. This means clearing and leveling the area for a smooth surface.
Clearing and Leveling the Area
Remove any debris, plants, and obstacles. Use a level to make sure the ground is even. Adjust as needed for a perfect level.
Soil Compaction Methods
After clearing and leveling, compact the soil. This stops settling or shifting later. Use a hand tamper or a mechanical compactor for compacting.

👉👉 Start your woodworking journey with Ted’s 16,000 plans »
🌿 👉 Browse top-rated woodworking shed and get inspired on Amazon »
Foundation Types for Different Terrains
The foundation type depends on your yard’s terrain. Each terrain needs a different foundation solution.
Concrete Slab Options
A concrete slab is a common choice for woodworking sheds. It offers a solid, level base for heavy tools and equipment.
Pier and Beam Systems
For poor drainage or unstable soil, a pier and beam system is better. This foundation elevates the shed, avoiding water damage.
Ensuring Proper Leveling and Drainage
Proper leveling and drainage are vital. They prevent water buildup around your shed, which can cause structural problems. Make sure the foundation slopes slightly to direct water away.
By following these steps and picking the right foundation, you’ll have a strong base for your woodworking shed. It will support your projects for many years.
Building the Frame and Structure of Your Woodworking Shed
With the foundation set, it’s time to build the frame of your woodworking shed. This is a key step in creating your outdoor woodworking space. It’s an exciting part of the process.
Wall Framing Techniques
Wall framing is the core of your shed’s structure. It needs precision and detail to make sure your shed is strong and well-supported.
Standard Stud Spacing
Studs are usually 16 inches apart, from center to center. This spacing balances strength and material use. But, you might need to adjust it based on your shed’s design and local codes.
Header and Sill Construction
Headers and sills are key parts of your shed’s frame. The header is above doors or windows, and the sill is the bottom plate. Making sure these are built right is essential for your shed’s stability.

Roof Truss Assembly and Installation
Building and installing roof trusses can be tough. But, with the right tools and patience, you can do it well. Always follow the manufacturer’s instructions and make sure the trusses are aligned and secure.
| Truss Type | Span | Pitch |
|---|---|---|
| Simple Fink | 20 feet | 4:12 |
| Modified Fink | 25 feet | 5:12 |
| Howe | 30 feet | 6:12 |
Door and Window Framing
Framing doors and windows right is important for their function and look. Making sure they are square and plumb is key.
Ensuring Square and Plumb Openings
To make sure your door and window openings are square and plumb, use a framing square and level. Double-check your measurements before fixing the frames in place.
By following these steps and paying attention to detail, you can build a strong and useful woodworking shed. It will meet your needs and last for years.
Customizing Your Woodworking Shed for Specific Needs
As you tailor your woodworking shed, you’ll see its true value. Customization makes your workspace better for woodworking and boosts your productivity. We’ll show you how to make your shed your own.
Specialized Storage Solutions
Good storage keeps your workspace tidy and efficient. Specialized solutions help organize tools and materials neatly.
Lumber Rack Designs
A smart lumber rack saves space and keeps wood organized. Choose an adjustable rack that mounts on walls to free up floor space.
Tool Cabinet Options
Tool cabinets protect and organize your tools. Look for ones with dividers and drawers. You can also add custom compartments for your favorite tools.
Climate Control Considerations
A stable climate in your shed is key for quality work. Extreme temperatures and humidity can harm your materials.
Insulation Strategies
Insulation regulates your shed’s temperature. Use foam board or fiberglass batts to keep it warm in winter and cool in summer.
Heating and Cooling Options
Insulation isn’t enough. Consider heaters, radiant floor heating, or air conditioning for better climate control.
Sound Dampening Techniques
Woodworking can be loud, disturbing neighbors and your focus. Sound dampening makes your space more pleasant.
Add mass to walls with thicker plywood or soundproofing materials. Acoustic panels also reduce echo and absorb sound.

👉👉 Start your woodworking journey with Ted’s 16,000 plans »
🌿 👉 Browse top-rated woodworking shed and get inspired on Amazon »
Customizing your shed makes it functional and enjoyable. Whether you’re experienced or new, a well-designed shed enhances your projects.
Interior Setup for Maximum Woodworking Efficiency
Setting up your woodworking shed’s interior is key to being efficient. A tidy space helps you focus on your projects. It keeps distractions and obstacles away.
Insulation and Wall Finishing
Insulation keeps your shed comfortable to work in. It controls temperature and noise. Choose insulation based on your climate and projects.
For walls, plywood or drywall works well. They give a smooth surface for your tools.
Electrical Wiring and Outlet Placement
Electrical setup is vital in your shed. Make sure you have enough outlets for your tools.
220V vs. 110V Requirements
Think about your tools’ voltage needs. Handheld tools use 110V, but big machines need 220V. Your wiring must support the right voltage.
Circuit Planning for Power Tools
Plan your circuits to avoid overloading. Use separate circuits for different tools. A licensed electrician can help make sure it’s safe and meets local codes.

👉👉 Start your woodworking journey with Ted’s 16,000 plans »
🌿 👉 Browse top-rated woodworking shed and get inspired on Amazon »
Lighting Solutions for Detailed Work
Good lighting is essential for detailed work. Use a mix of overhead and task lighting. LED lights are bright and energy-saving.
Dust Collection System Installation
A dust collection system is critical. It keeps your space clean and protects your health from dust.
Central vs. Tool-Specific Collection
You can go for a central dust system or tool-specific ones. Central systems are efficient but cost more. Tool-specific systems are flexible and cheaper for small setups.
By planning your shed’s interior well, you can boost your productivity. Think about your needs and projects to set up your shed right.
Organizing Your Woodworking Shed for Optimal Workflow
A well-organized woodworking shed unlocks your full creative power. When tools and materials are neatly arranged, you can focus on creating something amazing.
Tool Storage Solutions
Effective tool storage is key for a smooth workflow. Let’s look at some practical options.
Wall-Mounted Systems
Using wall space can declutter your area. Install wall-mounted tool holders or pegboards to keep tools handy.
Mobile Tool Stations
Mobile tool stations offer flexibility. They let you move tools where needed, boosting productivity.
Material Storage Strategies
Organizing materials is as important as tool storage. Use lumber storage racks and storage bins to keep materials tidy and easy to access.
Workbench Design and Placement
Your workbench is the shed’s heart. Make sure it’s comfortable and efficient. Think about height, size, and location for better workflow.
Safety Equipment Organization
Organizing safety equipment is vital. Use designated storage for goggles and ear protection. This way, they’re always ready.

By using these strategies, your woodworking shed will be more efficient and enjoyable.
👉👉 Start your woodworking journey with Ted’s 16,000 plans »
🌿 👉 Browse top-rated woodworking shed and get inspired on Amazon »
Conclusion: Enjoying Your New Woodworking Space
Now that you’ve finished your woodworking shed, it’s time to enjoy it. A dedicated backyard workshop is more than a space. It’s a place for creativity and getting things done.
This guide should have inspired you to make a great woodworking shed. Whether you’re experienced or new, your shed will be your favorite place to work. So, get ready to be creative and improve your woodworking skills in your own backyard.
🛠️ Want the Look Without the Sawdust? Here’s Your Shortcut
There’s something rewarding about building a wooden piece with your own hands—but let’s face it, not everyone has the time, tools, or space for a full DIY project.
💡 That’s why I recommend Ted’s Woodworking Plans – a massive library of 16,000+ step-by-step plans for every kind of woodworking project you can imagine. From pet houses to holiday gifts, you’ll get:
✨ Easy-to-follow blueprints
🧰 Complete material & cut lists
🪚 Projects for all skill levels
👉👉 Start your woodworking journey with Ted’s 16,000 plans »
🛒 Prefer to Buy Instead of Build?
No problem! If you love the look of handcrafted wood but would rather skip the tools, we’ve got you covered.
🌿 👉 Browse top-rated woodworking shed and get inspired on Amazon »
🔍FAQ
What is the ideal size for a woodworking shed?
How do I ensure proper ventilation in my woodworking shed?
What type of flooring is best for a woodworking shed?
How can I optimize tool storage in my woodworking shed?
What are the essential electrical components for a woodworking shed?
How can I reduce noise levels in my woodworking shed?
What are the benefits of a dust collection system in a woodworking shed?
How can I ensure my woodworking shed is secure and protected from the elements?
What are some common mistakes to avoid when building a woodworking shed?
How can I customize my woodworking shed to meet my specific needs?
Affiliate Disclosure
Some of the links in this article are affiliate links. If you click through and make a purchase, I may earn a small commission — at no additional cost to you.
This helps support my work so I can continue creating helpful woodworking tutorials and product reviews.I only recommend products and services that I have thoroughly researched and believe could provide real value to my readers.
Thank you for your support!