
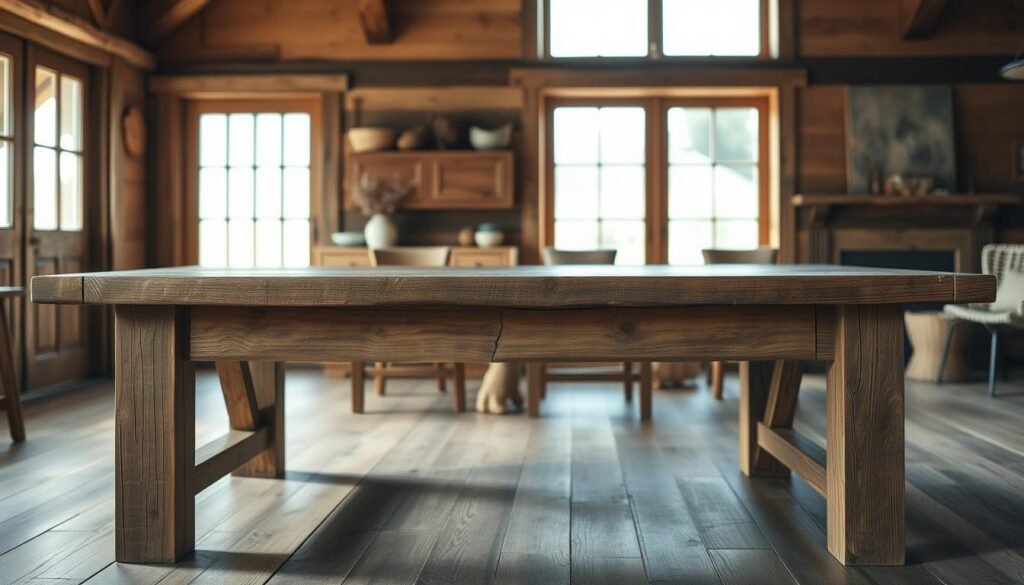
Are you ready to make a beautiful and useful piece of furniture for your home? We’re excited to help you build your own DIY farmhouse table with our detailed woodworking plan!
Building a farmhouse table is a rewarding DIY project. We’re here to guide you every step of the way. Our plan is easy to follow and fits your needs, whether you’re a beginner or an experienced woodworker.
With our guide, you’ll make a stunning dining table that will be the centerpiece of your home. Let’s start this exciting project!
👉👉 Start your woodworking journey with Ted’s 16,000 plans »
💝 Ted’s Woodworking Plans also makes an amazing gift for parents, children, friends, boyfriends, girlfriends, brothers, and sisters.
🌿 👉 Browse top-rated Farmhouse Table and get inspired on Amazon »
Key Takeaways
- Create a beautiful and functional piece of furniture for your home
- Follow our easy-to-use woodworking plan
- Build a sturdy and stylish dining table
- Customize the design to fit your needs
- Enjoy the satisfaction of completing a rewarding DIY project
The Enduring Appeal of Farmhouse Tables
Exploring DIY farmhouse table woodworking plans reveals their lasting charm. These tables have been a home staple for centuries. Their appeal continues to draw in homeowners today.
Historical Origins of the Farmhouse Style
The farmhouse style began in rural areas. These tables were built to be strong and useful. They were made from local wood and had simple designs.
Therustic farmhouse table blueprintsof the past could handle daily life. They were perfect for family meals and holiday gatherings.
Why Farmhouse Tables Work in Modern Homes
Farmhouse tables are popular in modern homes for good reasons. They mix rustic charm with practicality. A well-made farmhouse table can be the heart of your dining area.
With afarmhouse style table making guide, you can create something beautiful. It can fit your needs and style perfectly. Whether for a cozy breakfast nook or a big dining area, a farmhouse table is ideal.
Essential Tools and Materials for Your Farmhouse Table Project
Building a farmhouse table needs the right tools and materials. We’ll help you get ready for this project. It’s all about planning and doing it right.
Required Tools List
You’ll need a good set of tools to start. These include:
- A table saw for making straight cuts
- A miter saw for precise angled cuts
- A drill press for drilling accurate holes
- Sanders for smoothing out the wood surfaces
- Clamps for holding pieces together during assembly

Lumber Selection and Quantity Guide
Choosing the right lumber is key for your farmhouse table diy project. You need durable, quality wood that can handle the table’s weight and use. For a standard farmhouse table, you’ll need:
- 2-inch thick lumber for the legs and aprons
- 1-inch thick lumber for the tabletop slats
Make sure to calculate the right amount based on your farmhouse table blueprints.
Hardware and Fasteners Needed
The right hardware and fasteners are vital for a sturdy table. You’ll need:
- Wood screws for joining the legs to the aprons
- Wood glue for reinforcing joints
- Metal brackets for added stability
Choosing the right hardware makes your farmhouse table both beautiful and strong.
Complete Farmhouse Table Woodworking Plan Breakdown
In this section, we’ll dive into the details of our farmhouse table woodworking plan. We’ll break down the process into manageable steps. Our plan is designed to be easy to follow and adaptable to your specific needs. This ensures your finished table is both functional and aesthetically pleasing.
Understanding Dimensions and Measurements
To start, it’s important to understand the dimensions and measurements of our farmhouse table plan. The table’s overall size is 72 inches long, 42 inches wide, and 30 inches tall. These dimensions provide ample space for dining while fitting comfortably in most kitchens or dining areas.
| Component | Length | Width | Thickness |
|---|---|---|---|
| Table Top | 72″ | 42″ | 1.5″ |
| Legs | 29″ | 3.5″ | 3.5″ |
| Aprons | 42″ | 4″ | 1″ |
Adapting Plans to Your Space Requirements
We know every home is different, and your available space may vary. To adapt our plan to your needs, consider the following adjustments. You can shorten or lengthen the table top, adjust the height of the legs, or modify the apron width. Always double-check your measurements before cutting any lumber to ensure a precise fit.

👉👉 Start your woodworking journey with Ted’s 16,000 plans »
💝 Ted’s Woodworking Plans also makes an amazing gift for parents, children, friends, boyfriends, girlfriends, brothers, and sisters.
🌿 👉 Browse top-rated Farmhouse Table and get inspired on Amazon »
Reading Cutting Diagrams and Blueprints
Our cutting diagrams and blueprints are designed to be easy to follow. These visual guides will help you understand how to cut and assemble the various components of your farmhouse table. Take your time to study these diagrams, as they are critical to the success of your project.
“The devil is in the details.” – Anonymous
By carefully following our step-by-step instructions and paying close attention to the dimensions, measurements, and cutting diagrams, you’ll be able to create a beautiful and functional farmhouse table. This table will be the centerpiece of your home.
Preparing Your Workspace for a Successful Build
A clean workspace is key to a successful DIY farmhouse table project. Before starting, make sure your area is set up for efficiency and safety.
Setting Up a Safe and Efficient Work Area
To work well, you need a tidy and organized space. Clear a big, flat area for your project. Keep your tools close and have enough light.
Think about using a tool cart or pegboard to organize your tools. This saves time and lowers accident risks.
Environmental Considerations for Woodworking
Woodworking makes a lot of dust and debris. To stay healthy, get a dust collection system. Good air flow is also important.
Open windows or use a fan to keep air moving. Wearing masks and safety glasses also helps prevent injuries.
| Workspace Preparation Tips | Benefits |
|---|---|
| Clear a large, flat surface | Increased work area |
| Organize your tools | Improved efficiency and safety |
| Invest in dust collection | Healthier working environment |
Follow these tips to make a stunning farmhouse table. Whether using plans farmhouse table or designing your own, a good workspace is essential. For more help, check out how to build a farmhouse table guides online.
Cutting and Preparing the Lumber
Now that your workspace is ready, it’s time to start cutting and preparing the lumber for your farmhouse table. This step is key because it sets the foundation for your project.

Measuring and Marking Techniques
Getting your measurements right is essential for any woodworking project. To make sure your table pieces fit well, use a combination square to mark your cuts. Double-check your measurements against the plan. Precision here will save you time and material later on.
- Use a sharp pencil to mark cut lines clearly.
- Consider using a story stick for repetitive cuts.
- Always mark the waste side of the cut.
Making Precise Cuts for All Components
Now that your lumber is marked, it’s time to cut. Use a table saw for straight cuts and a circular saw for breaking down big boards. The goal is to make clean, precise cuts.
Remember, slow and steady wins the race – take your time to ensure each cut is accurate.
Initial Sanding and Preparation
After cutting, your pieces will have rough edges or splinters. Sanding them helps smooth these out, getting them ready for final assembly and finishing. Start with coarse grit sandpaper (about 80-100 grit) and move to finer grit for a smooth finish.
“Sanding is like cooking – you can’t skip steps if you want a great result. Start rough, finish fine.”
By following these steps for cutting and preparing your lumber, you’ll be well on your way to creating a beautiful and sturdy farmhouse table. It will be the centerpiece of your home.
Building the Tabletop: The Heart of Your Farmhouse Table
The tabletop is the heart of your farmhouse table. It’s where family and friends gather. A well-made tabletop is both beautiful and strong, lasting through daily use.

Selecting and Arranging Boards for Visual Appeal
Choosing the right boards and arranging them is key. You want a look that fits your farmhouse style. Think about the wood’s grain, color, and texture as you arrange the boards.
To make a beautiful tabletop, you can mix the grain direction or use a symmetrical pattern. This makes the table look good and helps prevent warping.
Creating Traditional Breadboard Ends
Breadboard ends add traditional charm to your table. You’ll need to cut mortises in the tabletop and tenons on the ends. This keeps the table flat and prevents warping.
Make sure the breadboard ends fit well. A tight joint keeps the tabletop strong.
Joining Planks Securely While Allowing for Wood Movement
Securing the planks is important for a sturdy tabletop. You can use dowels, biscuits, or pocket holes. But, you also need to let the wood move to avoid cracking or warping.
Using the right joinery and allowing for wood movement makes a strong and beautiful tabletop. It will be the centerpiece of your farmhouse table for many years.
Constructing a Sturdy Base: Legs and Aprons
The legs and aprons of your farmhouse table are its backbone. They provide the necessary support and stability. A well-constructed base is essential for a functional and durable table.

Cutting and Shaping Table Legs
When building a farmhouse table, the legs are a critical component. Start by cutting four legs to the same height for a level table. Use a miter saw or circular saw for precise cuts.
Choose sturdy hardwoods like oak or maple for the legs. They provide the necessary strength and durability.
After cutting the legs to size, shape them according to your desired design. This could involve tapering the legs or adding decorative elements. Use a jigsaw or bandsaw for curved cuts, and always sand the legs to smooth out any rough edges.
Building the Apron Framework
The apron framework connects the legs and provides additional support to the table. When designing your farmhouse table diy project, consider the width and depth of the aprons. Typically, aprons are 3-4 inches wide and are attached to the legs using mortise and tenon joints or pocket hole joinery.
To assemble the apron framework, start by attaching the aprons to the legs using your chosen joinery method. Make sure the corners are square and the frame is level. Use clamps to hold the pieces in place while the glue dries.
Adding Support Structures for Stability
To enhance the stability of your table, you’ll need to add support structures between the aprons. This can be achieved by installing stretchers or additional aprons. For larger tables, consider adding a center support beam to prevent the tabletop from sagging.
When referencing your farmhouse table blueprints, pay close attention to the specifications for support structures. Properly placed supports will ensure your table remains sturdy and functional over time.
Joinery Techniques for a Professional-Quality Farmhouse Table
Choosing the right joinery technique is key to a durable and beautiful farmhouse table. It’s not just about how strong the table is. It also affects how it looks. Your homemade farmhouse table project will shine with the right joinery.
Mortise and Tenon Joints: A Traditional Approach
The mortise and tenon joint is a classic and strong choice. It fits a tenon into a mortise, making a very strong bond. It’s a bit harder to do but gives your table a timeless look.
Pocket Hole Joinery: A Beginner-Friendly Option
Pocket hole joinery is perfect for beginners. It drills a hole at an angle and screws it into another piece. It’s fast, easy, and needs less skill than mortise and tenon joints.
Alternative Joinery Methods
You can also try dowels, biscuits, and floating tenons. Dowels are easy and strong. Biscuits are quick for aligning panels. Floating tenons are strong and look good without visible fasteners.
| Joinery Technique | Difficulty Level | Strength |
|---|---|---|
| Mortise and Tenon | High | Very Strong |
| Pocket Hole | Low | Strong |
| Dowels | Medium | Strong |
Learning about these joinery methods helps you pick the best for your step by step farmhouse table instructions. You’ll get a sturdy and stunning farmhouse kitchen table blueprint.
Assembling Your DIY Farmhouse Table
Now that you have everything cut and ready, it’s time to start assembling. Putting together your DIY farmhouse table is exciting. It brings together all the pieces you’ve worked on.
Dry Fitting All Components
Before you use glue, dry fit all parts. This makes sure everything fits right and helps you make any needed changes. Take your time to check:
- Table legs and aprons fit together securely
- Tabletop boards are properly aligned
- Breadboard ends are correctly attached
Gluing and Clamping Strategies
When everything fits right, it’s time to glue and clamp. Use good wood glue and follow the instructions. Here are some tips for gluing and clamping:
- Apply even pressure to avoid warping or twisting
- Use cauls to distribute clamping pressure
- Check that all joints are secure and flush

Attaching the Top to the Base
The last step is attaching the top to the base. Use the right fasteners and follow the instructions. Make sure the top is centered and attached well. With these steps done, your DIY farmhouse table is coming together. You’ll soon enjoy your new piece of furniture.
By following these steps and your building plans, you’ll make a beautiful and strong table. It will be the heart of your home. For more plans or tips, check your plans farmhouse table resources for more ideas.
Finishing Touches: Sanding, Staining, and Sealing
Now that your farmhouse table is built, it’s time to add the finishing touches. These touches will bring out its natural beauty. The finishing process is key. It not only makes your table look great but also protects it from damage.
Progressive Sanding for a Smooth Surface
Begin with coarse-grit sandpaper (about 120 grit) to remove any imperfections. Then, move to finer grits (150, 220, and 320) for a smooth finish. Always sand in the wood grain direction to avoid scratches.
Staining Options for Different Wood Types
Choose a stain that matches your wood type. Oak and pine work well with many stains. Maple looks best with a light, natural finish. Always test the stain on a small area first.
Applying Durable Protective Finishes
After staining, apply a protective finish. Polyurethane is a top choice for its durability. Apply thin coats, letting each dry before adding the next. For a rustic look, consider a matte or satin finish.
| Finish Type | Durability | Aesthetic Appeal |
|---|---|---|
| Polyurethane | High | Glossy to Matte |
| Wax | Medium | Natural, Low Sheen |
| Oil-Based Stain | High | Rich Color |
By following these steps, you’ll have a beautifully finished farmhouse table. It will be the centerpiece of your dining area.

Maintaining and Caring for Your Farmhouse Table
A well-maintained farmhouse table can be the heart of your home for years. To keep it looking great, follow a few simple steps.
Daily Care Practices
Wipe your table clean with a damp cloth after meals. Stay away from harsh chemicals that can harm the finish. Using placemats and coasters helps protect your table from spills and water marks.
Addressing Scratches and Damage
For minor scratches, a touch-up marker or wax stick in a matching color works well. More serious damage might need a pro or a DIY refinishing. Regular checks help catch problems early.
Periodic Refinishing Guidelines
Your farmhouse table might need refinishing every few years, depending on the finish and use. Start by sanding the surface to smooth out the old finish. Then, apply a new coat as the manufacturer suggests. This not only makes the table look new but also protects it from more wear.

By following these simple care and maintenance tips, you can enjoy your beautiful farmhouse table for many years.
Enjoying Your Handcrafted Farmhouse Table
Now that you’ve finished your DIY farmhouse table, it’s time to enjoy it. You’ve put in a lot of time and effort to make a beautiful piece of furniture. It’s ready to be the centerpiece of your home.
Imagine having family and friends gather around your new table. You’ll share meals and make memories that will last forever. The joy of creating something with your own hands is priceless. You’ll be proud to show off your work.
Using your new table, you’ll see how durable and functional it is. With the right care, it will be a beloved part of your home for many years. This is thanks to a detailed farmhouse table building plan.
Building a farmhouse table is rewarding, whether you’re experienced or new to DIY. We’re sure our plans have helped you make a beautiful and useful piece. It will be cherished by your family for many generations.
🛠️ Want the Look Without the Sawdust? Here’s Your Shortcut
There’s something rewarding about building a wooden piece with your own hands—but let’s face it, not everyone has the time, tools, or space for a full DIY project.
💡 That’s why I recommend Ted’s Woodworking Plans – a massive library of 16,000+ step-by-step plans for every kind of woodworking project you can imagine. From pet houses to holiday gifts, you’ll get:
✨ Easy-to-follow blueprints
🧰 Complete material & cut lists
🪚 Projects for all skill levels
👉👉 Start your woodworking journey with Ted’s 16,000 plans »
💝 Ted’s Woodworking Plans also makes an amazing gift for parents, children, friends, boyfriends, girlfriends, brothers, and sisters.
🛒 Prefer to Buy Instead of Build?
No problem! If you love the look of handcrafted wood but would rather skip the tools, we’ve got you covered.
🌿 👉 Browse top-rated Farmhouse Table and get inspired on Amazon »
FAQ
What is the best type of wood to use for a farmhouse table?
How do I determine the right size for my farmhouse table?
What are the essential tools needed to build a farmhouse table?
Can I customize the farmhouse table plan to fit my specific needs?
How do I ensure my farmhouse table is sturdy and durable?
What are some common mistakes to avoid when building a farmhouse table?
How long does it take to build a farmhouse table?
Can I use a farmhouse table plan for other DIY projects?
What are some tips for maintaining and caring for my farmhouse table?
How do I build a farmhouse table with a rustic or distressed finish?
Affiliate Disclosure
Some of the links in this article are affiliate links. If you click through and make a purchase, I may earn a small commission — at no additional cost to you.
This helps support my work so I can continue creating helpful woodworking tutorials and product reviews.I only recommend products and services that I have thoroughly researched and believe could provide real value to my readers.
Thank you for your support!