
Welcome to our guide on making DIY picture frames. We’re excited to share this project with you. By the end, you’ll have a beautiful, custom frame for your favorite memories.
This guide is perfect for beginners. We’ll take you through each step, making sure you feel comfortable and confident. You’ll create a stunning frame that matches your home decor. It’s a great way to keep your cherished moments safe.
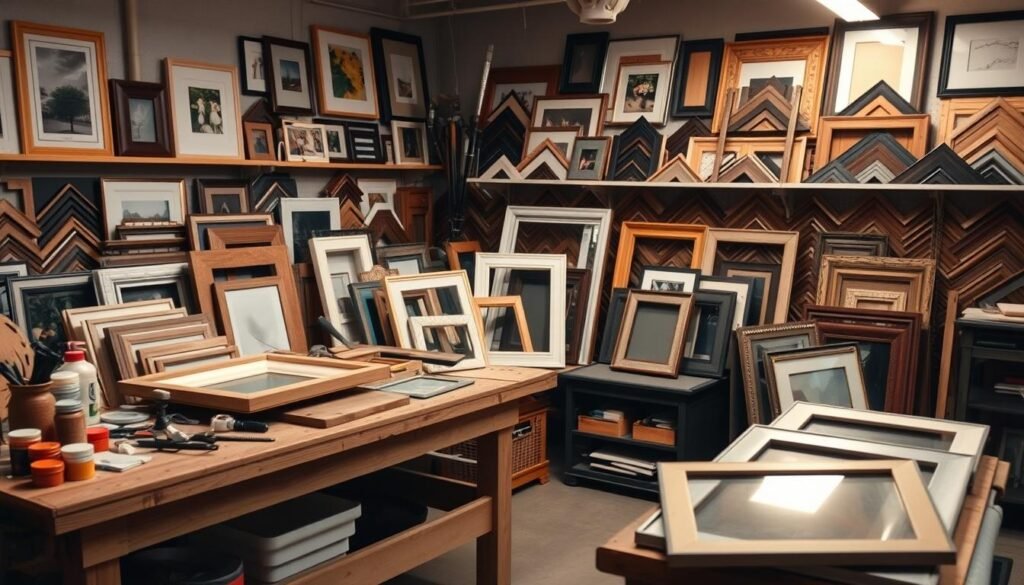
🛠️ Want the Look Without the Sawdust? Here’s Your Shortcut
There’s something rewarding about building a wooden piece with your own hands—but let’s face it, not everyone has the time, tools, or space for a full DIY project.
💡 That’s why I recommend Ted’s Woodworking Plans – a massive library of 16,000+ step-by-step plans for every kind of woodworking project you can imagine. From pet houses to holiday gifts, you’ll get:
✨ Easy-to-follow blueprints
🧰 Complete material & cut lists
🪚 Projects for all skill levels👉 Start your woodworking journey with Ted’s 16,000 plans »
💝 Ted’s Woodworking Plans also makes an amazing gift for parents, children, friends, boyfriends, girlfriends, brothers, and sisters.
🛒 Prefer to Buy Instead of Build?
No problem! If you love the look of handcrafted wood but would rather skip the tools, we’ve got you covered.
🌿 👉 Browse top-rated Picture Frame and get inspired on Amazon »
Key Takeaways
- Create a custom frame that fits your style
- Learn the basics of working with wood and materials
- Enhance your home decor with a personal touch
- Preserve your cherished memories in a beautiful frame
- Develop your DIY skills with a fun and rewarding project
The Art of Custom Picture Framing
With just a few tools and some creativity, you can make stunning picture frames. It’s a fun DIY project that lets you tailor the frame to your liking. This way, it will match your artwork or photo perfectly.
Why Make Your Own Picture Frames?
Creating your own frames lets you pick the materials, design, and size you want. It’s great for matching your decor or making a special gift. Plus, making your own frames can save you money compared to buying them.
Benefits of DIY Picture Frames
There are many perks to making your own frames. You get to customize them fully, choosing the wood, color, and style. It’s also cheaper than buying frames from stores. You can make high-quality frames with basic tools and materials.
Overview of the Frame-Making Process
Making a picture frame involves a few main steps. First, plan your frame, deciding on size, material, and design. Then, cut the pieces to size with a miter saw for clean cuts.
Next, assemble the frame with glue and nails or a corner clamp. Lastly, sand and finish the frame to your liking.
| Step | Description | Tools Needed |
|---|---|---|
| 1. Planning | Decide on frame size, material, and design | Measuring tape, calculator |
| 2. Cutting | Cut frame pieces to size | Miter saw, safety glasses |
| 3. Assembly | Assemble the frame | Glue, nails, corner clamp |
| 4. Finishing | Sand and finish the frame | Sandpaper, stain or paint |
Essential Tools and Materials for Picture Frame Making
Starting your picture frame making journey? Knowing the tools and materials you need is key. It’s a fun DIY project that can be very rewarding. But, you’ll need some basic items to start.
Required Tools for Beginners
You’ll need a few basic tools to cut, assemble, and finish your frame. A miter saw or hand saw is for precise cuts. A drill is for screwing the corners together. Clamps help hold the frame while it dries.
A tape measure and square are also essential. They ensure your cuts are accurate and your frame is square.

Materials Selection Guide
Choosing the right materials is as important as having the right tools. You’ll need wood for the frame, glass or acrylic for the front, and a backing material like cardboard or foam board. The wood type depends on your desired style and design.
Optional Equipment for Advanced Techniques
As you get better, you might want to try advanced techniques. A router can create decorative edges or cut a rabbet for the glass and artwork. A table saw is useful for precise cuts in larger wood pieces.
Safety Equipment You Shouldn’t Skip
Safety is always first, no matter your skill level. Wear safety glasses to protect your eyes from sawdust and debris. Use a dust mask when sanding or cutting wood to avoid inhaling particles.
Keeping your workspace clean and organized is also key to preventing accidents. With the right tools, materials, and safety gear, you’ll make beautiful, custom picture frames. These will showcase your favorite memories and artwork.
Choosing the Right Wood for Your Picture Frame
The type of wood you pick for your picture frame matters a lot. It affects how the frame looks, how long it lasts, and its overall quality.
Hardwood vs. Softwood Options
First, decide between hardwood and softwood. Hardwoods like oak and maple are strong and last long. They’re perfect for frames that get a lot of use. Softwoods like pine and fir are cheaper and work well for beginners.
Best Woods for Beginners
Beginners should try poplar or cedar. They’re easy to work with and look great. Poplar, for example, can be stained to look like more expensive woods.
Specialty Woods for Unique Frames
For something special, think about walnut or cherry. These hardwoods have deep colors and interesting grain patterns. They make your frame stand out.
Sustainable Wood Choices
| Wood Type | Sustainability | Aesthetic Appeal |
|---|---|---|
| Bamboo | Highly renewable | Modern, minimalist look |
| Reclaimed Wood | Reduces waste | Unique, rustic appearance |
| FSC-Certified Wood | Responsibly sourced | Varied, depending on type |
Choosing sustainable wood is good for the planet. It also makes your DIY project more interesting.

How to Make the Picture Frame: Basic Measurements and Planning
Now, let’s get started on our picture frame. First, we need to measure and plan carefully. This step is key to making sure our frame fits the artwork perfectly and all parts fit together well.
Calculating Frame Dimensions
First, decide on the frame’s size. Measure your artwork or photo, noting its width and height. Add the mat border width if you’re using one. Then, choose the frame’s width, usually 1 to 3 inches.
For example, if your artwork is 8×10 inches and you want a 2-inch frame with a 1-inch mat, your frame will be 12×14 inches.

Understanding Rabbet Cuts
A rabbet is a recessed area for the glass, artwork, and backing. It should be 1/4 to 1/2 inch deep. Making precise rabbet cuts is key for a professional look.
Creating a Project Plan
With your measurements ready, make a detailed plan. Include a cutting list, the joints you’ll use (like miter joints), and any extra features like decorative edges.
Common Measurement Mistakes to Avoid
Double-check your measurements to avoid mistakes. Common errors include forgetting the frame’s width, miscalculating the rabbet depth, and not including the glass and backing thickness.
| Measurement | Description | Example |
|---|---|---|
| Artwork Size | Width and height of the artwork | 8×10 inches |
| Mat Border | Width of the mat border | 1 inch |
| Frame Width | Width of the frame | 2 inches |
| Rabbet Depth | Depth of the rabbet cut | 1/4 inch |
By planning and measuring carefully, you’ll have a smooth and successful picture frame making process.
Cutting Techniques for Perfect Frame Corners
Cutting precise corners is key in making picture frames. It’s the same for small family photos or big frames for your living room. The goal is to have corners that are perfectly aligned and smooth.

Setting Up Your Miter Saw
Before cutting, make sure your miter saw is set up right. Check that it’s calibrated and the fence is square to the blade. A well-set miter saw is vital for making sharp 45-degree cuts.
Always use a sharp blade and adjust the saw for precise 45-degree cuts. It’s wise to test on a scrap piece of wood before cutting your actual frame pieces.
Making Precise 45-Degree Cuts
Making precise 45-degree cuts is key for perfect frame corners. Place your wood against the fence of the miter saw, ensuring it’s held in place. Cut slowly and smoothly, keeping your hand steady.
For better precision, use a miter saw with a laser guide. This feature helps align your cuts more accurately.
Hand Saw Options for Those Without Power Tools
If you don’t have a miter saw, you can use a hand saw. A backsaw or a dovetail saw works well for clean cuts. Take your time and make slow, deliberate cuts.
To ensure precise cuts, use a miter box. It helps you get the accurate 45-degree angles needed for your picture frame corners.
Troubleshooting Common Cutting Mistakes
Mistakes can happen, even with careful planning. If your cuts are not precise, don’t worry. You can fix common cutting mistakes. For example, if your cut is slightly off, sandpaper can fine-tune the edge.
| Cutting Issue | Solution |
|---|---|
| Inaccurate 45-degree angle | Adjust your miter saw or miter box to ensure it’s calibrated correctly. |
| Rough cut edges | Use sandpaper to smooth out the edges. |
| Misaligned cuts | Double-check your measurements and ensure your wood is properly aligned against the fence. |
Mastering these cutting techniques will help you make beautiful, professional-looking picture frames. Whether it’s a large or small frame, the principles are the same. Happy crafting!
Joining Frame Corners: Methods and Techniques
To make your picture frame strong and lasting, learning to join corners is key. You’ve cut your frame pieces well; now it’s time to put them together.
Using Corner Clamps Effectively
Corner clamps are a big help in joining corners. They keep the corners steady while the glue dries, making a tight joint. To use them right, put a little glue on the mitered edges, then clamp the corners. Make sure the clamps are tight all around to avoid any mess.
Nailing vs. Gluing Techniques
There are two main ways to join frame corners: nailing and gluing. Nailing holds things in place right away, while gluing makes a stronger bond over time. For a strong joint, try both. Nail the corner first, then glue it for extra strength.
Reinforcing Corners with Splines
Adding splines to your frame corners makes them even stronger. A spline is a thin wood piece that fits into a slot in the corner. It not only strengthens the corner but also makes a nice, visible joint that can be a design feature.
Testing Corner Strength
After joining your frame corners, test their strength. Press on the corners gently to see if they’re solid. If they’re not strong, now’s the time to make them better. A strong corner joint is essential for a durable picture frame.
| Technique | Strength | Complexity |
|---|---|---|
| Nailing | Medium | Low |
| Gluing | High | Low |
| Splines | Very High | Medium |
By learning these techniques, you’ll make beautiful, long-lasting homemade picture frames.
Creating the Rabbet for Glass and Artwork
Making a rabbet for your glass and artwork is key in picture frame making. This recessed area holds your artwork in place. We’ll show you how to create a rabbet for a professional finish.
Router Techniques for Rabbets
Using a router is a fast way to make a rabbet. The right bit makes a smooth cut. Start with a small pilot bit and then increase the size for the right depth.
- Choose the right router bit for your project.
- Set the depth carefully to avoid cutting too much material.
- Use a fence or guide for straight cuts.
Table Saw Methods
Table saws can also make a rabbet with multiple passes. This method needs careful setup and safety.
- Adjust your table saw to the correct height.
- Make multiple passes to achieve the desired depth.
- Use a push stick for safety.
Hand Tool Options for Rabbets
Hand tools like chisels and rabbet planes work well without power tools. They need more effort but can give great results.
Sizing Your Rabbet Correctly
Getting the rabbet size right is important, no matter your method. Measure your glass and artwork well. Add a small margin for a smooth fit.
Creative Design Ideas for Homemade Picture Frames
Now that you know how to make picture frames, it’s time to get creative. You can make your DIY picture frame stand special by adding unique touches. These touches should show off your personal style.
Decorative Edge Treatments
Adding a decorative edge to your picture frames can make them stand out. You can use a router for fancy designs or sand the edges for a smooth look. Trying different edge treatments can lead to unique homemade picture frame ideas.
Mixed Material Frame Ideas
Don’t just use wood for your frames. Mixing materials like metal, glass, or fabric can add creativity. For example, you could use a wooden base with metal accents or add fabric to the design. This way, you can create innovative diy picture frame stand designs.
Customizing Frames for Special Occasions
Picture frames can be made special for big events or holidays. You can make a frame that matches a wedding, birthday, or holiday. This makes the frame even more special for the person who gets it.
Upcycling Materials for Eco-Friendly Frames
Think about using old materials to make eco-friendly picture frames. You can use old pallets, reclaimed wood, or vintage windows. This not only helps the environment but also makes your homemade picture frame ideas unique.

Sanding and Finishing Your Homemade Picture Frame
To make your picture frame look professional, you need to sand and finish it right. These steps are more than just putting the pieces together. They make your frame look great and last longer.

Progressive Sanding Techniques
Sanding smooths out the wood and removes any rough spots. Begin with a coarse-grit sandpaper (120-grit) and move to finer grits (220-grit or higher) for a smooth finish. Always sand with the wood grain to prevent scratches.
Staining Options for Different Woods
Staining can really change how your picture frame looks. It can make the wood’s natural color pop or change it completely. Hardwoods like oak take stain well, but softwoods might need a pre-stain treatment. Test the stain on a small, hidden area first to get the right color.
Applying Clear Protective Finishes
After staining, put on a clear protective finish to seal the wood. This keeps it safe from dust and UV light. You can use polyurethane, varnish, or wax. Polyurethane is tough, varnish gives a hard finish, and wax is simple to apply and fix.
Troubleshooting Finish Problems
Even with careful work, sometimes the finish doesn’t look right. You might see uneven color, bubbles, or a finish that’s too thick or thin. For uneven color, try using a wood conditioner before staining. For bubbles, sand the area lightly and reapply the finish. Changing how you apply the finish or the product can fix these problems.
By following these steps and tips, you can make a picture frame that looks amazing. The secret to a professional finish is patience and paying close attention to detail.
Conclusion: Displaying Your Custom-Made Picture Frames
Now that you’ve made your picture frame, it’s time to show it off. Displaying your DIY frames can be fun and creative. You can hang multiple frames together for a gallery wall or a single frame as a statement.
Choosing the right hardware is key when hanging your frames. Use sturdy hangers or D-rings for security. Try different styles, like collages or symmetrical patterns, to add flair.
Experiment with frame styles and sizes to enhance your display. Add personal touches like decorative accents or messages. These tips will help you enjoy your frames for years and share your skills with others.
Creating your own frames is rewarding and builds your DIY confidence. So, show off your work – you’re now a skilled DIY picture frame maker, ready for more!
FAQ
What are the basic tools required to make a picture frame?
How do I choose the right wood for my picture frame?
What’s the best way to ensure accurate measurements for my picture frame?
How do I create a rabbet for my glass and artwork?
What are some creative ways to customize my picture frame?
How do I make a large picture frame?
What’s the best way to display my finished picture frame?
How do I make a DIY picture frame stand?
What safety equipment should I use when making a picture frame?
Affiliate Disclosure
Some of the links in this article are affiliate links. If you click through and make a purchase, I may earn a small commission — at no additional cost to you.
This helps support my work so I can continue creating helpful woodworking tutorials and product reviews.I only recommend products and services that I have thoroughly researched and believe could provide real value to my readers.
Thank you for your support!