
Are you ready to unleash your creativity and turn discarded materials into something special? We’re excited to share 15 inspiring ideas to give new life to your scrap materials. You’ll create beautiful and functional pieces for your home.
If you love DIY, you’re probably eager to start. Using scrap wood not only cuts down on waste but also lets you make unique items. In this guide, we’ll cover the tools and materials you need. Plus, we’ll show you a variety of woodworking projects for all skill levels.
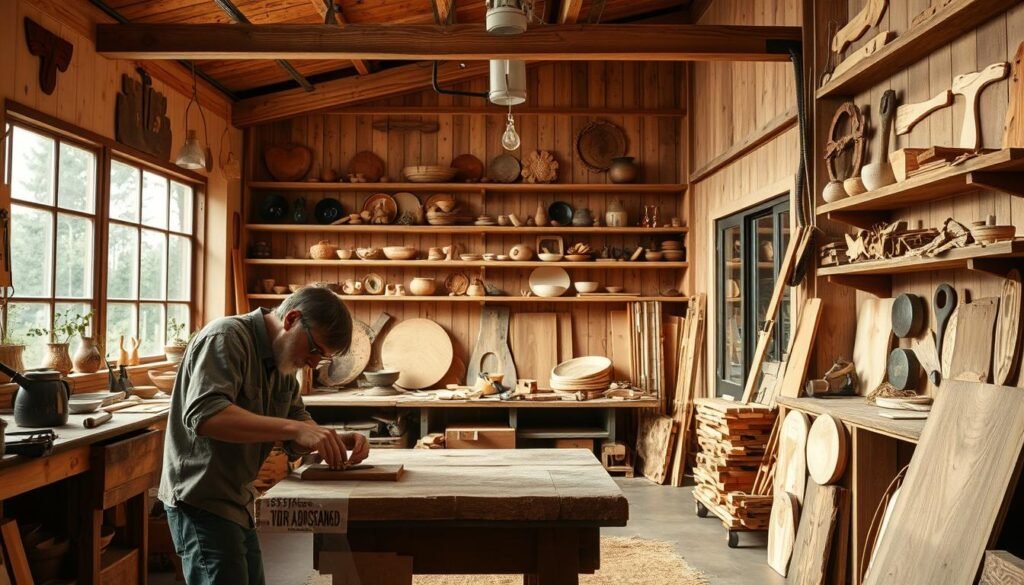
🛠️ Want the Look Without the Sawdust? Here’s Your Shortcut
There’s something rewarding about building a wooden piece with your own hands—but let’s face it, not everyone has the time, tools, or space for a full DIY project.
💡 That’s why I recommend Ted’s Woodworking Plans – a massive library of 16,000+ step-by-step plans for every kind of woodworking project you can imagine. From pet houses to holiday gifts, you’ll get:
✨ Easy-to-follow blueprints
🧰 Complete material & cut lists
🪚 Projects for all skill levels👉 Start your woodworking journey with Ted’s 16,000 plans »
💝 Ted’s Woodworking Plans also makes an amazing gift for parents, children, friends, boyfriends, girlfriends, brothers, and sisters.
Key Takeaways
- Transform your scrap materials into functional and beautiful pieces.
- Explore a variety of DIY wood projects to suit your skill level.
- Learn the essential tools and materials needed for your woodworking projects.
- Get inspired by 15 unique scrap wood project ideas.
- Reduce waste and create something truly special.
The Value of Repurposing Scrap Wood
Using scrap wood for your projects is good for the planet and your pocket. It cuts down on the need for new lumber. This helps save forests and lowers the environmental harm from wood processing.
Environmental Benefits of Wood Recycling
Wood recycling is great for the environment. It lessens landfill waste and methane emissions. Plus, it saves natural resources by needing less new timber.
David Malakoff said, “Reusing and recycling wood can significantly reduce the environmental footprint of our activities.”
“The earth has enough resources for our need, but not enough for our greed.” –
Economic Advantages of Using Scrap Materials
Scrap wood can save you money on DIY projects. It’s often cheap and easy to find. Some places even give tax breaks for wood recycling.
Choosing scrap wood is both green and budget-friendly. This article will show you how versatile scrap wood can be. From simple decor to useful furniture, the options are vast.
Essential Tools and Materials for Scrap Wood Projects
Starting your diy wood projects needs basic tools and quality materials. First, gather essential tools to efficiently complete your projects.
Basic Tools Every DIYer Should Have
Every DIYer should have a basic toolkit. It includes a saw, drill, sandpaper, and a hammer. These tools are key for most woodworking tasks. For example, a saw cuts wood into shapes and sizes. A drill makes holes for screws or nails.
- Saw: For cutting wood into the desired shapes and sizes.
- Drill: For making holes for screws or nails.
- Sandpaper: For smoothing out the wood surfaces.
- Hammer: For tapping pieces into place or fitting parts together.
How to Source Quality Scrap Wood
Finding quality scrap wood is key for your projects. Look for it at local hardware stores, online, or in your backyard. Choose pieces without damage, rot, or insects.

- Inspecting the wood for any signs of damage or rot.
- Checking for insect infestation, such as termites or carpenter ants.
- Asking the supplier about the wood’s origin and history.
With the right tools and quality scrap wood, you’re ready to make amazing diy wood projects.
Safety First: Precautions When Working with Scrap Wood
When you start your woodworking project, safety is as key as the project itself. Working with scrap wood can be dangerous if you’re not ready.
Proper Protective Equipment
Wearing the right gear is vital when working with scrap wood. You need safety glasses to protect your eyes, gloves to keep your hands safe, and a dust mask to avoid breathing in wood dust. This equipment greatly lowers the risk of injury.
| Protective Gear | Purpose |
|---|---|
| Safety Glasses | Protect eyes from debris |
| Gloves | Safeguard hands from splinters and cuts |
| Dust Mask | Prevent inhaling wood dust |
Checking Wood for Nails and Hazards
Before starting, always check your scrap wood for hazards. Look for nails, screws, or metal that could harm you or damage tools. Use a metal detector if needed, and handle the wood carefully.

By following these simple steps, you can work safely on your scrap wood projects. Safety is everyone’s duty, and we’re here to help you stay safe while you create.
Beginner-Friendly Scrap Wood Projects
If you’re new to DIY projects, you’re in the right place. We’ve got two great projects to get you started. They’re perfect for building your confidence and skills. Plus, they make great gifts or additions to your home decor.
1. Rustic Picture Frames
Creating rustic picture frames is a great way to start your DIY journey. They add a personal touch to your home decor. Plus, they make wonderful gifts.
Materials and Tools Needed
- Scrap wood (e.g., old pallets or wooden crates)
- Picture frame mold or frame making kit
- Sandpaper
- Nails or a hammer
- Wood glue
- Decorative items (optional, e.g., twine, ribbons)
Step-by-Step Instructions
- Cut your scrap wood into the required frame sizes.
- Sand the cut edges to smooth them out.
- Assemble the frame using nails or a frame making kit.
- Add a decorative touch with twine or ribbons if desired.
- Insert your favorite photo and hang it on the wall!
2. Simple Wooden Coasters
Simple wooden coasters are another easy and practical DIY project. They protect your furniture from water marks. Plus, they add a rustic charm to your living room.
Materials and Tools Needed
- Scrap wood (cut into coaster sizes)
- Sandpaper
- Wood sealant or varnish
- Cork backing (optional)
Step-by-Step Instructions
- Cut your scrap wood into coaster shapes and sizes.
- Sand the coasters to remove any rough edges.
- Apply a wood sealant or varnish to protect the wood.
- Attach a cork backing if desired for extra grip.
- Your coasters are now ready to use!
These beginner-friendly scrap wood projects are just the start of your DIY adventure. With these simple projects, you’ll gain the confidence to tackle more complex tasks. And you’ll enjoy the satisfaction of creating something with your own hands.

Functional Home Decor Projects
Make your home more beautiful with scrap wood projects. These projects add warmth and personality to any room. They also help reduce waste and support sustainability.
3. Floating Wall Shelves
Floating wall shelves are great for adding storage and style. They’re perfect for showing off decorative items, books, or kitchen tools.
Materials and Tools Needed
- Scrap wood planks
- Wall brackets
- Drill
- Screws
- Level
Step-by-Step Instructions
- Measure and cut the scrap wood planks to the desired length.
- Attach the wall brackets to the wall, ensuring they’re level.
- Place the wooden plank on the brackets and secure it.
4. Decorative Wall Art
Make stunning wall art with scrap wood. This project lets you be creative with shapes, textures, and patterns.
Materials and Tools Needed
- Various scrap wood pieces
- Glue
- Nails or a nail gun
- Hammer
- Design or pattern
Step-by-Step Instructions
- Plan your design or pattern on paper or using a digital tool.
- Cut the scrap wood into the required shapes and sizes.
- Assemble the pieces according to your design, using glue and nails.
These projects are fun to make and add a personal touch to your home. With creativity and basic tools, you can turn scrap wood into beautiful pieces.
| Project | Materials Needed | Skill Level |
|---|---|---|
| Floating Wall Shelves | Scrap wood, wall brackets, drill, screws | Beginner |
| Decorative Wall Art | Scrap wood, glue, nails, hammer | Intermediate |

Kitchen and Dining Scrap Wood Projects
We’re excited to share two DIY wood projects that will elevate your kitchen and dining experience. With scrap wood, you can create functional and beautiful pieces. These add warmth and character to your home.
5. Cutting Board with Handle
A cutting board with a handle is a practical and thoughtful addition to any kitchen. It’s perfect for food preparation. It can also be used as a serving board for special occasions.
Materials and Tools Needed
- Scrap wood (e.g., maple, walnut, or cherry)
- Wood glue
- Sandpaper
- Handle hardware (e.g., metal or wood)
- Saw
- Drill
Step-by-Step Instructions
- Cut the wood to the desired size for your cutting board.
- Sand the wood to smooth out any rough edges.
- Assemble the board using wood glue and clamp it until dry.
- Attach the handle hardware according to the manufacturer’s instructions.
6. Wine Rack
A wine rack is a great way to store your favorite bottles. It adds a touch of elegance to your kitchen or dining area.
Materials and Tools Needed
- Scrap wood (e.g., pine, cedar, or cypress)
- Wood screws
- Drill
- Sandpaper
- Wood finish (optional)
Step-by-Step Instructions
- Cut the wood to the required dimensions for your wine rack.
- Assemble the rack using wood screws and a drill.
- Sand the wood to smooth out any rough edges.
- Apply a wood finish if desired to protect the wood and enhance its appearance.
These DIY wood projects are perfect for adding a personal touch to your kitchen and dining areas. With these simple projects, you can create beautiful and functional pieces. These will be enjoyed for years to come.
Organizational and Storage Solutions
Let’s explore making storage solutions that are both useful and add rustic charm. You can use scrap wood to make beautiful, practical tools for your home or office.
7. Wall-Mounted Mail Organizer
A wall-mounted mail organizer keeps your entryway neat and your mail sorted. It’s a simple project needing just a few tools and materials.
Materials and Tools Needed
- Scrap wood (e.g., old pallets or wooden crates)
- Nails or screws
- Hammer or drill
- Saw
- Sandpaper
Step-by-Step Instructions
- Cut the scrap wood into the needed pieces for the organizer’s back, shelves, and brackets.
- Use nails or screws to put the pieces together.
- Sand the whole piece to make it smooth.
- Mount the organizer on your wall with the brackets.

8. Desktop Organizer
A desktop organizer keeps your workspace tidy. You can design it to fit your needs, with spots for pens, papers, and more.
Materials and Tools Needed
- Scrap wood (various sizes)
- Wood glue
- Nails or a nail gun
- Saw
- Sandpaper
Step-by-Step Instructions
- Plan your organizer’s design, including how many and what size compartments you want.
- Cut the wood according to your design.
- Use wood glue and nails to put the compartments together.
- Sand the organizer to make it smooth.
| Project | Materials Needed | Estimated Time |
|---|---|---|
| Wall-Mounted Mail Organizer | Scrap wood, nails/screws, hammer/drill | 2 hours |
| Desktop Organizer | Scrap wood, wood glue, nails/nail gun | 3 hours |
By doing these DIY projects, you can make storage solutions that improve your space. These projects help you stay organized and give you the joy of making something useful by hand.
Outdoor Scrap Wood Projects
Make your outdoor area more beautiful with scrap wood projects. They are both useful and good for the environment. You can make unique items from old wood that will make your garden or yard look better.
Bird House
Bring birds to your garden with a handmade bird house from scrap wood. It’s a fun project that also gives birds a warm place to live.
Materials and Tools Needed
- Scrap wood pieces (e.g., cedar, pine)
- Nails and hammer
- Saw
- Drill
- Waterproof glue and sealant
Step-by-Step Instructions
- Cut the wood into the right pieces for the bird house.
- Use nails and a hammer to put the pieces together.
- Drill a hole for the bird entrance.
- Use waterproof glue and sealant to keep it dry.
Planter Box
A planter box is a smart way to add plants to your outdoor area. You can put flowers, herbs, or succulents in it. It’s a handy and versatile project.
Materials and Tools Needed
- Scrap wood planks
- Wood screws
- Drill
- Saw
- Weather-resistant wood finish
Step-by-Step Instructions
- Cut the wood planks to the right length.
- Use wood screws to make a box shape.
- Drill holes at the bottom for drainage.
- Apply a weather-resistant finish to protect the wood.
As “The possibilities are endless” with outdoor scrap wood projects. These easy guides help you make beautiful and useful items for your outdoor space.

Furniture Projects from Scrap Wood
Turning scrap wood into furniture is a fun DIY project. It brings a personal touch to your home. With creativity, you can make beautiful furniture that improves your living space.

Rustic Side Table
A rustic side table is a great use for scrap wood. It’s easy to make, useful, and adds warmth to any room.
Materials and Tools Needed
- Scrap wood planks
- Wood screws
- Drill
- Saw
- Sandpaper
Step-by-Step Instructions
- Cut the scrap wood planks to the desired length for the table legs and top.
- Assemble the legs using wood screws.
- Attach the table top to the legs.
- Sand the entire piece to smooth out any rough edges.
Wooden Footstool
A wooden footstool is another excellent project for scrap wood. It’s useful in many places, like living rooms and bedrooms.
Materials and Tools Needed
- Scrap wood pieces
- Wood glue
- Nails
- Hammer
- Sandpaper
Step-by-Step Instructions
- Cut the scrap wood pieces to the required dimensions.
- Assemble the footstool using wood glue and nails.
- Sand the footstool to ensure it’s smooth and comfortable to use.
Both of these furniture projects are great for beginners and experts. They reduce waste and add a personal touch to your home.
Creative Gift Ideas Using Scrap Wood
Turning scrap wood into gifts is a thoughtful gesture. These projects are eco-friendly and personal. We’ll share ideas like making a wooden jewelry box and personalized signs.
Wooden Jewelry Box
A wooden jewelry box is a practical and beautiful gift. It’s perfect for storing cherished jewelry pieces.
Materials and Tools Needed
- Scrap wood (e.g., cedar or pine)
- Sandpaper
- Hinges
- Small nails or a nail gun
- Wood glue
- Decorative items (optional)
Step-by-Step Instructions
- Cut the scrap wood into appropriate sizes for the box’s sides, top, and bottom.
- Sand all cut edges to smooth them out.
- Assemble the box using wood glue and small nails.
- Attach the hinges to create a lid.
- Add any decorative elements you like.

Personalized Wooden Signs
Personalized wooden signs make thoughtful gifts for any occasion. They can be customized with names, quotes, or messages.
Materials and Tools Needed
- Scrap wood (various types)
- Paint or wood stain
- Paintbrushes
- Stencils or lettering guides
- Clear coat
Step-by-Step Instructions
- Select and cut the scrap wood to the desired size.
- Sand the wood to prepare it for staining or painting.
- Apply the paint or stain, and let it dry.
- Use stencils or lettering guides to add the personalized message.
- Seal with a clear coat to protect the sign.
| Project | Materials | Skill Level |
|---|---|---|
| Wooden Jewelry Box | Scrap wood, hinges, nails | Intermediate |
| Personalized Wooden Signs | Scrap wood, paint, stencils | Beginner |
Both projects are great ways to create homemade wooden gifts that are meaningful and unique. With these DIY projects, you can show your loved ones that you care.
“The art of woodworking is not just about creating something with your hands; it’s about creating something with heart.”
Advanced Scrap Wood Projects for Experienced DIYers
For those who love DIY, making something special is always exciting. What’s better than making wooden toys from scrap wood? It’s a chance to show off your skills and give a unique gift to kids.
Wooden Toys
Making wooden toys is a fun challenge that needs some skill. But with the right help, you can make something truly special. Let’s get into the details.
Materials and Tools Needed
You’ll need quality scrap wood, like oak or maple. Also, basic tools like a saw, drill, sandpaper, and hammer. And don’t forget safety gear like gloves and goggles.
| Material | Quantity | Purpose |
|---|---|---|
| Scrap Wood | Various | Main Material |
| Saw | 1 | Cutting Wood |
| Drill | 1 | Making Holes |
Step-by-Step Instructions
First, design your toy, thinking about the child’s age and safety. Cut the wood, sand the edges, and put it together. Then, add paint or varnish for the final touches.
- Design your toy
- Cut out the wood
- Sand the edges
- Assemble the pieces
- Add finishing touches
Finishing and Safety Considerations
Use safe materials for finishing your toy. Sand it well to avoid splinters. Consider varnish to protect the wood. Always check for hazards before giving it to a child.
“The way to get started is to quit talking and begin doing.”
Now you’re set to make your own wooden toys from scrap wood. This project is great for reusing materials and making something special for kids.

Scrap wood projects open up a world of creativity. They can turn into useful home decor or special gifts. By recycling wood, you make something unique and help the environment.
This guide has shown you many ways to use scrap wood. It doesn’t matter if you’re experienced or new to DIY. The fun of making something yourself is unmatched. So, start gathering your materials and let your creativity shine.
Keep in mind, every piece of scrap wood has a story and a purpose. We’re excited to hear about your projects. Happy crafting, and let’s keep exploring together!
FAQ
What are some easy scrap wood projects for beginners?
How do I source quality scrap wood for my projects?
What safety precautions should I take when working with scrap wood?
Can I use scrap wood for outdoor projects?
What are some creative gift ideas using scrap wood?
Do I need to be an experienced DIYer to tackle advanced scrap wood projects?
How can I ensure my scrap wood projects are sustainable and eco-friendly?
Affiliate Disclosure
Some of the links in this article are affiliate links. If you click through and make a purchase, I may earn a small commission — at no additional cost to you.
This helps support my work so I can continue creating helpful woodworking tutorials and product reviews.I only recommend products and services that I have thoroughly researched and believe could provide real value to my readers.
Thank you for your support!