
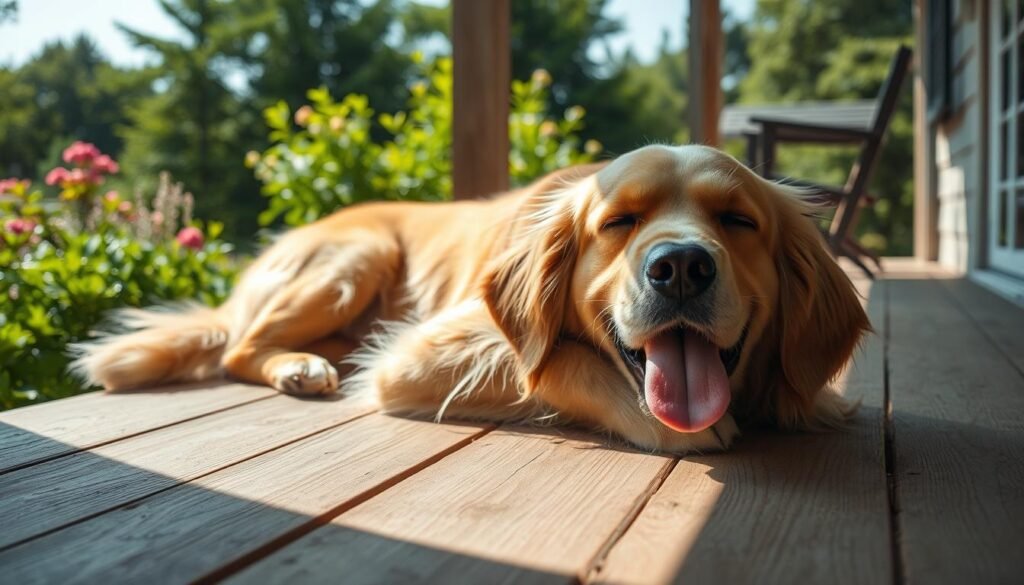
Seeing your dog suffer in the summer heat is terrible. Our beloved dogs can’t sweat like we do. So, we must give them a cool place to rest. This DIY project is a simple way to make a outdoor dog house cooling system.
Our guide will help you build a cozy dog house with a cooling system. It’s perfect for hot days. We’ll share tips and tricks to make this woodworking plan easy.
👉 Start your woodworking journey with Ted’s 16,000 plans »
💝 Ted’s Woodworking Plans also makes an amazing gift for parents, children, friends, boyfriends, girlfriends, brothers, and sisters.
Key Takeaways
- Learn how to build a DIY air-conditioned dog house to keep your pet cool
- Discover the benefits of a cooling system for your outdoor dog house
- Follow our easy-to-follow woodworking plans for a stress-free build
- Create a comfortable retreat for your dog to enjoy all summer long
- Get practical tips and tricks for a successful DIY project
Why Your Dog Needs a Cool Retreat
As summer gets hotter, it’s key to give your dog a cool place to rest. Dogs, like us, need a comfy spot to relax and feel safe. A cool dog house is not just a luxury; it’s essential for their health in the heat.
Understanding Canine Heat Sensitivity
Dogs can’t sweat like we do, making them more sensitive to heat. They cool down by panting, but this doesn’t always work in very hot weather. Canine heat sensitivity can cause serious health problems if not handled right.
Health Benefits of Temperature-Controlled Spaces
A dog house that keeps a steady temperature has many health perks. It stops heatstroke, lowers stress, and makes your dog more comfortable. Here are the main benefits in a table:
| Health Benefit | Description |
|---|---|
| Prevents Heatstroke | A cool spot lowers the risk of heatstroke, a serious and dangerous condition. |
| Reduces Stress | A comfy temperature cuts down stress and anxiety in dogs. |
| Improves Comfort | A cool dog house gives your dog a cozy place to rest and relax. |
By knowing how important a cool spot is and making one, you can greatly improve your dog’s life in the summer.
Air Conditioned Dog House DIY: Project Overview
Before starting your DIY air-conditioned dog house project, it’s essential to consider several key factors. We’ll guide you through the process, ensuring your furry friend’s new retreat is both comfortable and safe.
Determining the Right Size for Your Dog
To determine the ideal size for your dog house, consider your dog’s breed, age, and size. A larger dog will need more space to stand up, turn around, and lie down comfortably. You can use the following table as a rough guide:
| Dog Size | Ideal Dog House Size |
|---|---|
| Small (under 20 lbs) | 2×2 feet to 3×3 feet |
| Medium (21-50 lbs) | 3×3 feet to 4×4 feet |
| Large (51-80 lbs) | 4×4 feet to 5×5 feet |
Choosing the Ideal Location
When selecting a location for your dog house, consider factors like shade, drainage, and proximity to your home. You want to ensure your dog stays cool and comfortable. Ideally, the dog house should be placed in a shaded area to reduce direct sun exposure.
Budget Considerations
Your budget will play a significant role in determining the materials and features you can include in your DIY dog house. Consider the cost of lumber, insulation, and cooling components. You can save money by repurposing materials or shopping during sales. Here’s a rough estimate of costs:

👉 Start your woodworking journey with Ted’s 16,000 plans »
💝 Ted’s Woodworking Plans also makes an amazing gift for parents, children, friends, boyfriends, girlfriends, brothers, and sisters.
By carefully planning your project, you can create a comfortable and safe retreat for your dog without breaking the bank.
Essential Materials for Your Project
Let’s explore the key materials needed for your air-conditioned dog house. Building a cozy and useful retreat for your dog requires several important parts.
Lumber and Building Materials
You’ll need strong lumber that can handle different weather. Use pressure-treated wood for the base to fight off rot and bugs. For the rest, cedar or pine are good because they resist decay and bugs well.
Insulation Options
Good insulation keeps the inside cool. You can pick between foam board insulation or fiberglass batts. Foam board is better for small spaces because it has a high R-value per inch.
Cooling System Components
The cooling system is the heart of your dog house. You’ll need a small air conditioning unit and a thermostat to control the temperature.
Hardware and Fasteners
To put the dog house together, you’ll need screws, nails, and brackets. Make sure they don’t rust to keep the structure strong over time.
| Material | Purpose | Recommended Type |
|---|---|---|
| Lumber | Structure | Pressure-treated wood, Cedar, Pine |
| Insulation | Thermal Regulation | Foam board, Fiberglass batts |
| Cooling System | Temperature Control | Air conditioning unit, Thermostat |
| Hardware | Assembly | Rust-resistant screws, nails, brackets |
👉 Start your woodworking journey with Ted’s 16,000 plans »
💝 Ted’s Woodworking Plans also makes an amazing gift for parents, children, friends, boyfriends, girlfriends, brothers, and sisters.
Tools You’ll Need
Before starting your DIY air-conditioned dog house project, it’s essential to gather the right tools. Having the correct equipment will make the process smoother and more efficient.
Power Tools
Power tools are key for cutting, drilling, and shaping the materials for your dog house. You’ll need:
- A circular saw for cutting lumber
- A drill press for precise drilling
- A jigsaw for curved cuts
- A sander for smoothing out the surfaces
Hand Tools
Hand tools are necessary for tasks that require more precision and control. Essential hand tools include:
- A hammer for tapping pieces into place
- Tape measure for measuring and marking lumber
- Level for ensuring the structure is even
- Pliers for gripping and bending
Measuring and Marking Tools
Accurate measurements are vital for a successful DIY project. You’ll need:
- A tape measure for measuring lumber
- A square for ensuring corners are square
- A pencil and marker for marking cuts
| Tool Category | Tools Needed |
|---|---|
| Power Tools | Circular saw, drill press, jigsaw, sander |
| Hand Tools | Hammer, tape measure, level, pliers |
| Measuring and Marking Tools | Tape measure, square, pencil, marker |
By having these tools at your disposal, you’ll be well-prepared to tackle your DIY air-conditioned dog house project.
Preparing Your Workspace and Materials
Before we start building your air-conditioned dog house, let’s get your workspace ready. A clean and organized workspace makes the build smoother and safer.
Setting Up a Safe Work Area
First, clear your work area of any clutter or obstructions. Make sure there’s good lighting and ventilation to avoid accidents. Wear protective gear like gloves and safety glasses to keep yourself safe from sawdust and sharp objects.
Cutting the Lumber to Size
Next, cut your lumber according to the plans. Use a sharp saw blade for clean cuts. Here’s a simple table to help you plan your cuts:
| Part | Quantity | Dimensions |
|---|---|---|
| Side Panels | 2 | 24″ x 36″ |
| Back Panel | 1 | 36″ x 48″ |
| Front Panel | 1 | 36″ x 48″ |
Pre-Assembly Organization

👉 Start your woodworking journey with Ted’s 16,000 plans »
💝 Ted’s Woodworking Plans also makes an amazing gift for parents, children, friends, boyfriends, girlfriends, brothers, and sisters.
Organize your cut lumber and other materials in the order you’ll need them. This will save you time and reduce confusion during the build.
By following these steps, you’ll be ready to start building your air-conditioned dog house. A well-prepared workspace is essential for a successful DIY project.
Building the Dog House Foundation and Frame
Building a strong foundation and frame is key for our air-conditioned dog house. We’ll guide you through it step by step. “A sturdy base is the backbone of any successful DIY project,” as the saying goes. It’s very true for our dog house project.
Creating a Solid Base
To start, we need a solid base for our dog house. First, clear the area. Then, lay down a level foundation plate and secure it with anchors. Make sure the base is level and sturdy to support the whole structure.

👉 Start your woodworking journey with Ted’s 16,000 plans »
💝 Ted’s Woodworking Plans also makes an amazing gift for parents, children, friends, boyfriends, girlfriends, brothers, and sisters.
Framing the Walls
With the base ready, we can start framing the walls. Cut the lumber to size as per your plan. Then, assemble the frame using screws or nails. Make sure the corners are square and the frame is sturdy.
Constructing the Roof Frame
Constructing the roof frame is the next step. Create a slope to let water run off. Ensure the frame is strong enough for the roofing material and any extra features like vents or skylights. Use precise measurements and sturdy joints for a functional and durable roof frame.
By following these steps, you’ll have a solid foundation and frame for your dog house. It’s ready for the next stages of construction.
Installing Insulation for Maximum Efficiency
Insulation is key to keeping your dog house cool. It cuts down on heat gain in summer and loss in winter. This keeps your dog comfy all year.
Wall Insulation Techniques
There are many ways to insulate your dog house walls. You can use fiberglass batts, which are simple to put in and work well. Or, you might choose reflective insulation to bounce sun rays away. Make sure the insulation fits tightly between the studs.
Floor and Ceiling Insulation
Don’t overlook the floor and ceiling of your dog house. For the floor, rigid foam insulation under the house stops ground heat from getting in. For the ceiling, use the same methods as the walls. This keeps the house cool in summer and warm in winter.
Sealing Gaps and Cracks
Sealing gaps and cracks is as vital as insulation. Use caulk or weatherstripping to block air leaks around windows, doors, and vents. This keeps hot air out and cool air in, boosting your insulation’s effectiveness.

👉 Start your woodworking journey with Ted’s 16,000 plans »
💝 Ted’s Woodworking Plans also makes an amazing gift for parents, children, friends, boyfriends, girlfriends, brothers, and sisters.
Cooling System Installation Guide
Creating a cool oasis for your dog is more than just picking a cooling method. It requires careful installation and considering several factors. We’ll guide you through installing a cooling system to keep your dog house cool.
Choosing the Right Cooling Method
The first step is deciding on the cooling method that best suits your dog’s needs. You have several options to consider:
- Small AC Unit Option: Ideal for larger dog houses or in extremely hot climates.
- Cooling Pad Systems: A more energy-efficient and cost-effective solution.
- Fan and Ventilation Approaches: Great for improving airflow and reducing temperature.
Small AC Unit Option
A small AC unit can cool your dog house well, if you live in very hot areas. Make sure to choose a unit that fits the space right.
Cooling Pad Systems
Cooling pads are another excellent option. They’re often less expensive to run and can be very effective. Just make sure to follow the manufacturer’s instructions for installation.
Fan and Ventilation Approaches
Improving ventilation with fans and vents can significantly lower the temperature inside the dog house. Consider installing a thermostatically controlled fan for optimal efficiency.
Electrical Considerations and Safety
When installing any cooling system, electrical safety is key. Here are some key considerations:
- Ensure all electrical components are rated for outdoor use.
- Follow the manufacturer’s instructions for installation.
- Consider hiring a professional if you’re unsure about any aspect of the electrical installation.
Proper Ventilation Setup
Proper ventilation is critical for your cooling system’s effectiveness. Make sure your dog house is well-ventilated. This allows hot air to escape and cool air to enter. Use a combination of vents and fans for this.
By carefully choosing and installing the right cooling system, you can ensure your dog stays cool and comfortable throughout the summer. Remember, safety and efficiency should be your top priorities.
Testing and Adjusting Your Cooling System
Now that you’ve set up the cooling system in your DIY air-conditioned dog house, it’s time to test and fine-tune it. This will make sure your furry friend stays cool and comfortable.
Temperature Monitoring Methods
To check the temperature, use a digital thermometer inside the dog house. It will give you accurate readings. This helps you see how well the cooling system is working.
Making Efficiency Adjustments
If the temperature isn’t right, you might need to make some changes. Check the cooling system’s settings to make sure they’re correct. You could also add more insulation or improve ventilation to make it more efficient.
Troubleshooting Common Issues
Some common problems include not enough cooling or uneven temperatures. To fix this, check for blockages in the cooling system. Make sure all connections are secure. Also, check if the system is the right size for your dog house.

👉 Start your woodworking journey with Ted’s 16,000 plans »
💝 Ted’s Woodworking Plans also makes an amazing gift for parents, children, friends, boyfriends, girlfriends, brothers, and sisters.
By following these steps, you can make sure your dog’s new retreat is cool, safe, and comfortable. Regular checks and adjustments will keep the temperature just right. This will give your pet a happy and healthy place to be.
Finishing Touches and Customization
Now that your air-conditioned dog house is built, it’s time to add the finishing touches. These touches will make it a cozy retreat for your furry friend. This stage is key to ensuring your dog’s comfort and safety.
Exterior Weatherproofing
To protect your dog house from the elements, apply a waterproof coating to the exterior. This will help prevent damage from rain and sun exposure. Consider using a durable finish like cedar or pine to enhance the structure’s longevity.

👉 Start your woodworking journey with Ted’s 16,000 plans »
💝 Ted’s Woodworking Plans also makes an amazing gift for parents, children, friends, boyfriends, girlfriends, brothers, and sisters.
Interior Comfort Features
Inside, you can add comfort features such as soft bedding, a heated mat for colder months, or even a few toys. These will make the space inviting. Ensure that any materials used are safe for your dog and easy to clean.
Personalization Options
Personalize the dog house with your dog’s name or a decorative trim that matches your home’s style. You can also consider adding windows or a doggy door for extra charm.
| Feature | Description | Benefit |
|---|---|---|
| Waterproof Coating | Applied to the exterior to protect against rain and sun | Extends the life of the dog house |
| Soft Bedding | Added inside for comfort | Makes the dog house a cozy retreat |
| Decorative Trim | Matches the style of your home | Enhances the appearance of the dog house |
Conclusion: Enjoying Your Completed Air Conditioned Dog House
Now that you’ve finished your DIY air-conditioned dog house, it’s time to enjoy it with your furry friend. A cool and comfy space for your dog shows you care. It’s a great way to show your love.
Watching your dog relax in their new home is rewarding. You’ll see the effort you put into building a perfect dog house for hot days. It’s more than comfort; it’s joy for your pet.
With the air-conditioned dog house, your dog is safe and happy, even when it’s very hot. Take a moment to appreciate your work. Enjoy the special bond you share with your pet in their new favorite spot.
🛠️ Want the Look Without the Sawdust? Here’s Your Shortcut
There’s something rewarding about building a wooden piece with your own hands—but let’s face it, not everyone has the time, tools, or space for a full DIY project.
💡 That’s why I recommend Ted’s Woodworking Plans – a massive library of 16,000+ step-by-step plans for every kind of woodworking project you can imagine. From pet houses to holiday gifts, you’ll get:
✨ Easy-to-follow blueprints
🧰 Complete material & cut lists
🪚 Projects for all skill levels
👉 Start your woodworking journey with Ted’s 16,000 plans »
💝 Ted’s Woodworking Plans also makes an amazing gift for parents, children, friends, boyfriends, girlfriends, brothers, and sisters.
FAQ
What size should my air-conditioned dog house be?
Can I use any type of insulation for my dog house?
How do I choose the right cooling system for my dog house?
Are there any safety considerations when installing a cooling system?
How can I make my dog house more comfortable for my pet?
What are some common issues with DIY air-conditioned dog houses, and how can I troubleshoot them?
Can I build an air-conditioned dog house on a tight budget?
How do I weatherproof the exterior of my dog house?
What are some DIY air-conditioned dog house cooling ideas?
Affiliate Disclosure
Some of the links in this article are affiliate links. If you click through and make a purchase, I may earn a small commission — at no additional cost to you.
This helps support my work so I can continue creating helpful woodworking tutorials and product reviews.I only recommend products and services that I have thoroughly researched and believe could provide real value to my readers.
Thank you for your support!