
Ready to make your kitchen look sleek and modern without spending a lot? We’re here to help you create a beautiful, functional space. Our guide will take you through planning and installation, giving you all the info you need.
Creating your own budget-friendly cabinetry is a rewarding DIY project. We’ll guide you every step of the way. Follow our instructions to make a stunning modern kitchen design that you’ll enjoy for years.
👉👉 Start your woodworking journey with Ted’s 16,000 plans »
🌿 👉 Browse top-rated Frameless Kitchen Cabinets and get inspired on Amazon »
Key Takeaways
- Learn how to plan and install frameless cabinets for a sleek, modern look.
- Discover the benefits of building your own budget-friendly cabinetry.
- Understand the essential tools and materials required for the project.
- Get step-by-step guidance on building and installing your cabinets.
- Transform your kitchen into a beautiful, functional space.
Understanding Frameless Kitchen Cabinets
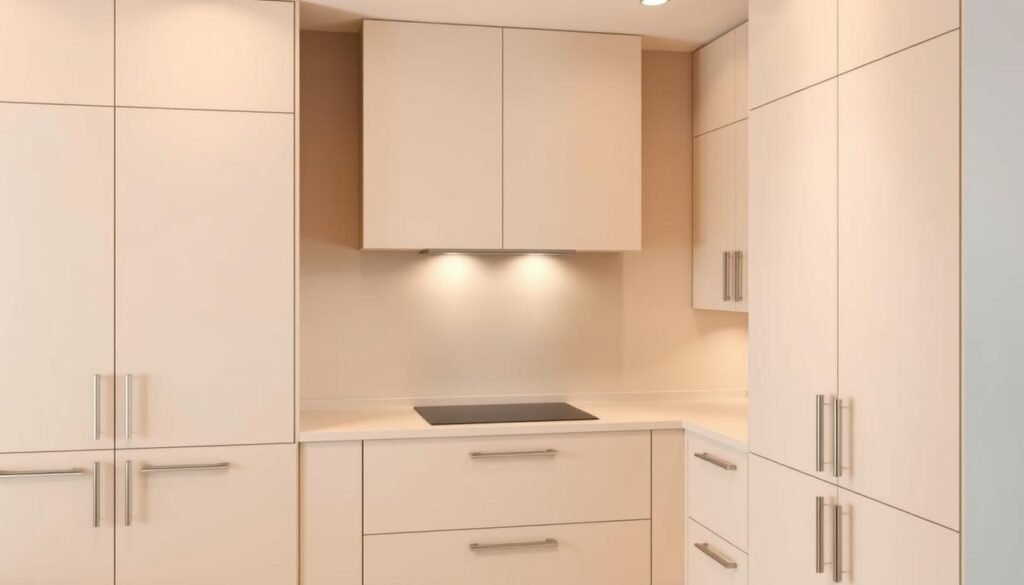
Frameless kitchen cabinets are a key part of modern kitchen design. They offer a sleek and sophisticated look. Unlike traditional cabinets, they give your kitchen a clean, unobstructed appearance, making it feel more spacious.
What Are Frameless Cabinets?
Frameless cabinets, also known as full-access cabinets, don’t have a face frame. This design lets doors and drawers cover the entire cabinet box, creating a seamless look. Homeowners who love contemporary cabinet styles and need custom cabinet solutions often choose this style.
Benefits of Frameless Design
The frameless design has many benefits, like more storage space and a modern look. Without a face frame, you can reach more of the cabinet’s interior, perfect for storing larger items. The sleek look of frameless cabinets also makes your kitchen look more contemporary and streamlined.
European vs. American Cabinet Construction
Frameless cabinets use European-style cabinetry techniques. This method uses thicker panels and different joinery compared to American construction. We find that European-style construction gives a minimalist look, a key feature of frameless kitchen cabinets. Knowing these differences helps you choose the right cabinet style for your kitchen.
Planning Your DIY Frameless Kitchen Cabinets Project
To make your dream kitchen come true, start by planning your DIY frameless kitchen cabinets project carefully. Planning is key to keeping your project on track, both in budget and execution.
👉👉 Start your woodworking journey with Ted’s 16,000 plans »
🌿 👉 Browse top-rated Frameless Kitchen Cabinets and get inspired on Amazon »
Measuring Your Kitchen Space
Getting accurate measurements is the first step to a successful DIY kitchen cabinet project. Measure your kitchen space well, including wall, window, and doorway dimensions. Use a laser measuring tool for precision and double-check your measurements to avoid costly mistakes.
Creating a Cabinet Layout
With your kitchen measurements ready, create a detailed cabinet layout. Think about your kitchen’s workflow and storage needs. Consider the “work triangle” – sink, stove, and refrigerator – and how your cabinet layout can improve this area.
Determining Cabinet Sizes and Configurations
Choose the sizes and configurations of your cabinets based on your layout. You’ll need to pick between wall, base, and tall cabinets, based on your storage and kitchen layout. Standard cabinet sizes can simplify your project, but custom sizes might be needed for a perfect fit.
Budgeting for Materials and Tools
Budgeting is a critical part of your DIY project. Make a list of materials and tools you’ll need and find out their costs. Look for budget-friendly options for cabinetry without sacrificing quality. Your budget should also cover hardware, finishes, and any specialized tools needed.
By following these steps, you’ll have a detailed plan for your DIY frameless kitchen cabinets project. This planning phase is essential for a successful and stress-free renovation.

👉👉 Start your woodworking journey with Ted’s 16,000 plans »
🌿 👉 Browse top-rated Frameless Kitchen Cabinets and get inspired on Amazon »
- Measure your kitchen space accurately
- Create a detailed cabinet layout
- Determine cabinet sizes and configurations
- Budget for materials and tools effectively
With a solid plan in place, you’ll be well on your way to creating beautiful, functional DIY kitchen cabinets. These cabinets will enhance your kitchen’s look and function.
Essential Tools and Materials for Building Frameless Cabinets
Let’s explore the tools and materials needed for modern, minimalist frameless kitchen cabinets. The right equipment and supplies are key for a successful DIY project.
Required Power Tools
You’ll need some essential power tools to begin. A table saw is necessary for straight cuts in your cabinet materials. A drill press is vital for drilling precise holes for hardware and assembly. A circular saw is also useful for cross-cuts and ripping boards to size.

👉👉 Start your woodworking journey with Ted’s 16,000 plans »
🌿 👉 Browse top-rated Frameless Kitchen Cabinets and get inspired on Amazon »
Hand Tools and Accessories
Along with power tools, you’ll need various hand tools and accessories. Clamps are essential for holding pieces together while the glue dries. You’ll also need sandpaper and a sanding block to smooth surfaces. Other necessary tools include a tape measure, square, and pencil.
Cabinet Materials Selection
Choosing the right materials for your frameless cabinets is critical. You’ll need to select a suitable type of wood or engineered wood product for the cabinet boxes, doors, and drawers. Consider durability, cost, and aesthetic appeal when making your selection.
| Material | Characteristics | Cost |
|---|---|---|
| Plywood | Stable, less prone to warping | Moderate |
| MDF | Smooth surface, ideal for painting | Low |
| Oak | Durable, attractive grain pattern | High |
Hardware Components
Lastly, you’ll need to select the right hardware components for your frameless cabinets. This includes hinges for the doors, drawer slides for the drawers, and any other necessary hardware like handles or knobs. Choose high-quality hardware that fits your cabinet design and materials.
By gathering the necessary tools and materials, you’ll be ready to tackle your DIY frameless cabinet project with confidence.
Designing Your Frameless Cabinet System
To make a frameless cabinet system that fits your needs, think about a few key things. A good design can really change how your kitchen looks and works.
Cabinet Box Dimensions
Choosing the right size for your cabinet boxes is important. You should think about your kitchen’s space, appliance sizes, and the cabinets you want. For example, base cabinets are usually 24 to 36 inches tall. Wall cabinets can be 12 to 42 inches tall.
Door and Drawer Specifications
Deciding on the doors and drawers is also key. You’ll need to pick the material, size, and style that matches your design. You might choose contemporary cabinet styles with modern handles or prefer a classic look with fancy hardware.

👉👉 Start your woodworking journey with Ted’s 16,000 plans »
🌿 👉 Browse top-rated Frameless Kitchen Cabinets and get inspired on Amazon »
Using Design Software
Design software can make designing easier. Tools like SketchUp or Autodesk let you see your frameless cabinet design and make changes before building.
Creating Cutting Lists
After you’re happy with your design, make a cutting list. This list helps you get all the parts you need before starting. Here’s an example of what a cutting list might look like:
| Component | Quantity | Dimensions |
|---|---|---|
| Cabinet Sides | 4 | 24″ x 30″ |
| Cabinet Back | 2 | 36″ x 30″ |
| Shelves | 6 | 12″ x 24″ |
By following these steps, you can design a custom cabinet solution that’s perfect for your kitchen. Remember, careful planning and detail are the keys to a great frameless cabinet system.
Building Cabinet Boxes: Step-by-Step Process
The foundation of your DIY kitchen cabinets lies in the cabinet boxes. We’ll learn to build them step by step. Building cabinet boxes is a multi-stage process that requires attention to detail and the right techniques.
Cutting Cabinet Panels to Size
To start, you’ll need to cut your cabinet panels to the correct size. Use a table saw or circular saw for precise cuts. Make sure your measurements are accurate to avoid any discrepancies in the assembly process.
Here’s a simple table to help you understand the typical dimensions for cabinet boxes:
| Cabinet Component | Typical Thickness | Typical Width/Depth |
|---|---|---|
| Sides | 3/4 inch | Variable |
| Top/Bottom | 3/4 inch | Variable |
| Back | 1/4 inch | Variable |
Drilling Holes for Assembly
Before assembling the cabinet boxes, you’ll need to drill holes for the screws or dowels. Use a drill press or a hand drill with a precise bit to create clean, accurate holes.

👉👉 Start your woodworking journey with Ted’s 16,000 plans »
🌿 👉 Browse top-rated Frameless Kitchen Cabinets and get inspired on Amazon »
Assembling Cabinet Boxes
With your panels cut and holes drilled, it’s time to assemble the cabinet boxes. Use screws or dowels to secure the sides, top, and bottom panels together. Make sure the corners are square and the structure is sturdy.
Adding Support Elements
To enhance the durability of your cabinet boxes, consider adding support elements. Back panels or internal shelves can significantly improve stability and functionality. These additions can make your DIY kitchen cabinets more reliable.
By following these steps, you’ll be able to build robust and reliable cabinet boxes. They will form the backbone of your homemade kitchen remodel.
Creating and Installing Cabinet Doors and Drawers
Now that we’ve built the cabinet boxes, it’s time to add doors and drawers. This step is key for both looks and function.
Door Construction Methods
You have many ways to make cabinet doors. You can choose a simple flat panel or a more detailed raised panel door. Your choice depends on your style and skill.
- Flat Panel Doors: Simple and good for a clean look.
- Raised Panel Doors: More complex, for a traditional feel.
Building Drawer Boxes
Drawer boxes are essential for your drawers. You’ll need to cut and put together the sides, back, and bottom. Using dovetail joints or dado joints makes them strong.
Here’s how to do it:
- Cut the drawer box parts to size.
- Put the sides and back together with the right joinery.
- Add the bottom panel.
👉👉 Start your woodworking journey with Ted’s 16,000 plans »
🌿 👉 Browse top-rated Frameless Kitchen Cabinets and get inspired on Amazon »
Installing Drawer Slides
Drawer slides are key for smooth movement. Pick high-quality slides that can handle your drawers’ weight. Soft-close slides add a touch of luxury.
- Measure and mark the slide spots on the drawer and cabinet.
- Attach the slides to the drawer and cabinet frame.
- Check the drawers for smooth movement.
Mounting Door Hinges
For frameless cabinets, hidden hinges are best. They look clean and are adjustable, making installation easier.
To mount door hinges:
- Mark the hinge spots on the door and cabinet.
- Drill the holes needed.
- Put on the hinges and adjust as needed.
By following these steps, you can make and install doors and drawers that look and work great. This completes your minimalist cabinet installation with a budget-friendly cabinetry approach.
DIY Frameless Kitchen Cabinets Installation Guide
Now that you’ve built your frameless kitchen cabinets, it’s time to install them. This step is key for a professional look and kitchen function.
Preparing the Installation Area
Clear the area of debris and obstructions before starting. Check for plumbing or electrical components that might get in the way. Make sure the floor is level for cabinet stability.
Mounting Wall Cabinets
Mounting wall cabinets needs precision for level and secure fastening. Use a stud finder to find wall studs and mark them. Start with the upper cabinets, working from the center outwards for even spacing.

👉👉 Start your woodworking journey with Ted’s 16,000 plans »
🌿 👉 Browse top-rated Frameless Kitchen Cabinets and get inspired on Amazon »
Securing Base Cabinets
Base cabinets are the foundation for countertops and appliances. Ensure they are properly aligned and secured to the floor. Use shims for leveling and screw into wall studs for stability.
Leveling and Aligning Cabinet Units
After installing, check if cabinets are level and aligned. Use a laser level for accuracy. Adjust cabinets as needed before finishing your kitchen renovation.
By following these steps, you’ll get a professional installation. Your DIY frameless kitchen cabinets will look great and last for years.
Finishing Touches for Professional-Looking Results
Now that your cabinet boxes are built and doors are on, it’s time for the final touches. These will make your DIY frameless kitchen cabinets look like they were done by a pro.
Edge Banding Techniques
Edge banding is key for a seamless look. You’ll need a quality edge bander and some patience. Cut your edge banding to size, leaving some extra to trim later.
Apply the adhesive and press it firmly onto the cabinet edge. Use a trimmer or sharp knife to remove excess, ensuring a smooth finish.

👉👉 Start your woodworking journey with Ted’s 16,000 plans »
🌿 👉 Browse top-rated Frameless Kitchen Cabinets and get inspired on Amazon »
Sanding and Surface Preparation
Sanding is vital for a smooth finish. Start with coarse-grit sandpaper (120-grit) and move to finer grits (220-grit or higher) for a silky surface. This step removes imperfections and prepares your cabinets for painting or staining.
Painting or Staining Options
Choosing between painting or staining depends on your desired look. For a modern style, high-gloss paint is a good choice. For a traditional look, staining highlights the wood’s natural beauty. Always prime first for a uniform base coat.
Installing Decorative Hardware
The last step is adding decorative hardware. Pick hardware that matches your cabinet style and is practical. Measure carefully and follow the manufacturer’s instructions for installation.
| Finishing Technique | Description | Tips |
|---|---|---|
| Edge Banding | Applying a matching edge band to hide raw edges | Use a good quality edge bander for a smooth finish |
| Sanding | Smoothing out the surface for painting or staining | Progress from coarse to fine grit for the best results |
| Painting/Staining | Applying a finish to enhance the appearance | Always prime first for a uniform base |
| Hardware Installation | Adding functional and decorative hardware | Measure carefully and follow manufacturer instructions |
Cost Savings and Budget Considerations
For homeowners on a budget, DIY frameless kitchen cabinets are a great choice. They offer a chance to save money on kitchen renovation.
Comparing DIY vs. Professional Installation
Deciding between DIY and hiring a pro depends on your budget, skills, and project complexity. Let’s look at the costs:
| Installation Type | Cost | Time |
|---|---|---|
| DIY Installation | $500 – $2,000 | Several weekends |
| Professional Installation | $3,000 – $10,000 | A few days to a week |
DIY can cut down on labor costs. But remember, your time is valuable, and fixing mistakes can add up.
Where to Splurge and Where to Save
When planning your DIY kitchen, choose wisely where to spend and save. “Quality hardware is worth the investment”, say DIY experts. Save on hidden parts like cabinet backs. Spend more on durable drawer slides and hinges.
Long-Term Value of Custom Cabinets
DIY custom cabinets can boost your home’s value. A study shows a well-done kitchen renovation can recoup up to 80% of its cost. Quality materials and construction are key to long-term savings.

👉👉 Start your woodworking journey with Ted’s 16,000 plans »
🌿 👉 Browse top-rated Frameless Kitchen Cabinets and get inspired on Amazon »
With smart planning, you can get a high-end look without breaking the bank. Enjoy the DIY process and the long-term benefits of your kitchen remodel.
Conclusion
Now that you’ve reached the end of our DIY frameless kitchen cabinets guide, you’re ready to create a modern kitchen. You’ve learned how to plan, design, build, and install these cabinets. This will make your kitchen look great and work better.
Starting your DIY project? Remember, planning and doing things right are key to getting great results. With diy frameless kitchen cabinets, you can make a sleek, modern kitchen that shows off your style. So, get ready to start and make your kitchen vision come true!
🛠️ Want the Look Without the Sawdust? Here’s Your Shortcut
There’s something rewarding about building a wooden piece with your own hands—but let’s face it, not everyone has the time, tools, or space for a full DIY project.
💡 That’s why I recommend Ted’s Woodworking Plans – a massive library of 16,000+ step-by-step plans for every kind of woodworking project you can imagine. From pet houses to holiday gifts, you’ll get:
✨ Easy-to-follow blueprints
🧰 Complete material & cut lists
🪚 Projects for all skill levels
👉👉 Start your woodworking journey with Ted’s 16,000 plans »
🌿 👉 Browse top-rated Frameless Kitchen Cabinets and get inspired on Amazon »
🛒 Prefer to Buy Instead of Build?
No problem! If you love the look of handcrafted wood but would rather skip the tools, we’ve got you covered.
🌿 👉 Browse top-rated Frameless Kitchen Cabinets and get inspired on Amazon »
You May also Like
FAQ
🔍What are the benefits of choosing DIY frameless kitchen cabinets over traditional face-frame cabinets?
🔍What are the essential tools required for building frameless kitchen cabinets?
🔍How do I determine the correct cabinet sizes and configurations for my kitchen?
🔍What are the differences between European and American cabinet construction methods?
🔍Can I use design software to visualize my DIY frameless kitchen cabinets project?
🔍How do I achieve a professional-looking finish on my DIY frameless kitchen cabinets?
🔍What are the cost savings of choosing DIY frameless kitchen cabinets over professional installation?
🔍How do I ensure my DIY frameless kitchen cabinets are sturdy and durable?
🔍What are some budget-friendly options for custom cabinet hardware?
🔍Can I customize my DIY frameless kitchen cabinets to fit my specific needs?
Affiliate Disclosure
Some of the links in this article are affiliate links. If you click through and make a purchase, I may earn a small commission — at no additional cost to you.
This helps support my work so I can continue creating helpful woodworking tutorials and product reviews.I only recommend products and services that I have thoroughly researched and believe could provide real value to my readers.
Thank you for your support!