
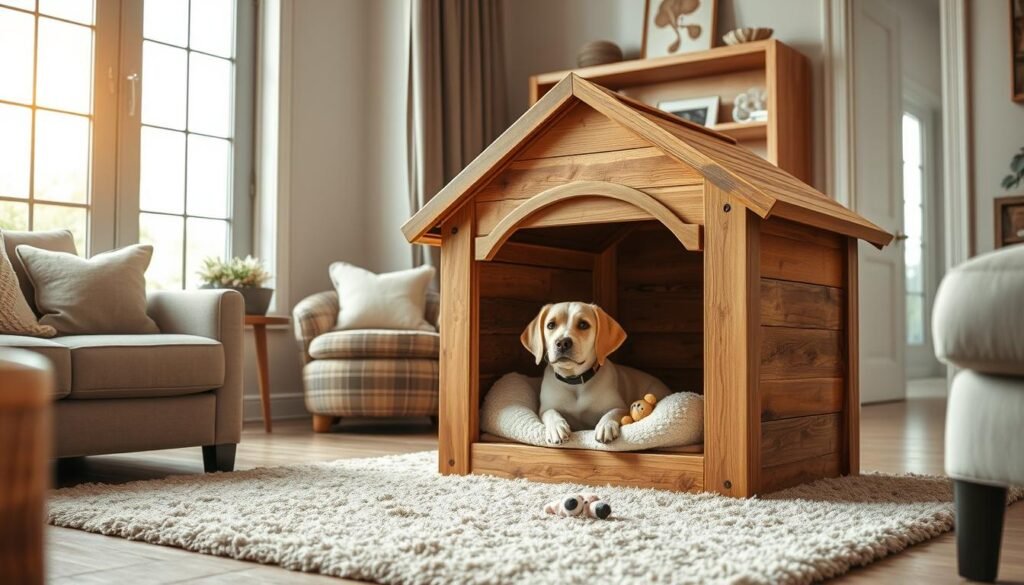
Is your furry friend feeling left out when you’re cozying up at home? Let’s change that! Building a cozy indoor dog house is a fun project. It gives your pup a comfy spot and adds a personal touch to your home.
Our woodworking plan makes it easy to build a warm spot for your dog. It’s great for anyone, whether you’re experienced or just starting. This project is a great way to spend time with your pet.
We aim to make the process fun and easy. By the end, you’ll have a beautiful indoor dog house your pup will adore.
👉 Start your woodworking journey with Ted’s 16,000 plans »
💝 Ted’s Woodworking Plans also makes an amazing gift for parents, children, friends, boyfriends, girlfriends, brothers, and sisters.
🌿 👉 Browse top-rated Indoor Dog House and get inspired on Amazon »
Key Takeaways
- Learn how to build a cozy indoor dog house using a simple woodworking plan.
- Create a comfortable and safe space for your furry friend.
- Enhance your DIY skills with a fun and rewarding project.
- Customize the dog house to fit your home decor.
- Enjoy quality time with your pet while working on this project.
Why Your Dog Needs a Cozy Indoor Retreat
A cozy indoor dog house is more than a luxury for your dog. It’s essential for their well-being. Dogs, like us, need a quiet, comfy spot to go when they’re stressed or just want to be alone.
Benefits of an Indoor Dog House
An indoor dog house offers many benefits for your furry friend. It gives them a safe and secure space to relax, lowering anxiety and stress. It also keeps them warm and cozy in cold weather. Having their own indoor spot makes your dog feel more at ease and secure.
Understanding Your Dog’s Needs and Behaviors
To make the perfect indoor dog house, knowing your dog’s needs and behaviors is key. Watch how your dog acts: Do they like to curl up or stretch out? Are they often anxious or excited? By knowing these habits, you can build a diy dog house indoor that meets their needs. This ensures they’re happy and comfortable in their new home.
Planning Your DIY Indoor Dog House Project
When you start your DIY indoor dog house project, think about a few important things. You want your dog’s new spot to be comfy and stylish. It’s more than just a shelter; it’s a cozy, safe place for your dog to relax.
Measuring Your Dog for the Perfect Fit
To make a DIY simple dog house that fits your dog, measure them carefully. Take their length, width, and height when they’re standing and lying down. This will help you pick the right size for your dog’s new home, so they can move around easily.
Choosing the Right Location in Your Home
Choosing where to put the dog house is key. Pick a quiet, cozy spot where your dog likes to rest. Make sure it’s not near drafts or heating vents. You could also place it near where your family likes to hang out to bring everyone closer together.
Design Considerations and Style Options
When it comes to design considerations, you have lots of choices to match your home. You can go for modern, rustic, or traditional looks. Think about the colors, materials, and style that will fit with your furniture. Adding windows, trim, or a nameplate can make it even more special.
Here are some important design considerations to remember:
- Choose materials that are tough and easy to clean.
- Think about what your dog likes, like a covered or open design.
- Adding insulation can help keep the temperature right.
- Make sure it’s well-ventilated.

👉 Start your woodworking journey with Ted’s 16,000 plans »
💝 Ted’s Woodworking Plans also makes an amazing gift for parents, children, friends, boyfriends, girlfriends, brothers, and sisters.
🌿 👉 Browse top-rated Indoor Dog House and get inspired on Amazon »
Essential Tools and Materials for Your Project
Let’s start your DIY indoor dog house project. First, we need to gather the tools and materials. Having everything ready will make the project easier and more fun for you and your pet.

Required Woodworking Tools List
You’ll need basic woodworking tools to begin. A circular saw is for cutting lumber. A drill is for screw holes, and a hammer for tapping pieces together. A tape measure and square ensure your cuts are right and your dog house is square.
A jigsaw is useful for curved cuts, if your design has them.
Essential Tools:
- Circular saw
- Drill
- Hammer
- Tape measure
- Square
- Jigsaw (optional)
Materials Shopping List and Wood Selection
For a pallet dog house diy project, you’ll need wooden pallets or similar lumber. If not using pallets, pine or cedar is good for durability and rot resistance. You’ll also need screws, nails, and wood glue for assembly. Don’t forget sandpaper for smoothing edges.
Materials Needed:
- Wooden pallets or lumber (pine or cedar)
- Screws
- Nails
- Wood glue
- Sandpaper
Budget Considerations and Cost-Saving Tips
Creating a materials shopping list in advance helps stay within budget. Repurpose materials like old pallets or reclaimed wood to save money and add character. Shopping during sales or using coupons can also cut costs. Remember, the goal is to create a cozy space for your dog, not to spend too much.
By being mindful of your spending and choosing materials wisely, you can build a wonderful indoor dog house that fits your budget.
Complete Cutting List and Measurements
Now, let’s get into the details of the cutting list and measurements for our DIY indoor dog house. Having a precise cutting list is key to avoid waste and keep our project on track.
Wood Cutting Dimensions and Diagram
We’ve made a detailed diagram for easier cutting. It shows the wood cutting dimensions. For a standard dog house, you’ll need:
- Four pieces for the legs (2″ x 2″ x 18″)
- Eight pieces for the frame (2″ x 4″ x 24″)
- Multiple panels for the walls and roof (varies based on design)
Understanding the Assembly Layout
Knowing the assembly layout is essential for building your dog house. It involves making the base, building the walls, and putting on the roof. The diagram and cutting list will help you see how it all comes together.
By following the cutting list and measurements, you’re on your way to a cozy DIY dog house with pallets. Your furry friend will love it.
Step-by-Step Building Instructions for Your DIY Indoor Dog House
Now that we have our materials and tools ready, let’s start building your DIY indoor dog house. This guide will help you create a cozy retreat for your furry friend.

👉 Start your woodworking journey with Ted’s 16,000 plans »
💝 Ted’s Woodworking Plans also makes an amazing gift for parents, children, friends, boyfriends, girlfriends, brothers, and sisters.
🌿 👉 Browse top-rated Indoor Dog House and get inspired on Amazon »
Building the Base and Floor Structure
The foundation of your dog house is key for stability and comfort. Begin by cutting the base and floor parts as per your plan. Use pressure-treated wood for the base to fight off moisture. Assemble the floor frame with 2-inch screws, making sure it’s strong and square.
Next, attach the floor paneling, ensuring it’s well-fastened to the frame. This will give your dog house a solid base.
| Component | Material | Dimensions |
|---|---|---|
| Base Frame | Pressure-Treated Wood | 2×4 inches |
| Floor Paneling | Plywood | 1/2 inch thick |
Constructing and Securing the Walls
With the base done, it’s time to build the walls. Cut the wall frames as per your plan, using 2×4 lumber. Assemble the frames on the floor, using 3-inch nails for extra stability.
Attach the wall paneling, ensuring it’s well-fastened to the frames. Make sure the corners are square and the walls are straight.
“A well-built dog house is not just a shelter, it’s a home within a home.” – Dog Lovers’ Guide
Assembling the Roof Structure
The roof is vital, protecting from the elements. Cut the roof rafters as per your plan, using 2×4 lumber. Assemble the roof frame, making sure it’s sturdy and evenly spaced.
Attach the roofing material, such as asphalt shingles or corrugated metal, following the manufacturer’s instructions.
Installing the Door Opening and Trim
The last step is installing the door opening and trim. Cut the door frame as per your plan, using 1×4 lumber. Attach the door frame to the wall, ensuring it’s secure and evenly spaced.
Add trim around the door and any other openings, using 1×2 lumber. This will give a finished look and protect the edges from damage.
With these steps done, your DIY indoor dog house is ready for your furry friend. Remember to add comfortable bedding and consider any additional features, such as ventilation or insulation, to make it cozy.
Safety Considerations When Building Your Dog House
Building a DIY indoor dog house means safety first. As you start this woodworking project, think about how to keep yourself and your dog safe.
👉 Start your woodworking journey with Ted’s 16,000 plans »
💝 Ted’s Woodworking Plans also makes an amazing gift for parents, children, friends, boyfriends, girlfriends, brothers, and sisters.
🌿 👉 Browse top-rated Indoor Dog House and get inspired on Amazon »
Tool Safety and Proper Woodworking Techniques
Choosing the right tools and techniques is key for a safe project. Here are some important tips:
- Wear protective gear: Always wear safety glasses, a dust mask, and gloves when using power tools.
- Use tools correctly: Always follow the tool’s instructions and use it for its intended purpose.
- Keep your workspace clean: A messy workspace can cause accidents. Keep your tools and materials organized.
Pet-Safe Materials and Avoiding Hazards
The materials you pick for your dog house are as important as how you build it. To keep your dog safe:
- Choose non-toxic materials: Pick materials that are safe for your dog, like untreated wood and pet-safe finishes.
- Avoid small parts: Make sure there are no small parts or loose pieces your dog could swallow.
- Consider your dog’s behavior: If your dog likes to chew, use materials that are chew-resistant.
By focusing on safety and picking the right materials, you can make a cozy and safe DIY indoor dog house for your pet.
Adding Comfort Features to Your DIY Indoor Dog House
Once you’ve built the basic structure of your DIY indoor dog house, it’s time to add comfort features. These will make it a cozy spot for your dog. Remember, your dog will spend a lot of time here, so comfort is key.

👉 Start your woodworking journey with Ted’s 16,000 plans »
💝 Ted’s Woodworking Plans also makes an amazing gift for parents, children, friends, boyfriends, girlfriends, brothers, and sisters.
🌿 👉 Browse top-rated Indoor Dog House and get inspired on Amazon »
Insulation Options for Warmth and Comfort
Insulation is vital for keeping your dog’s house warm in winter and cool in summer. You can use foam board or fiberglass batts for walls and floor. Proper insulation ensures a comfortable temperature, making it a cozy spot for your dog.
Ventilation Considerations for Air Flow
Good ventilation is essential to prevent moisture buildup and keep air fresh. Add vents or windows that can be opened and closed. Good ventilation stops mold and mildew, keeping your dog healthy.
Comfortable Bedding Ideas and Installation
The bedding is where your dog will spend most of their time. Choose something comfortable like a dog bed or mattress. Or, repurpose an old blanket or towel. Make sure it’s secure to prevent slipping or bunching.
Finishing and Decorating Your Indoor Dog Retreat
Now that the structure is done, it’s time for the fun part – decorating your indoor dog house. The finishing touches will make it look great and ensure it’s comfy and safe for your dog.
Pet-Safe Paint and Finish Options
Choosing the right paint and finish is key when decorating your dog house. Opt for low-VOC (Volatile Organic Compound) paints or natural finishes like beeswax or plant-based oils. These options are safe for your dog and good for the environment too.
| Finish Type | Safety Features | Aesthetic Appeal |
|---|---|---|
| Low-VOC Paint | Non-toxic, eco-friendly | Variety of colors |
| Natural Beeswax | Safe for pets, durable | Warm, natural look |
| Plant-based Oils | Non-toxic, easy to apply | Enhances wood grain |
Personalization Ideas and Creative Touches
To make your dog’s house special, add personal touches. Think about what shows your dog’s personality or matches your home’s style. A personalized plaque or a cozy throw blanket can be great choices.

👉 Start your woodworking journey with Ted’s 16,000 plans »
💝 Ted’s Woodworking Plans also makes an amazing gift for parents, children, friends, boyfriends, girlfriends, brothers, and sisters.
🌿 👉 Browse top-rated Indoor Dog House and get inspired on Amazon »
Adding Your Dog’s Name and Special Features
Make your dog house unique by adding your dog’s name or special features. A built-in toy box or a hidden treat compartment can be fun. These features make the house more useful and add a personal touch your dog will love.
By focusing on these ideas, you’ll create a cozy indoor dog house your pet will adore. Happy decorating!
Creative Variations for Your DIY Indoor Dog House
Let’s dive into some cool ideas for your indoor dog house. You can make it match your home’s style and your dog’s needs.
Using Pallets for an Eco-Friendly Dog House
Think about using pallets for an eco-friendly dog house. Pallets are easy to find, cheap, and can be turned into a cozy spot for your dog. Eco-friendly stuff not only cuts down on waste but also makes your home stand out.

👉 Start your woodworking journey with Ted’s 16,000 plans »
💝 Ted’s Woodworking Plans also makes an amazing gift for parents, children, friends, boyfriends, girlfriends, brothers, and sisters.
🌿 👉 Browse top-rated Indoor Dog House and get inspired on Amazon »
Multi-Purpose Designs (Dog House with Storage)
A dog house that does double duty can be a cozy spot for your dog and a place to store pet stuff. You can add shelves or spots for storing things in the design. This makes it useful and space-saving, perfect for small homes.
By adding creative touches to your DIY indoor dog house, you can make a space that’s both useful and stylish. Whether you pick pallets or add storage, your dog will love the effort you put into their special spot.
Conclusion
We’ve shown you how to make a cozy indoor dog house. This guide helps you plan, build, and customize a space for your dog. It meets their needs perfectly.
Building a dog house is a fun project. It gives your pet a warm, safe place. Plus, it lets you show off your creativity and skills. Seeing your dog happy in their new home is rewarding.
Now, you’re ready to start your dog house project. With the right tools and materials, and a little patience, you’ll make a place your dog will love. So, begin and enjoy making a special spot for your loyal friend.
🛠️ Want the Look Without the Sawdust? Here’s Your Shortcut
There’s something rewarding about building a wooden piece with your own hands—but let’s face it, not everyone has the time, tools, or space for a full DIY project.
💡 That’s why I recommend Ted’s Woodworking Plans – a massive library of 16,000+ step-by-step plans for every kind of woodworking project you can imagine. From pet houses to holiday gifts, you’ll get:
✨ Easy-to-follow blueprints
🧰 Complete material & cut lists
🪚 Projects for all skill levels
👉 Start your woodworking journey with Ted’s 16,000 plans »
💝 Ted’s Woodworking Plans also makes an amazing gift for parents, children, friends, boyfriends, girlfriends, brothers, and sisters.
🛒 Prefer to Buy Instead of Build?
No problem! If you love the look of handcrafted wood but would rather skip the tools, we’ve got you covered.
🌿 👉 Browse top-rated Indoor Dog House and get inspired on Amazon »
FAQ
What materials are best for building a DIY indoor dog house?
How do I measure my dog for the perfect fit?
Can I customize the design of the dog house to fit my home decor?
What safety considerations should I keep in mind when building a DIY indoor dog house?
How can I make my DIY indoor dog house comfortable for my pet?
Can I build a DIY indoor dog house with pallets?
What are some creative variations for a DIY indoor dog house?
How do I ensure proper ventilation in my DIY indoor dog house?
Affiliate Disclosure
Some of the links in this article are affiliate links. If you click through and make a purchase, I may earn a small commission — at no additional cost to you.
This helps support my work so I can continue creating helpful woodworking tutorials and product reviews.I only recommend products and services that I have thoroughly researched and believe could provide real value to my readers.
Thank you for your support!