
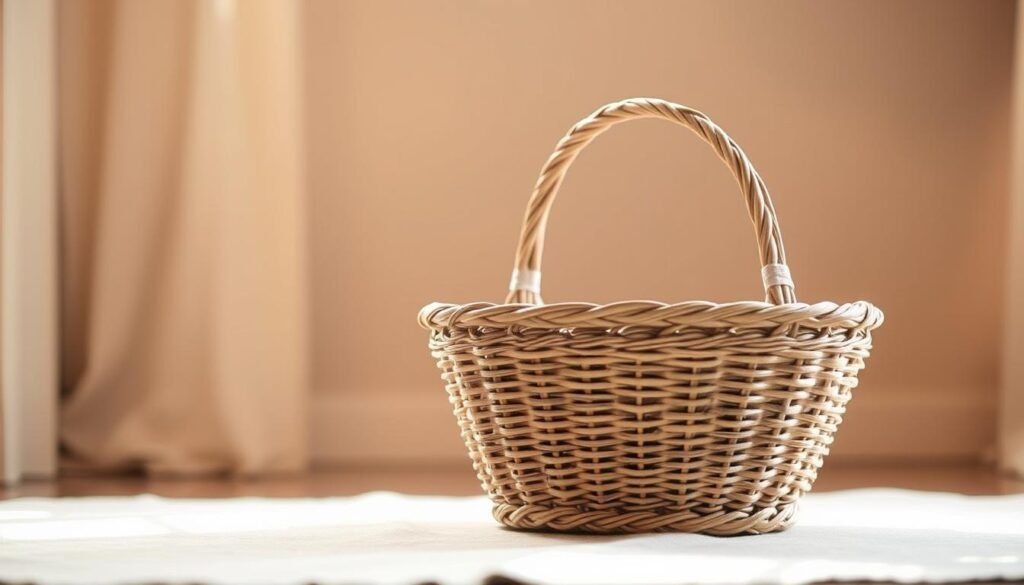
Creating a cozy and safe sleeping space for your newborn is a top priority. A handmade baby basket is not only practical but also beautiful. It adds charm to any nursery. In this guide, we’ll show you how to make a stunning DIY baby bassinet. It will become a cherished haven for your little one.
We’ll cover everything from preparing your materials to adding the finishing touches. By the end of this project, you’ll have a beautiful and functional DIY Moses basket with stand. It will provide a comfortable and secure sleeping environment for your baby.
Key Takeaways
- Craft a practical and stylish addition to your nursery
- Create a cozy and safe sleeping space for your newborn
- Learn how to prepare materials and add finishing touches
- Build a beautiful and functional DIY baby bassinet
- Ensure a comfortable and secure sleeping environment for your baby
The Beauty of Creating Your Own Moses Basket
Starting a DIY Moses basket project is a rewarding journey. It combines functionality with personal touches. As we guide you, you’ll find joy in making something special for your baby.
Benefits of a Handmade Baby Bassinet
A handmade Moses basket is more than furniture; it’s a labor of love. It offers a safe, cozy space for your newborn. By making your own, you get customization that fits your baby’s needs and your home’s style. Plus, it’s a sustainable choice, using safe materials for your baby and the planet.
With a handmade Moses basket, every detail is thoughtfully chosen. From fabric to finishing touches, it’s all about comfort and safety for your baby.
What to Expect from This Project
In this Moses basket tutorial, we’ll show you how to build one step-by-step. You’ll learn how to build a Moses basket that’s both beautiful and safe. Our guide is easy to follow, perfect for DIY beginners or experts. By following our steps, you’ll create a unique piece with confidence.
Materials and Tools You’ll Need
Before starting your DIY Moses basket with stand, gather all needed materials and tools. This step ensures a smooth build process. You’ll make a safe and cozy DIY newborn sleeping option for your baby.
For the Moses Basket
For the Moses basket, choose materials that are soft on your baby’s skin but strong. Use natural fibers like cotton or linen for the fabric. A sturdy base, like wicker or rattan, is also needed for structure.
- Cotton or linen fabric for the basket’s lining
- Wicker or rattan for the basket’s base
- Thread and needles for sewing
- Scissors and a measuring tape
For the Wooden Stand
The wooden stand is key for your homemade baby crib, adding stability and support. You’ll need strong wood, like oak or pine, and tools for cutting and assembling.
| Material/Tool | Description |
|---|---|
| Oak or pine wood | Durable wood for the stand’s frame |
| Saw | For cutting the wood to size |
| Drill | For assembling the stand’s components |
| Sandpaper | For smoothing out the wood surfaces |

👉 👉Click here to explore TedsWoodworking plans now »
🌿 👉 Browse Top-Rated Moses Basket with Stand on Amazon »
With these materials and tools, you’re ready to make a beautiful and functional DIY Moses basket with stand. It will be a safe and comfy place for your baby to sleep.
Safety Considerations Before You Begin
The safety of your newborn is the most important thing when making a handmade baby basket. As you start, think about several safety points to keep your baby safe.
Materials are key for your baby’s health. Let’s look at what to consider for safe materials.
Material Safety for Newborns
Choosing the right materials for your DIY baby bassinet is critical. Pick non-toxic, eco-friendly stuff that’s soft on your baby’s skin. Here are some tips:
- Go for natural fibers like cotton or linen for the basket’s fabric.
- Stay away from materials with harsh chemicals or dyes.
- Make sure any wood is sustainably sourced and has non-toxic stains.
| Material | Safety Feature |
|---|---|
| Natural Fibers | Gentle on baby’s skin |
| Sustainably Sourced Wood | Non-toxic and eco-friendly |
Structural Safety Guidelines
It’s also key to make sure your handmade baby basket is sturdy. Here are some safety guidelines to keep in mind:
- Make the basket’s base strong to stop it from tipping.
- Choose solid materials for the stand to hold the weight.
- Check the basket and stand often for any wear or damage.

👉 👉Click here to explore TedsWoodworking plans now »
🌿 👉 Browse Top-Rated Moses Basket with Stand on Amazon »
By sticking to these tips and picking safe materials, you’ll make a cozy, safe spot for your baby to sleep. Always put safety first when making a handmade baby basket.
Preparing Your Workspace and Materials
To start your crafting journey, let’s get your workspace ready and gather your materials. A tidy workspace boosts your creativity and keeps you focused. It’s essential for a smooth project.
Setting Up Your Work Area
First, clear a flat area like a table or countertop for your project. Make sure it’s well-lit and your tools are close. Organizing your tools saves time and reduces stress.

👉 👉Click here to explore TedsWoodworking plans now »
🌿 👉 Browse Top-Rated Moses Basket with Stand on Amazon »
Preparing Your Materials
Then, get your materials ready for the project. Measure and cut your fabric, wood, or other materials to the right size. Check your measurements twice to avoid mistakes. Labeling your materials helps you stay organized.
| Material | Preparation Step |
|---|---|
| Fabric | Measure and cut to size |
| Wood | Cut according to the stand design |
| Thread | Sort by color and type |
Crafting the Moses Basket Base
The base of the Moses basket is the starting point. It’s where you create a beautiful and useful basket. A strong base is key for your baby’s safety and comfort.

👉 👉Click here to explore TedsWoodworking plans now »
🌿 👉 Browse Top-Rated Moses Basket with Stand on Amazon »
Creating the Foundation
To start, plan and prepare your materials carefully. First, cut the base material to the right size. Make sure it’s big enough to hold the basket steady. You can use wicker or rattan for the base. It should be strong enough for your baby and any bedding.
Here’s a simple guide to help you get started:
| Material | Size | Quantity |
|---|---|---|
| Wicker/Rattan | 30″ x 20″ | 1 piece |
| Wooden Slats | 1″ x 2″ | 5 pieces |
Weaving Techniques for Beginners
Weaving is easy to learn with a bit of practice. Start by learning the basic weaving patterns. For a Moses basket, a simple over-and-under pattern works well. Begin by securing the warp threads to a stable frame, then start weaving the weft threads over and under the warp threads.
As you weave, keep the tension even and not too tight. This will prevent the base from puckering. With patience, you’ll soon have a beautiful and sturdy Moses basket base.
Building the Basket Sides and Rim
Now, we move on to making the sides and rim of your Moses basket. This part needs patience and careful work. With the base done, you’re set to weave the sides and add the rim, getting closer to finishing your basket.
Weaving the Sides Step-by-Step
Start by attaching the weaving material to the base with a simple knot. Make sure the tension is even for a uniform weave. As you weave, pull the material gently to tighten. But don’t pull too hard, or it might pucker.
Keep weaving row by row, overlapping the material. This makes the side sturdy and looks good. Keep the weave consistent by checking the tension and adjusting if needed.
- Begin with a simple knot to secure the weaving material.
- Weave row by row, maintaining even tension.
- Overlap the material to create a sturdy side.
Finishing the Rim Securely
After weaving the sides, it’s time for the rim. Fold the material over the top and secure it with a strong stitch or a small nail. Make sure the rim is secure to avoid any risks.
Inspect the rim carefully to make sure it’s even and secure. You can add a decorative trim or a simple binding to make it look better and last longer.

👉 👉Click here to explore TedsWoodworking plans now »
🌿 👉 Browse Top-Rated Moses Basket with Stand on Amazon »
Constructing a Sturdy DIY Moses Basket with Stand
Building a stable base for your Moses basket is key for your baby’s comfort and safety. A strong stand is vital for your DIY newborn sleeping option. We’ll show you how to make a solid stand for your homemade baby crib.
Cutting and Preparing the Wood
First, cut and prepare the wood for the stand. Measure and cut four legs and the frame pieces as per your design. Use a miter saw or a circular saw for accurate cuts. Sand the edges to smooth them out and remove splinters.
This step is vital for the stand’s stability and your baby’s safety.
Assembling the Stand Frame
Assembling the stand frame needs careful attention. Start by putting together the legs and frame pieces with wood screws or dowels. Ensure the corners are tight and the frame is level. Use clamps to hold the pieces while you screw them together.
This will give your Moses basket a sturdy base. As you assemble the stand, check that all parts are well attached.

👉 👉Click here to explore TedsWoodworking plans now »
🌿 👉 Browse Top-Rated Moses Basket with Stand on Amazon »
Adding Support Elements
To make the stand more stable, add support elements like stretchers or brackets between the legs. These help spread the weight and prevent the stand from tipping. Measure carefully and attach these supports securely for stability.
By following these steps, you’ll make a sturdy and reliable stand for your Moses basket. It will provide a safe and cozy homemade baby crib for your newborn.
Adding Comfort: Mattress and Bedding
As we near the end of our handmade baby basket, let’s focus on comfort. A cozy mattress and safe bedding are key for your baby’s comfort and safety.
Making a Custom-Sized Mattress
To make a custom mattress, measure your Moses basket’s inside carefully. Use a firm, breathable material like cotton or natural fibers. Cut it to size, leaving extra for a snug fit.
For filling, pick something safe and comfy for your baby. You can use foam made for infant mattresses or natural fibers like wool or cotton batting.
Creating Safe and Cozy Bedding
Bedding should be simple and safe. Choose a lightweight, breathable blanket or sheet that fits well. Avoid loose bedding that could be a suffocation risk.
Use a fitted sheet for Moses baskets or make one from stretchy cotton. Make sure bedding is tucked in well to prevent it from coming loose at night.
| Material | Safety Features | Comfort Level |
|---|---|---|
| Cotton | Breathable, hypoallergenic | High |
| Wool | Natural temperature regulation | High |
| Foam | Specifically designed for infants | High |

👉 👉Click here to explore TedsWoodworking plans now »
🌿 👉 Browse Top-Rated Moses Basket with Stand on Amazon »
Finishing Touches and Decorative Elements
As we near the end of our DIY Moses basket with stand, it’s time for the final touches. These will make it truly special. We’ll focus on making it both functional and beautiful.
Sanding and Finishing the Wood
Sanding is key to getting the wood ready for finishing. Use a fine-grit sandpaper to smooth out any rough spots. After sanding, apply a finish that matches your style, like natural oil or colored stain.
Follow the instructions for application and drying times carefully. A well-finished wooden stand looks great and protects the wood from damage.

👉 👉Click here to explore TedsWoodworking plans now »
🌿 👉 Browse Top-Rated Moses Basket with Stand on Amazon »
Adding Personal Touches to Your Basket
Now, let’s add personal touches to make your Moses basket unique. Think about adding a soft lining or decorative trim. You could also add a handmade label or a small embroidered design.
These details not only look good but also make the basket more comfortable for your baby.
You may also like
Testing Your Completed Moses Basket for Safety
It’s very important to make sure your Moses basket is safe for your baby. We’ll help you with the testing steps. Your handmade Moses basket is a safe place for your baby. So, it’s important to test it well before you use it.
Weight and Stability Tests
To check if your Moses basket is stable, add a load that feels like your baby and a bit more for safety. You can use bags of rice or sand for this. Gently rock the basket to see if it stays steady. If it tips over too easily, you might need to adjust the stand or add more weight to the base. Stability is key to preventing accidents.
Checking for Hazards
Look for any sharp edges or points on your Moses basket that could hurt your baby. Check the weaving for loose threads or gaps that could trap small limbs. Make sure all materials are safe for your baby’s skin. Your diligence will provide peace of mind. Also, make sure the mattress fits well and there’s no gap between it and the basket’s sides.
Conclusion
Now that you’ve made your DIY Moses basket with stand, you’ve created a safe space for your baby. It’s also a special family treasure. Your handmade baby basket shows off your skill and hard work.
In this moses basket tutorial, you’ve learned new things and faced challenges. You’ve made a unique and personal item that shows your love. Looking at your finished basket, you’ll see the effort you put into every part, from the stand to the bedding.
Keep going on your DIY path. Each project is a chance to learn and grow. The joy of making something yourself is a lasting reward. Your handmade basket is just the start of many crafting memories with your child.
💡 Ready to Take the Next Step in Woodworking?
If building your own Moses Basket with Stand has sparked a deeper interest in woodworking, why not take it further?
🔨 TedsWoodworking offers over 16,000 woodworking plans that cover everything from garden trellises to furniture and toys. Whether you’re a beginner or an advanced builder, you’ll find clear blueprints, material lists, and easy-to-follow instructions to turn your ideas into reality.
👉 👉Click here to explore TedsWoodworking plans now »
🛒 Not Into DIY? No Problem.
If you love the idea of a beautiful wooden Moses Basket with Stand but don’t have the time or tools to build it yourself, you’re still in luck!
Check out our favorite ready-made Moses Basket with Stand on Amazon
🌿 👉 Browse Top-Rated Moses Basket with Stand on Amazon »
FAQ
🔍What materials are best for a DIY Moses basket?
🔍How do I ensure the Moses basket is safe for my newborn?
🔍Can I customize the size of my Moses basket?
🔍What are the benefits of a handmade Moses basket?
🔍How do I clean and maintain my Moses basket?
🔍Can I use a Moses basket for an extended period?
🔍What are some common mistakes to avoid when building a Moses basket?
🔍How long does it take to build a DIY Moses basket with stand?
Affiliate Disclosure
Some of the links in this article are affiliate links. If you click through and make a purchase, I may earn a small commission — at no additional cost to you.
This helps support my work so I can continue creating helpful woodworking tutorials and product reviews.I only recommend products and services that I have thoroughly researched and believe could provide real value to my readers.
Thank you for your support!