
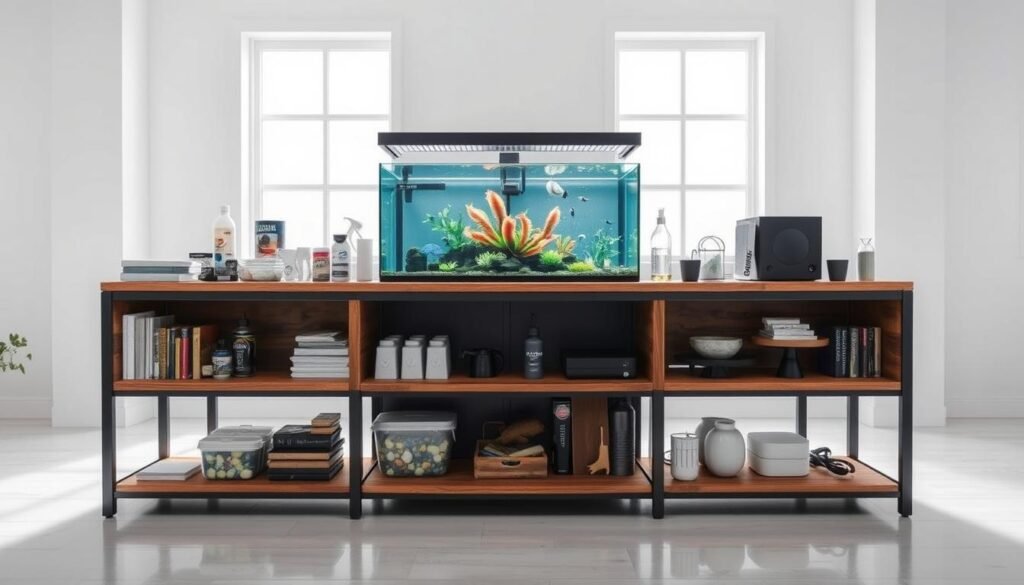
Welcome to our project where we’ll show you how to make a beautiful, functional, and affordable aquarium stand. You’ll save money and have the chance to customize it to fit your space and style.
We’re excited to help you on your DIY adventure! Making a custom aquarium stand is a fun and rewarding task. You can make it fit your needs and decor perfectly, creating a unique piece for your home.
🛠️ Want the Look Without the Sawdust? Here’s Your Shortcut
There’s something rewarding about building a wooden piece with your own hands—but let’s face it, not everyone has the time, tools, or space for a full DIY project.
💡 That’s why I recommend Ted’s Woodworking Plans – a massive library of 16,000+ step-by-step plans for every kind of woodworking project you can imagine. From pet houses to holiday gifts, you’ll get:
✨ Easy-to-follow blueprints
🧰 Complete material & cut lists
🪚 Projects for all skill levels👉 Start your woodworking journey with Ted’s 16,000 plans »
💝 Ted’s Woodworking Plans also makes an amazing gift for parents, children, friends, boyfriends, girlfriends, brothers, and sisters.
🛒 Prefer to Buy Instead of Build?
No problem! If you love the look of handcrafted wood but would rather skip the tools, we’ve got you covered.
🌿 👉 Browse top-rated fish-tank-stand and get inspired on Amazon »
Key Takeaways
- Create a functional and stylish aquarium stand
- Customize the stand according to your space and style
- Save money by building it yourself
- Enjoy a fun and rewarding DIY experience
- Tailor the stand to your specific needs and decor
Why Build Your Own Fish Tank Stand
Building your own fish tank stand lets you feel a sense of pride and achievement. It also gives you a chance to make something that fits perfectly with your home’s style. This DIY project can save you money and let you design it just the way you want.
When you think about getting a fish tank stand, you can either buy one or make your own. Let’s look at why making your own is a good choice.
Cost Savings vs. Store-Bought Options
One big plus of making your own fish tank stand is saving money. Store-bought stands can be pricey, and they might not have the exact look you want. By doing it yourself, you can use materials you already have or find cheaper options that are just as good.
Customization Benefits for Your Space
Another great thing about a DIY fish tank stand is how it can be tailored to your space. Whether your home is modern or cozy, you can make a stand that fits right in. You can pick the materials, colors, and design that match your style. This level of personalization is hard to find with pre-made stands, making DIY stands a great choice for those who like unique things.
Understanding Aquarium Weight Requirements
The weight of a filled aquarium can be surprisingly heavy. It’s important to know this weight to build a sturdy stand. The weight includes the tank, water, gravel, decorations, and equipment.
Calculating Your Tank’s Weight When Filled
To find the total weight, we must consider several factors. The tank’s weight varies by size and material. Then, there’s the water, which weighs about 8.34 pounds per gallon.
Don’t forget the gravel, decorations, and equipment. For example, a 55-gallon tank filled with everything can weigh over 600 pounds!
Safety Margins for Long-Term Stability
After finding the total weight, we need a safety margin. A good rule is to make the stand support at least 1.5 times the tank’s weight. This extra capacity prevents accidents and keeps the stand stable.
By understanding these weight requirements, we can create a safe and durable DIY fish tank stand.

Essential Tools for Building a DIY Fish Tank Stand
Before starting your DIY aquarium stand, let’s talk about the tools you’ll need. The right tools make the project easier and ensure your stand is strong and looks good.
Basic Carpentry Tools You’ll Need
You’ll need some basic tools to begin. A circular saw is for cutting wood, and a drill is for screw holes. Don’t forget sandpaper for smooth wood surfaces.
You’ll also need a tape measure for precise measurements. And clamps to keep pieces together while gluing.

Optional Tools That Make the Job Easier
Some tools are not necessary but make the job easier. A miter saw helps with precise angled cuts. A router can add decorative edges to your wood.
A power sander also saves time on large surfaces. Having these tools can make your DIY aquarium stand look better and last longer.
Materials Selection Guide
Choosing the right materials for your DIY fish tank stand is key. It affects both the stand’s look and its ability to hold your aquarium’s weight.

Best Woods for Aquarium Stands
When building a custom fish tank stand, picking the right wood is essential. Look for woods that are strong, can handle moisture, and look good. Oak, maple, and cherry are top choices. They’re strong and have beautiful grain patterns.
Think about the wood’s cost and if it’s easy to find. Pine or cedar might be cheaper but might need extra work to look right.
Hardware and Fasteners
The hardware and fasteners you pick are as important as the wood. You’ll need strong screws, brackets, and maybe metal straps to hold your aquarium’s weight. Stainless steel or galvanized hardware helps avoid rust and corrosion.
When picking fasteners, think about the wood you’re using. Choose screws that match the wood’s density. Hardwoods need special screws.
Finishing Materials
The finishing touches are what make your DIY fish tank cabinet stand out. You need a finish that protects the wood and makes it look good. Polyurethane, varnish, and stain are popular choices.
When applying your finish, follow the instructions carefully. A well-finished stand looks great and lasts longer.
Planning Your DIY Fish Tank Stand
To make your DIY fish tank stand both useful and good-looking, start with a clear plan. Planning is key to success. Measure your tank right and make a detailed plan to avoid mistakes and make building easier.
Measuring Your Aquarium Dimensions
Getting your measurements right is essential for any DIY project. Use a tape measure to get the tank’s length, width, and height. Remember to measure any parts like handles or filters that might change your design. Double-check your measurements to avoid mistakes.

Creating a Detailed Sketch or Plan
Once you have your measurements, make a detailed sketch or plan for your stand. Think about the style, materials, and features you want. Will it have space for fish food and tools? Does it need to fit your home’s look? Use graph paper or software like SketchUp for a detailed design. A good plan will help you build a stand that works well and looks great.
| Dimension | Measurement | Notes |
|---|---|---|
| Length | 48 inches | Include handles or other obstructions |
| Width | 18 inches | Measure at the widest point |
| Height | 24 inches | Consider the height of the stand and tank |
As Bob Vila said, “Measure twice, cut once.” This is true for any DIY project, like making a fish tank stand. By planning and measuring well, you’ll save time and money.
Step-by-Step DIY Fish Tank Stand Construction
Now, let’s start building our aquarium stand. Making a DIY aquarium stand needs patience and focus. But with this guide, you can make a strong and nice stand for your tank.
Cutting Your Materials
First, cut your materials as planned. Choose the right saw for your wood type. A circular saw is good for straight cuts, and a jigsaw for curves. Always wear safety glasses and a dust mask for your safety.
Building the Base Frame
The base frame is key for your homemade aquarium stand. Use wood glue and screws to build it. Make sure it’s square and strong. Clamps help hold pieces together while the glue dries. This step is important for the stand’s stability.

Adding Vertical Supports
Vertical supports keep your stand stable. Attach them to the base frame, making sure they’re even and tight. These supports spread the aquarium’s weight, preventing the stand from bending or falling.
Creating the Top Support Structure
The top support holds your aquarium. It must be strong and level. Add extra supports for big tanks. This structure should handle the full weight of the tank, so use good materials and build it well.
By following these steps, you can make a solid and good-looking DIY aquarium stand. It will safely hold your tank and improve your home’s look.
Adding the Outer Shell and Panels
Now, let’s move on to adding the outer shell and panels to our fish tank stand plans. This step is key to giving your stand its final look and protecting your aquarium. We’ll go over how to do this well.
Attaching Side Panels
First, we attach the side panels. Make sure to measure your stand’s dimensions and cut the panels to fit. Choose a strong material that can hold the aquarium’s weight and any extra features, like storage.
Installing the Top Surface
The top surface must be sturdy and even to hold your aquarium right. Make sure it’s aligned with the frame and securely fastened with the right hardware.
Creating a Solid Base
A solid base is vital for your stand’s stability. Attach the bottom panel and check it’s even with the rest of the stand. A level stand keeps your aquarium water steady, which is good for your fish.
| Component | Material | Purpose |
|---|---|---|
| Side Panels | Plywood or MDF | Outer shell protection and aesthetics |
| Top Surface | Solid Wood or Plywood | Support for the aquarium |
| Base | Plywood or Solid Wood | Stability and level support |
By following these steps, you’ll make a custom fish tank stand that works well and looks great. Always measure right and pick the right materials for a long-lasting stand.
Incorporating Storage Solutions
To make the most of your DIY fish tank cabinet, adding storage is essential. A tidy stand not only looks good but also simplifies aquarium care. It keeps vital supplies within arm’s reach, cutting down on clutter around your tank.
Building Cabinet Doors
Adding cabinet doors to your fish tank stand is a smart move. It conceals equipment and supplies, making your aquarium area look better. It also safeguards your gear from dust and curious pets or kids.
Door Measurements and Cutting
To craft cabinet doors that fit just right, precise measurements are vital. Consider the space needed for smooth door opening and closing. Use a miter saw or a circular saw to cut the panels to the right size.
Hinge Installation
After cutting your door panels, attaching hinges is the next step. Opt for hinges that can handle the doors’ weight and any extra decorations or hardware.
Adding Internal Shelving
Internal shelving boosts storage in your DIY fish tank stand. Use these shelves for filters, heaters, food, and other supplies. This keeps them organized and hidden from view.
When planning your shelving, think about the size and weight of your items. Ensure the shelves are strong and securely fastened to the stand’s frame. This prevents them from collapsing under the load.

Waterproofing and Finishing Your Homemade Aquarium Stand
Now that you’ve built your DIY fish tank stand, it’s time to protect it from moisture. You also want to make it look great. Waterproofing and finishing are key steps to keep your stand strong and looking good for a long time.
Sealing Wood Surfaces
Sealing your wood surfaces is important to protect your homemade aquarium stand from water damage. You can use a waterproof sealant or a polyurethane finish to keep moisture out. Follow the manufacturer’s instructions to apply the sealant in thin coats, letting each coat dry before adding the next.
For extra protection, think about using a marine-grade varnish. This is good if your stand will be near the aquarium or in a humid place. Marine-grade varnish is made to handle moisture and will last a long time.
| Sealant Type | Drying Time | Moisture Resistance |
|---|---|---|
| Polyurethane | 2-4 hours | High |
| Marine-grade Varnish | 4-6 hours | Very High |
Paint and Stain Application Techniques
When painting or staining your homemade aquarium stand, preparation is key. First, sand the surface to make it smooth. Then, apply a primer if you’re using a dark color or covering a light surface.
For a professional look, use high-quality paint or stain that fits your stand’s material. Apply thin, even coats, letting each coat dry as instructed. Finish with a clear coat to protect the paint or stain and add shine.

By following these steps, you’ll not only make your DIY fish tank stand look better. You’ll also make sure it’s a sturdy and safe place for your aquarium.
Equipment Integration and Cable Management
A good DIY aquarium stand is about looks and function. It should fit your aquarium equipment neatly. This makes your aquarium look better and easier to care for.
Creating Access Holes for Tubing and Wires
When making your DIY aquarium stand, think about your equipment’s connections. Holes for tubing and wires keep things tidy. Use a drill or jigsaw, depending on your stand’s material.
For a wooden stand, drill holes in the back or bottom. This keeps your aquarium area clean and protects your equipment.
Organizing Filters, Heaters, and Other Equipment
Keeping your aquarium equipment organized is key. Add compartments or shelves to your custom fish tank stand. This hides filters, heaters, and more, but keeps them easy to reach.
Use cable ties or zip ties to manage cables. Label them to make maintenance simpler. This way, you avoid tangles and keep everything neat.

Focus on integrating equipment and managing cables. Your DIY aquarium stand will support your aquarium well. It will also improve your aquarium experience.
Troubleshooting Common DIY Fish Tank Stand Issues
Even with careful planning, your DIY fish tank stand might encounter some issues. Don’t worry, we’ve got you covered! In this section, we’ll address some common problems you might face and provide practical solutions to get your stand back on track.
Fixing Wobbling or Uneven Stands
A wobbling or uneven stand can be alarming, as it holds a filled aquarium. First, check if the floor is level. If not, consider using adjustable feet on your stand to compensate. If the issue persists, inspect the stand’s construction for any loose joints or uneven surfaces.
Tightening any loose screws or adding shims can often resolve the problem. For a more permanent fix, you might need to reassemble the stand, ensuring it’s properly aligned and level.

Addressing Water Damage Concerns
Water damage is a significant concern for any aquarium stand. To mitigate this risk, ensure that your stand is properly sealed and waterproofed. Regularly inspect the stand for any signs of water damage or leaks.
If you notice any issues, address them promptly by drying the area thoroughly and applying a waterproof sealant. Consider using a drip tray or mat under the aquarium to catch any accidental spills, protecting your stand and floor from damage.
By being proactive and addressing these common issues, you can ensure your DIY fish tank stand remains sturdy and safe for your aquarium. Remember, a well-maintained stand is key for the health and safety of your fish.
Conclusion
Now that you’ve finished our guide on building a diy fish tank stand, you’ve started something amazing. You’ve learned how to make a custom fish tank stand that makes your home look better. You’ve gone through planning, building, and making your fish tank stand your own.
As you look at your beautiful aquarium, we hope this guide has made you excited about DIY projects. You now have the skills to try even more creative projects. Whether you’re experienced or new to DIY, keep exploring and trying new things.
By making your own diy fish tank stand, you’ve saved money and made something special. It shows off your personal style. We think anyone can be creative and feel proud of making something with their own hands.
FAQ
What are the benefits of building a DIY fish tank stand over buying one?
How do I calculate the weight of my filled aquarium?
What are the essential tools needed for building a DIY fish tank stand?
What type of wood is best for building a fish tank stand?
How do I waterproof my homemade aquarium stand?
Can I customize my DIY fish tank stand to fit my home decor?
How do I ensure my DIY fish tank stand is stable and level?
What are some common issues with DIY fish tank stands, and how can I troubleshoot them?
Can I add storage to my DIY fish tank stand?
How do I integrate equipment and manage cables with my DIY fish tank stand?
Affiliate Disclosure
Some of the links in this article are affiliate links. If you click through and make a purchase, I may earn a small commission — at no additional cost to you.
This helps support my work so I can continue creating helpful woodworking tutorials and product reviews.I only recommend products and services that I have thoroughly researched and believe could provide real value to my readers.
Thank you for your support!