
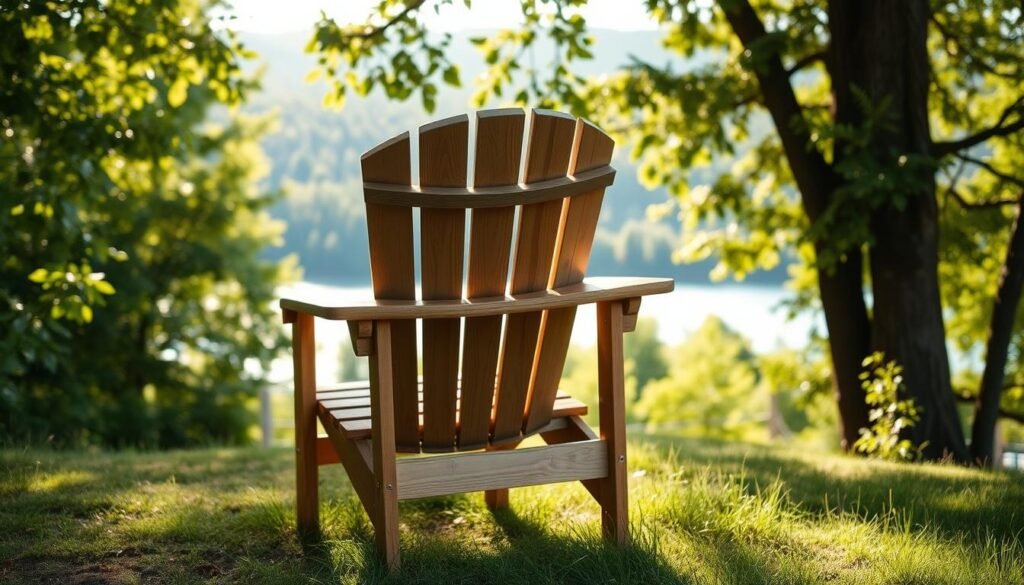
Are you looking for a fun DIY project to improve your outdoor space? Building your own folding Adirondack chair is a great way to save money. It also lets you create furniture that shows off your style.
Our DIY plans will help you make a beautiful and comfy chair. You’ll save about $200 compared to buying one!
Our plans are perfect for both DIY experts and beginners. They’re easy to follow and need only basic tools.
👉 👉Start your woodworking journey with Ted’s 16,000 plans »
🌿 👉 Browse top-rated Folding Adirondack Chair and get inspired on Amazon »
Key Takeaways
- Save $200 by building your own folding Adirondack chair
- Easy-to-follow DIY plans for a beautiful and functional chair
- Perfect for DIY enthusiasts and homeowners looking for a new project
- Minimal specialized tools required
- Create a unique piece of furniture that reflects your personal style
Why Build Your Own Folding Adirondack Chair
Making your own outdoor furniture, like a folding Adirondack chair, is fun and saves money. You’ll get to customize your chair to match your style and outdoor decor.
Cost Comparison: DIY vs Store-Bought
Building your own folding Adirondack chair can save you around $200. Here’s a breakdown of the costs:
- Materials for DIY: $100-$150
- Store-bought chair: $300-$350
By choosing DIY, you can use the saved money for other projects. Or, enjoy the pride of creating something yourself.
Customization Benefits
Building your own outdoor folding chair lets you customize it to your liking. You can pick the wood type, color, and add personal touches. This ensures your chair fits your outdoor space perfectly.
Materials and Tools You’ll Need
Let’s start your DIY journey. We’ll find out what materials and tools you need for your portable Adirondack chair.

👉 👉Start your woodworking journey with Ted’s 16,000 plans »
🌿 👉 Browse top-rated Folding Adirondack Chair and get inspired on Amazon »
Lumber Selection and Quantity
Choosing the right lumber is key for outdoor furniture that lasts. The type and amount you need depends on your folding Adirondack chair‘s design.
Best Wood Types for Outdoor Furniture
For outdoor furniture, pick durable and weather-resistant woods. Cedar, teak, or cypress are good choices. They resist rot, decay, and insects, keeping your chair strong.
Calculating Board Feet Required
To figure out board feet needed, measure each wood piece’s dimensions. Use the formula: (Thickness x Width x Length) / 12. This will tell you the board feet for each piece. Add them up to find the total lumber needed.
Hardware Requirements
You’ll need screws, hinges, and maybe metal brackets for stability. Make sure all hardware can handle outdoor weather.
Essential Tools List
You’ll need basic woodworking tools for this project. A circular saw, drill press, sander, and tape measure are must-haves. The right tools make building easier and faster.
Preparing for Your DIY Project
To have a great DIY experience, preparation is essential. Before starting your foldable Adirondack chair project, get your workspace ready and understand the plans.
Workspace Setup
Having a well-set workspace is key for a successful DIY project. Make sure your area is bright and clutter-free. Organize your tools and materials so they’re easy to find. This saves time and reduces stress.
Consider using a workbench or a dedicated space to keep everything organized.

👉 👉Start your woodworking journey with Ted’s 16,000 plans »
🌿 👉 Browse top-rated Folding Adirondack Chair and get inspired on Amazon »
Safety Considerations
Always put safety first when doing a DIY project. Wear safety glasses and gloves to protect yourself from sawdust and sharp edges. Keep your workspace clean and dry to avoid accidents.
Make sure your tools are in good shape and used correctly.
Reading and Understanding the Plans
Before you start cutting wood, read and understand the plans for your foldable Adirondack chair. Make sure you know each step and have all the materials you need. If you’re unsure, look up online resources or ask a more experienced DIYer for help.
| Preparation Task | Description | Importance Level |
|---|---|---|
| Workspace Setup | Organize your work area for efficiency | High |
| Safety Precautions | Wear protective gear and maintain a clean workspace | High |
| Understanding Plans | Read and comprehend the project plans | High |
Understanding Folding Adirondack Chair Design
Designing a folding Adirondack chair is all about form and function. It’s not just about looks; it’s also about how it works. A good chair must be both beautiful and practical. It should be comfy, durable, and easy to fold.
How the Folding Mechanism Works
The folding mechanism is the heart of a folding Adirondack chair. It makes the chair compact and portable. The mechanism uses hinges and joints to fold the chair flat.
Think of it like a seesaw. Pull the seat towards you, and the backrest folds down. This makes the chair more compact. It’s all thanks to well-designed hinges and pivot points that make folding smooth.

👉 👉Start your woodworking journey with Ted’s 16,000 plans »
🌿 👉 Browse top-rated Folding Adirondack Chair and get inspired on Amazon »
Critical Measurements and Angles
Critical measurements and angles are vital in folding Adirondack chair design. The seat height, backrest angle, and armrest length all matter. They affect the chair’s comfort and use.
The seat height should let your feet rest flat. The backrest angle should support you without being too reclined. Armrests should be at a height that supports your arms. Getting these measurements right is essential for a chair that’s both comfy and useful.
By understanding the folding mechanism and focusing on key measurements and angles, you can make a compact Adirondack chair. It will be perfect for your outdoor area.
Step-by-Step Building Instructions
Now we’re ready to build our own folding Adirondack chair! This guide will walk you through each step. From cutting wood to installing the folding mechanism, we’ve got you covered.
Cutting the Wood Pieces
Cutting wood accurately is key for a sturdy and comfy chair. We’ll start by making a template for our cuts.
Template Creation
Creating a template ensures precision. It acts as a guide for accurate cuts. This way, all pieces fit together perfectly.

👉 👉Start your woodworking journey with Ted’s 16,000 plans »
🌿 👉 Browse top-rated Folding Adirondack Chair and get inspired on Amazon »
Using the right cutting techniques is important. We’ll use table saws and miter saws for precise cuts. Always double-check your measurements to avoid mistakes.
Assembling the Seat and Back
Now that our wood is cut, let’s assemble the seat and back. Proper alignment and securing the slats are essential for comfort and durability.
Proper Alignment Methods
To align the seat and back, we’ll use clamps and a carpenter’s square. This step is vital for the chair’s structure and comfort.
Securing Slats Correctly
Securing the slats requires the right screws and even spacing. This is key for the chair’s stability. Always pre-drill holes to avoid wood splitting.
| Component | Material | Quantity |
|---|---|---|
| Seat Slats | 1″ x 4″ Cedar | 5 |
| Back Slats | 1″ x 4″ Cedar | 7 |
| Armrests | 2″ x 6″ Cedar | 2 |
Creating the Armrests and Supports
The armrests and supports add comfort and stability. We’ll cut and assemble them carefully, ensuring they’re sturdy and comfy.
Installing the Folding Mechanism
The folding mechanism makes our chair unique. We’ll show you how to place hinges and test the fold.
Hinge Placement
Correct hinge placement is vital for smooth folding. We’ll use heavy-duty hinges for outdoor furniture. Follow the manufacturer’s instructions for installation.
Testing the Fold
After installing hinges, we’ll test the fold. This ensures it works smoothly and safely. It’s important for the chair’s longevity and usability.
Sanding and Finishing Your Folding Adirondack Chair
To make your folding Adirondack chair last longer, sanding and finishing are key. These steps not only make your chair look better but also keep it safe from the weather. A well-finished chair will last longer and need less upkeep.
Proper Sanding Techniques
Sanding is a vital step to get your chair ready for finishing. Begin with a coarse-grit sandpaper (about 120-grit) and move to finer grits (220-grit or higher) for a smooth finish. Always sand with the wood grain to avoid scratches.
For tricky spots or curved areas, use a sanding block or detail sander. These tools keep the sanding even and prevent mistakes. After sanding, clean the chair with a tack cloth to get rid of dust or debris.
Choosing the Right Outdoor Finish
Picking the right finish for your Adirondack chair is key for its look and durability. Outdoor finishes like cedar tone or transparent water-repellent ones are favorites. Look for a finish that protects against UV rays to keep the wood from fading.
Think about the color of the finish too. It should match your outdoor decor. You can go for a finish that highlights the natural wood or a colored one to match your patio furniture.
Application Methods for Longevity
To get a finish that lasts, follow the manufacturer’s instructions for application. Applying thin coats and letting them dry before adding more is best. Use a high-quality brush or sprayer made for outdoor use.
For extra protection, add a waterproof sealant as a final step. This layer can greatly extend your finish’s life and shield the wood from moisture damage.

👉 👉Start your woodworking journey with Ted’s 16,000 plans »
🌿 👉 Browse top-rated Folding Adirondack Chair and get inspired on Amazon »
Customization Options
Your new folding Adirondack chair is more than just furniture. It’s a blank canvas for your creativity. Now that you’ve built your lightweight folding chair, let’s look at how you can make it your own.
Color Choices and Staining Techniques
Choosing the right color can totally change your chair’s look. Think about where your chair will sit. For a natural vibe, try staining techniques that highlight the wood grain. Try out different stain colors to match your outdoor decor.

👉 👉Start your woodworking journey with Ted’s 16,000 plans »
🌿 👉 Browse top-rated Folding Adirondack Chair and get inspired on Amazon »
Adding Comfort Features
To make your chair more comfy, think about adding cushions or a footrest. Armrest pads can also add extra comfort. Ask yourself, what makes your chair the coziest spot outside?
Personalization Ideas
Personalizing your chair can be as simple as adding a unique touch, like a carved name or message. You can also tweak the comfort features to suit your needs. This way, your chair will be both beautiful and tailored to your comfort.
By exploring these customization options, you can make your DIY folding Adirondack chair truly unique. It will show off your personality and style.
Maintenance and Care for Longevity
Keeping your folding Adirondack chair in good shape is key. It helps it last longer and stay beautiful. Regular care makes sure your chair is always a cozy spot outside.

👉 👉Start your woodworking journey with Ted’s 16,000 plans »
🌿 👉 Browse top-rated Folding Adirondack Chair and get inspired on Amazon »
Seasonal Storage Recommendations
As the seasons change, storing your chair right is important. Store it in a dry, safe place when the weather gets bad. If you can’t keep it inside, use a waterproof cover to protect it.
Cleaning Methods
Cleaning your chair often is a must. Use a gentle soap and water mix to clean it. Stay away from strong chemicals that can harm the wood or finish. For stubborn stains, a soft-bristled brush can gently remove dirt without scratching.
Refinishing Guidelines
The finish on your chair might fade over time. To keep it looking great, refinish it every few years. First, sand the surface to smooth it out. Then, apply a new outdoor finish. This makes it look better and protects the wood from the weather.
By following these easy care tips, your folding Adirondack chair will be a favorite for many years.
Conclusion
Now that you’ve finished your DIY folding Adirondack chair, take a moment to admire your work. Completing this project is a big achievement. You should feel proud knowing you’ve made something beautiful and useful.
Your new chair is more than just furniture. It shows your hard work and dedication to DIY projects. Building it has taught you new skills and boosted your confidence for future projects. Enjoying your new outdoor seating, remember the joy of DIY is in the journey, not just the end.
As you try more DIY projects, you’ll keep feeling that sense of pride and accomplishment. So, be proud of your work, share it with others, and enjoy the many moments in your new DIY folding Adirondack chair.
🛠️ Want the Look Without the Sawdust? Here’s Your Shortcut
There’s something rewarding about building a wooden piece with your own hands—but let’s face it, not everyone has the time, tools, or space for a full DIY project.
💡 That’s why I recommend Ted’s Woodworking Plans – a massive library of 16,000+ step-by-step plans for every kind of woodworking project you can imagine. From pet houses to holiday gifts, you’ll get:
✨ Easy-to-follow blueprints
🧰 Complete material & cut lists
🪚 Projects for all skill levels
👉 👉Start your woodworking journey with Ted’s 16,000 plans »
💝 Ted’s Woodworking Plans also makes an amazing gift for parents, children, friends, boyfriends, girlfriends, brothers, and sisters.
🛒 Prefer to Buy Instead of Build?
No problem! If you love the look of handcrafted wood but would rather skip the tools, we’ve got you covered.
🌿 👉 Browse top-rated Folding Adirondack Chair and get inspired on Amazon »
FAQ
What are the benefits of building a folding Adirondack chair instead of buying one?
What type of wood is best for building a folding Adirondack chair?
How do I ensure the folding mechanism works smoothly?
Can I customize the color and design of my folding Adirondack chair?
How do I maintain and care for my folding Adirondack chair?
What are some common mistakes to avoid when building a folding Adirondack chair?
Can I use a portable Adirondack chair plan for other outdoor furniture projects?
How long does it take to build a folding Adirondack chair?
What are the advantages of a lightweight folding chair?
Can I build a folding Adirondack chair with limited DIY experience?
Affiliate Disclosure
Some of the links in this article are affiliate links. If you click through and make a purchase, I may earn a small commission — at no additional cost to you.
This helps support my work so I can continue creating helpful woodworking tutorials and product reviews.I only recommend products and services that I have thoroughly researched and believe could provide real value to my readers.
Thank you for your support!