
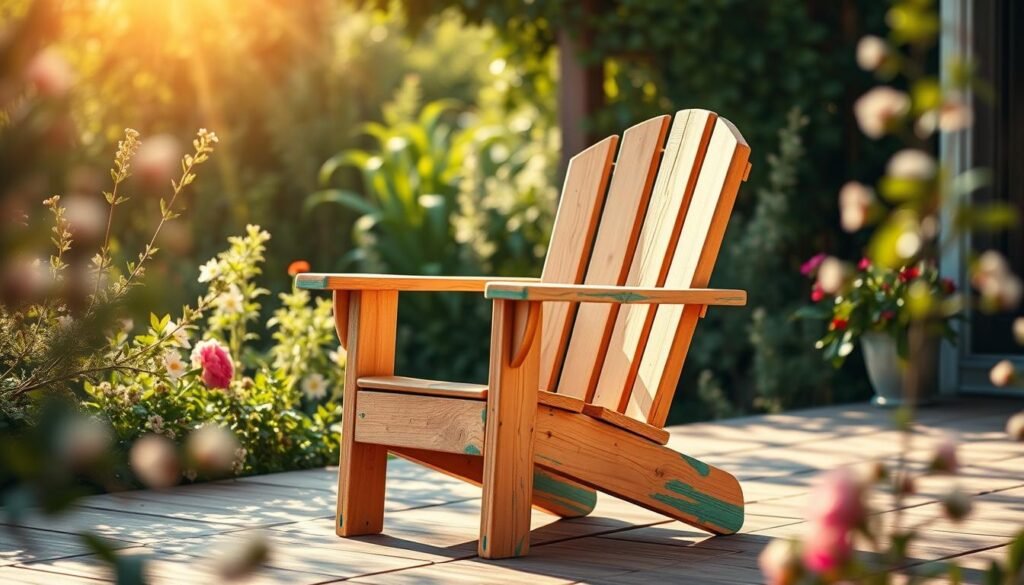
Looking for a special gift for the holidays? Why not try making a DIY Kids Adirondack Chair? It’s a fun project for you and helps kids enjoy the outdoors.
We’ll show you how to make a lovely outdoor chair for young adventurers. You’ll learn what materials you need and how to put it together. Our guide makes sure your holiday gift idea is safe and beautiful, lasting for many years.
Key Takeaways
- Learn how to build a DIY Kids Adirondack Chair as a unique holiday gift.
- Discover the materials needed for the project.
- Follow step-by-step assembly instructions for a safe and beautiful chair.
- Understand how this project encourages kids to spend time outdoors.
- Enjoy a fun and rewarding DIY project for the holiday season.
Why a Kids Adirondack Chair Makes the Perfect Holiday Gift
A kids Adirondack chair is more than furniture; it’s a way to make memories with your family. Imagine the happiness when a child sits in their own chair, made just for them.
The Timeless Appeal of Wooden Outdoor Furniture for Children
👉👉 Click here to explore TedsWoodworking plans now »
🌿 👉👉 Browse Top-Rated kids chairon on Amazon »
Wooden outdoor furniture is always in style. A kids Adirondack chair adds classic charm to any outdoor space. It’s where kids can relax, read, or enjoy the air.
The wood lasts through weather and time, becoming a favorite for years.
Benefits of Handmade Gifts for the Holidays
A handmade kids Adirondack chair is a thoughtful and personalized gift. It’s made with love and care, unlike mass-produced items. This chair shows your effort and dedication, making it a special holiday gift.
Materials Needed for Your Kids Adirondack Chair Project
Let’s start your kids Adirondack chair project by picking the right materials. A wooden Adirondack chair for children needs materials that are strong and safe.
Wood Selection and Quantity
Choosing the right wood is key for your kid-sized Adirondack chair. You want wood that’s tough and safe for your child.
Best Types of Wood for Durability and Safety
For a durable and safe chair, pick woods that resist rot and bugs. Cedar and pine are good choices because they fight off outdoor damage well. A study by the Forest Products Society shows cedar’s oils help it resist decay.
“Cedar is renowned for its durability and resistance to rot, making it an ideal choice for outdoor furniture.”
How Much Wood to Purchase
The wood you need depends on your chair’s design. For a standard kids Adirondack chair, you’ll need about 10-12 feet of 1×6 lumber for the seat and back. You’ll also need 6-8 feet of 1×4 lumber for the arms and legs. Here’s a simple guide:
| Component | Lumber Size | Quantity |
|---|---|---|
| Seat and Backrest | 1×6 | 10-12 feet |
| Arms and Legs | 1×4 | 6-8 feet |
Hardware and Fasteners
For putting your kid-sized Adirondack chair together, you’ll need screws, nails, and wood glue. Make sure to use galvanized or stainless steel fasteners to avoid rust.
Finishing Materials
Lastly, you’ll need materials to protect and beautify your chair. This includes stain or paint, sealant, and sandpaper. Pick a finish that’s good for outdoors and safe for kids.
By picking the right materials, your kids Adirondack chair will be beautiful, strong, and safe for many years.
Essential Tools for Building a Kids Adirondack Chair
Having the right tools is key to a successful kids Adirondack chair project. The right equipment helps you work accurately, efficiently, and safely.
First, let’s talk about the power tools you’ll need. These are vital for making the cuts and joints for your mini Adirondack chair.
Power Tools Required
For your kids patio chair project, you’ll need these power tools:
- Circular Saw: For making straight cuts in wood.
- Drill Press: Essential for drilling precise holes.
- Jigsaw: Useful for curved cuts.
- Sander: To smooth out the wood surfaces.

👉👉 Click here to explore TedsWoodworking plans now »
🌿 👉👉 Browse Top-Rated kids chairon on Amazon »
Hand Tools and Measuring Equipment
You’ll also need hand tools and measuring equipment. These ensure your kids Adirondack chair is sturdy and well-made.
- Tape Measure: For accurate measurements.
- Square: To ensure corners are square.
- Clamps: For holding pieces together while gluing.
- Level: To ensure your chair is perfectly level.
Having these tools ready will make building your mini Adirondack chair easier and more fun.
Preparing Your Workspace and Safety Considerations
Creating a safe and efficient workspace is key when building a colorful kids Adirondack chair. Before starting, organize your area well for a smooth build.
Setting Up an Efficient Work Area
Start by clearing a flat surface big enough for your plans and materials. Make sure it’s well-lit and has good air flow to avoid eye strain and dust inhalation. Keep your tools close to avoid moving around a lot.

Safety Gear and Precautions
When using power tools for your small Adirondack chair for kids, safety comes first. Wear safety glasses, a dust mask, and ear protection to stay safe. Also, keep loose clothes tied back and avoid jewelry that could get caught.
| Safety Gear | Purpose |
|---|---|
| Safety Glasses | Protects eyes from debris |
| Dust Mask | Prevents inhalation of dust and fumes |
| Hearing Protection | Reduces noise exposure from power tools |
By following these safety precautions, you’ll have a safe and fun build. You’ll end up with a beautiful and strong kids Adirondack chair.
Cutting the Wood: Measurements and Templates for Your Kids Adirondack Chair
Cutting wood for your kids Adirondack chair needs focus. Our templates make it easy. A sturdy and comfy chair starts with precise cuts, and we’re here to help.

👉👉 Click here to explore TedsWoodworking plans now »
🌿 👉👉 Browse Top-Rated kids chairon on Amazon »
Downloading and Using Templates
We’ve made templates for you to download and use. They help you cut accurately and save time. Just pick the right template, print it, and use it to guide your cuts.
It’s easy to use templates: place the template on your wood, clamp it if needed, and cut along the lines. This way, your pieces will fit perfectly.
Cutting Guide for Each Chair Component
Now, let’s look at cutting each part of the kids Adirondack chair.
Seat and Back Pieces
The seat and back are key for comfort and stability. Cut two main parts: the seat and the backrest. Use your template to get the right size and shape. The seat should be a rectangular piece with rounded edges, and the backrest should be slightly curved.
Arms, Legs, and Support Pieces
The arms, legs, and supports give the chair its strength. Cut four legs that are the same length for stability. The arms should be curved for comfort. Also, cut support pieces to connect the legs and add stability.
By following these steps and using our templates, you’ll cut the wood accurately. This will help you build a fantastic kids Adirondack chair.
Step-by-Step Assembly Instructions
Now that we have all the pieces cut, it’s time to start assembling your kids’ Adirondack chair. We’ll guide you through the process. This ensures your chair is sturdy and well-built.

👉👉 Click here to explore TedsWoodworking plans now »
🌿 👉👉 Browse Top-Rated kids chairon on Amazon »
Building the Seat Base
The first step is building the seat base. You’ll attach the seat slats to the seat frame. Make sure the slats are evenly spaced and securely fastened with the recommended screws.
To make this process easier, here’s a simple table to follow:
| Component | Quantity | Fastener |
|---|---|---|
| Seat Slats | 5 | 2-inch screws |
| Seat Frame | 2 | 3-inch screws |
Attaching the Back Support
Next, attach the back support. Connect the backrest slats to the back frame. Ensure the slats are aligned properly and securely attached.
“The key to a sturdy chair is in the assembly. Make sure each component is securely fastened.”
To ensure stability, use the recommended hardware. Here’s a checklist:
- Backrest slats: 5
- Back frame: 2
- Screws: 2-inch and 3-inch
You may also like
Connecting the Arms and Legs
The final step is connecting the arms and legs. Ensure all parts are aligned correctly and securely fastened. This step requires patience, as it involves multiple components.
Here’s a summary of the assembly process:
- Assemble the seat base
- Attach the back support
- Connect the arms and legs
By following these step-by-step instructions, you’ll have a beautifully assembled kids’ Adirondack chair, ready for use. Remember, the key to a successful assembly is patience and attention to detail.
Sanding and Finishing Your Kids Adirondack Chair
Now that your kids Adirondack chair is built, it’s time for the final touches. Sanding and finishing make the chair look great and safe for kids. These steps are key for both looks and safety.

👉👉 Click here to explore TedsWoodworking plans now »
🌿 👉👉 Browse Top-Rated kids chairon on Amazon »
Proper Sanding Techniques for Child Safety
Sanding is vital to remove splinters and smooth the wood. Start with coarse-grit sandpaper (about 120-grit) and move to finer grits (220-grit or higher) for a smooth finish. Always sand with the wood grain to avoid scratches. Focus on areas kids will touch, like the seat and backrest.
- Use a sanding block for flat surfaces to maintain even pressure.
- Sand curved areas by hand, following the curve carefully.
- Wipe away dust between sanding stages with a tack cloth.
Staining vs. Painting Options
Finishing your kids Adirondack chair can be done by staining or painting. Staining brings out the wood’s natural beauty and is durable. It comes in many colors and types. Painting lets you choose from many colors and change the chair’s look. Think about your outdoor space and your child’s taste when deciding.
Weather-Proofing for Outdoor Use
To keep your kids Adirondack chair safe from the weather, apply a weather-proof finish. For stained chairs, use a clear sealant. For painted chairs, a waterproof topcoat is best. Apply multiple thin coats, letting each dry as the maker says. This makes the finish last longer.
By doing these steps, you’ll make a safe and lovely kids Adirondack chair. It will bring joy to your children for many years.
Troubleshooting Common Issues When Building a Kids Adirondack Chair
Building a kids Adirondack chair is a fun DIY project. But, you might run into problems. Don’t worry, we’re here to help.
Fixing Alignment Problems
Alignment issues can be a real pain. To solve them, check your measurements and templates again. Make sure all parts are lined up right before you screw them together.

Dealing with Splitting Wood
Splitting wood is a common problem with natural materials. To avoid it, pre-drill screw holes and use the right screws.
Adjusting for Stability and Safety
Stability and safety are key. Make sure your chair is steady on different surfaces and adjust as needed. Make sure all joints are tight to keep everyone safe.
👉👉 Click here to explore TedsWoodworking plans now »
🌿 👉👉 Browse Top-Rated kids chairon on Amazon »
Conclusion
Now that you’ve finished your DIY Kids Adirondack Chair, you have a beautiful outdoor piece. It’s perfect for the holiday season. This chair is more than a gift; it’s a way to make lasting memories with your kids.
Showing off your handiwork will make you proud. The kids will love their new chair, and you’ll enjoy seeing them use it. This project is a great way to bond with your kids, teaching them about handmade gifts and the joy of creating together.
We hope this guide inspired you to do more DIY projects. Whether you’re experienced or new, we encourage you to share your project. Show off your kids adirondack chair as a wonderful holiday gift idea.
💡 Ready to Take the Next Step in Woodworking?
If building your own kids adirondack chairon has sparked a deeper interest in woodworking, why not take it further?
🔨 TedsWoodworking offers over 16,000 step-by-step woodworking plans that cover everything from garden trellises to furniture and toys. Whether you’re a beginner or an advanced builder, you’ll find clear blueprints, material lists, and easy-to-follow instructions to turn your ideas into reality.
👉👉 Click here to explore TedsWoodworking plans now »
🛒 Not Into DIY? No Problem.
If you love the idea of a beautiful kids adirondack chairon but don’t have the time or tools to build it yourself, you’re still in luck!
Check out our favorite ready-made kids adirondack chairon Amazon—perfect for upgrading your garden without picking up a saw.
🌿 👉👉 Browse Top-Rated kids chairon on Amazon »
FAQ
🔎What is the recommended age range for a kids Adirondack chair?
🔎What type of wood is best for building a kids Adirondack chair?
🔎Can I customize the size of the kids Adirondack chair to fit my child’s needs?
🔎What kind of finish should I use to protect the kids Adirondack chair from the elements?
🔎How do I ensure the kids Adirondack chair is stable and safe for my child?
🔎Can I build a kids Adirondack chair as a beginner DIY enthusiast?
🔎What are some common mistakes to avoid when building a kids Adirondack chair?
🔎Can I use a mini Adirondack chair plan for a smaller child?
Affiliate Disclosure
Some of the links in this article are affiliate links. If you click through and make a purchase, I may earn a small commission — at no additional cost to you.
This helps support my work so I can continue creating helpful woodworking tutorials and product reviews.I only recommend products and services that I have thoroughly researched and believe could provide real value to my readers.