
Are you tired of hiding your favorite coffee mugs? Do you want to show off your beautiful collection and add a personal touch to your kitchen? We’re here to help you create a stunning mug shelf that will become the centerpiece of your morning routine.
Building a DIY mug shelf is a fun and rewarding project. You can do it with minimal materials and tools. In this guide, we’ll take you through the process, from planning to finishing touches. We’ll make sure you have all the information you need to complete your project successfully.
🛠️ Want the Look Without the Sawdust? Here’s Your Shortcut
There’s something rewarding about building a wooden piece with your own hands—but let’s face it, not everyone has the time, tools, or space for a full DIY project.
💡 That’s why I recommend Ted’s Woodworking Plans – a massive library of 16,000+ step-by-step plans for every kind of woodworking project you can imagine. From pet houses to holiday gifts, you’ll get:
✨ Easy-to-follow blueprints
🧰 Complete material & cut lists
🪚 Projects for all skill levels👉 Start your woodworking journey with Ted’s 16,000 plans »
💝 Ted’s Woodworking Plans also makes an amazing gift for parents, children, friends, boyfriends, girlfriends, brothers, and sisters.
🛒 Prefer to Buy Instead of Build?
No problem! If you love the look of handcrafted wood but would rather skip the tools, we’ve got you covered.
🌿 👉 Browse top-rated mug display shelf and get inspired on Amazon »
Key Takeaways
- Learn how to plan and design your perfect mug display
- Discover the materials and tools needed for the project
- Follow step-by-step instructions for building your mug shelf
- Get tips on finishing and decorating your shelf
- Explore ideas for customizing your DIY project
Why Create Your Own Mug Display Shelf
A DIY mug display shelf is more than just a place to store mugs. It’s a way to show off your favorite mugs. By making your own, you can add a personal touch to your kitchen. Plus, it keeps your mugs organized and easy to grab.
Showcasing Your Collection
One big plus of a mug display shelf is showing off your mug collection. Whether you have vintage mugs, handmade ceramics, or your go-to coffee mugs, it’s a chance to share your style. It lets everyone see your personality when they walk into your kitchen.
Space-Saving Benefits
A good mug display shelf also saves space in your kitchen. You can hang it on a wall or put it in a corner. This keeps your countertops free and makes the most of your space. It’s perfect for small kitchens where every inch matters.
Personal Expression Through DIY
Making your own mug display shelf lets you show off your style and creativity. You can pick the materials, design, and finish that match your kitchen. It becomes a unique piece that shows off your taste and preferences.
| Benefits | Description |
|---|---|
| Showcasing Collection | Proudly display your favorite mugs |
| Space-Saving | Keep countertops clear and make the most of your space |
| Personal Expression | Customize to fit your style and kitchen decor |
Planning Your Mug Display Shelf Project
Creating a great mug display shelf starts with planning. Before you start building, think about how you want it to look and work.
Assessing Your Space and Needs
First, measure the space for your shelf. Look at both the width and height. Think about how many mugs you’ll display and if you need extra space for other items. This will help you figure out the right size and design.
Determining Shelf Size and Capacity
Choose the size and capacity of your shelf based on your needs. Think about the size of your mugs and if you’ll add more later. A good idea is to measure your biggest mug and add a few inches for extra space.
Sketching Your Design
With your measurements and needs in mind, draw a basic design. You don’t need to be a great artist; a simple sketch will do. Think about the style that fits your kitchen, like modern, rustic, or something in between.
By following these steps, you’ll create a beautiful and useful mug display shelf. It will show off your collection and make your kitchen look great.
| Planning Step | Description |
|---|---|
| Assess Your Space | Measure the area where the shelf will be installed. |
| Determine Size and Capacity | Decide on the shelf size based on your mug collection. |
| Sketch Your Design | Create a simple sketch of your shelf design. |
Essential Materials for Your DIY Mug Display Shelf
Choosing the right materials is key to making a shelf that looks good and works well. The materials you pick will impact how long your shelf lasts and its style.
Wood Options and Recommendations
There are many wood choices. Solid woods like oak and pine are strong and look natural. Engineered wood is stable and doesn’t warp easily. Think about the wood’s color and pattern to match your decor.
| Wood Type | Characteristics | Cost |
|---|---|---|
| Solid Oak | Durable, natural look | High |
| Pine | Softwood, easy to work with | Moderate |
| Engineered Wood | Stable, less prone to warping | Moderate to High |
Hardware and Fasteners
The hardware you pick can change how your shelf looks and works. Decorative brackets can make it fancy, while simple fasteners keep it simple. Make sure your hardware can hold the weight of your mugs.
Tools You’ll Need
You’ll need various tools to build your shelf. You’ll need a saw, drill, sandpaper, and a measuring tape. For detailed designs, you might also need a jigsaw or sander.
With the right materials and tools, you can make a shelf that’s both beautiful and useful. It will show off your mugs and enhance your home’s look.
Popular Mug Display Shelf Designs
There are many mug display shelf designs to choose from. You can pick from modern minimalism to rustic charm. Whether you want elegance or creativity in your kitchen, there’s something for everyone.

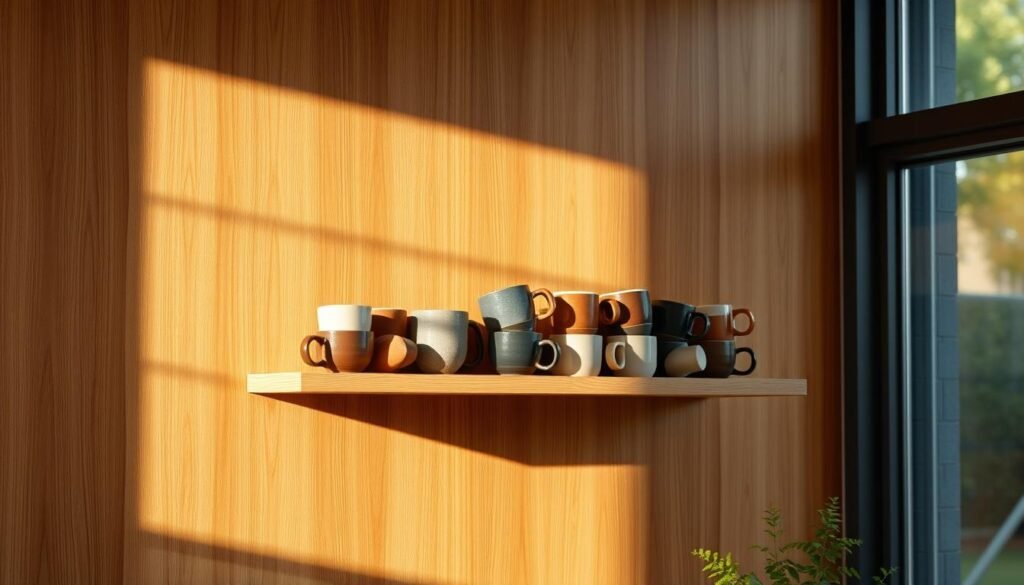
Floating Shelf Style
The floating shelf style is great for a clean look. It makes your kitchen feel open. To get this look, measure and mark the wall carefully to ensure your shelf is level.
This design makes your mugs stand out. It’s sleek and modern.
Ladder-Style Display
For a rustic or vintage look, try a ladder-style display. It holds mugs and adds to your kitchen’s decor. It’s perfect for small spaces, as it can lean against the wall or be secured.
Rustic Pallet Design
Using old pallets for a mug display is creative and eco-friendly. It adds a rustic touch to your kitchen. Sand and stain the pallet to make it unique.
Modern Minimalist Approach
The modern minimalist approach is all about simplicity. It has clean lines and focuses on the material’s natural beauty. It’s perfect for those who like simple elegance.
These designs offer many styles for any kitchen. Whether you like a sleek floating shelf or a rustic pallet, there’s a perfect mug display shelf for you.
- Consider the style and decor of your kitchen when choosing a mug display shelf.
- Think about the material and finish that will complement your existing furniture.
- Measure your space carefully to ensure the shelf fits perfectly.
Preparing Your Materials
Getting your materials ready is key to making your DIY mug display shelf. This step includes important processes. They make sure your project looks good and is strong.
Measuring and Marking
Getting your measurements right is essential for any DIY project. Use a good tape measure and check your numbers twice. Mark the wood with a pencil, making sure your lines are straight and clear.
Cutting the Wood
When cutting wood, safety comes first. Use a sharp saw blade to avoid splinters. Always cut away from your body. For straight cuts, a circular saw works best. For curved cuts, a jigsaw is better.

Sanding Techniques
Sanding makes your wood smooth, ready for staining or painting. Start with coarse-grit sandpaper (about 120-grit). Then move to finer grits (220-grit or higher) for a smooth finish. Always sand with the grain to avoid scratches.
| Sanding Stage | Grit | Purpose |
|---|---|---|
| Coarse Sanding | 120-grit | Remove rough spots |
| Fine Sanding | 220-grit | Prepare for finish |
Building Your Mug Display Shelf: Step-by-Step Construction
Now that we have our materials ready, let’s start building our mug display shelf. We’ll guide you through the process. This way, your DIY project will be sturdy and look great.
Assembling the Frame
The first step is to build the frame. This is the base of your shelves and keeps them stable. Start by laying out the side and top and bottom panels. Use wood glue and 2-inch wood screws to hold the corners together. Make sure the corners are square and the frame is level.
As you build the frame, check your measurements carefully. This avoids mistakes. If you’re using a pre-cut kit, follow the instructions. For a custom build, use your design plan.

Attaching the Shelves
Now, let’s add the shelves. Measure the frame’s inside to find the best shelf spacing. Even spacing is usually best, but adjust for your mugs.
Use shelf brackets to hold the shelves. Attach these brackets inside the frame with screws. Place the shelves on the brackets, making sure they’re level and secure. Do this for each shelf, checking the spacing and levelness.
| Shelf Number | Spacing from Top | Notes |
|---|---|---|
| 1 | 5 inches | Bottom shelf |
| 2 | 10 inches | Middle shelf |
| 3 | 15 inches | Top shelf |
Adding Support Elements
To make your shelf more stable and functional, add support elements. This could be extra brackets for heavy loads or decorative trim.
For extra support, attach a backing to the shelf with thin plywood or MDF. This stops the shelves from sagging under the mugs’ weight. Use nails or screws to secure the backing, making sure it’s even with the frame’s back.
By following these steps, you’ll have a sturdy and attractive mug display shelf. It will beautifully showcase your collection.
Installing Mug Hooks or Rails
To make your mug display shelf functional, you need to install mug hooks or rails. This step is key as it keeps your mugs organized and easy to grab. We’ll look at the different types of mug hooks, how to space them, and how to install them securely.
Different Hook Options
Choosing mug hooks involves several options. You can pick simple screw-in hooks or more stylish brass hooks. Here are some popular choices:
- Screw-in hooks for easy installation
- Adhesive hooks for no damage
- Decorative hooks that match your shelf
Proper Spacing for Mugs
Spacing your mug hooks right is key to avoid overcrowding. A good starting point is to space them 4-6 inches apart. This depends on your mug size. Adjust the spacing for your mug collection’s size and shape.

Secure Installation Methods
To ensure your mug hooks are securely in place, use different methods. For screw-in hooks, screw them into wall studs for the best support. For adhesive hooks, follow the maker’s weight and application tips. The right installation method makes your mug display shelf sturdy and reliable.
Finishing Touches for Your Mug Display
Now that your mug display shelf is built, it’s time to add the finishing touches. The finish you choose can greatly impact your kitchen’s look and feel. Let’s explore some options to help you achieve the perfect look.
Staining and Painting Options
When it comes to staining or painting your shelf, you have many choices. Think about your kitchen’s color scheme and style. Staining can give a natural look, while painting can add a pop of color.
Remember to choose a paint or stain that’s suitable for the type of wood you’re using.

Sealing and Protecting the Wood
Sealing your shelf is key, whether you stain, paint, or leave it natural. A clear coat of polyurethane or varnish will protect it from spills and wear. This is important if your shelf will hold mugs that are used often.
A well-sealed shelf is not only more durable but also easier to clean.
Decorative Elements to Consider
To add personality to your shelf, consider decorative elements. You could add metal or wooden ornaments, or even some greenery like a small potted plant. If you’re crafty, try decoupage or other techniques.
The key is to have fun and make your shelf reflect your personal style.
By carefully considering your finishing options, you can create a mug display shelf that’s not only functional but also a beautiful addition to your kitchen.
Mounting Your Mug Display Shelf
Now that your mug display shelf is ready, it’s time to hang it on the wall. This step is key for making sure your shelf works well and is safe.
Finding Wall Studs
To hang your shelf right, you need to find the wall studs. Use a stud finder to locate them. Slide it over the wall until it shows a stud. Mark the spot with a pencil. It’s essential to hang your shelf on studs for maximum support.
If you don’t have a stud finder, knock gently on the wall. Studs sound more solid than the empty spaces between them.
Proper Hanging Techniques
After finding the studs, hang your shelf. Use a level to make sure it’s straight. Drill pilot holes into the wall at the marked stud locations, then screw in the hanging screws or brackets.
- Hold the shelf against the wall, ensuring it’s level.
- Mark the screw holes on the wall with a pencil.
- Remove the shelf and drill the pilot holes.
Ensuring Stability and Safety
After mounting the shelf, check if it’s stable by gently pulling on it. If it feels secure, you’ve done well. Regularly check the shelf’s stability over time, after moving or rearranging items on it.
To keep it safe, don’t overload the shelf with too many heavy mugs. Spread the weight out to avoid straining the hanging hardware.

Troubleshooting Common DIY Mug Shelf Issues
Let’s tackle some common problems you might face with your DIY mug shelf. Even with careful planning and execution, issues can arise. But with the right troubleshooting techniques, you can enjoy your shelf without worrying about its stability or appearance.
Fixing Wobbly Shelves
A wobbly shelf can be quite frustrating. First, check if the shelf is properly aligned with the frame. Sometimes, a slight adjustment can resolve the issue. If the problem persists, consider adding support brackets or adjusting the existing ones to ensure stability.
For instance, if you’ve used a floating shelf design, ensure that the hidden brackets are securely fastened to the wall studs. You can use a level to verify that the shelf is perfectly horizontal.
Addressing Uneven Surfaces
Uneven surfaces can cause your mugs to tip over or make the shelf look unstable. To address this, you can use shims or adjustable feet to level the shelf. If you’re dealing with a particular uneven wall, consider using a flexible adhesive or adjusting the shelf’s mounting system.
“A sturdy foundation is key to a successful DIY project. Ensuring your shelf is level and secure will make all the difference in its longevity and functionality.”
Using a laser level can help you achieve a perfectly even surface. Also, if you’re mounting the shelf on a plasterboard wall, make sure to use appropriate wall anchors to distribute the weight evenly.
Repairing Damaged Hooks or Rails
Damaged hooks or rails can compromise the functionality of your mug shelf. To repair or replace them, start by assessing the damage. If the hooks are loose, tightening the screws might solve the problem. For more significant damage, consider replacing the hooks or rails entirely.
| Issue | Solution |
|---|---|
| Loose Hooks | Tighten screws |
| Damaged Hooks | Replace with new hooks |
| Uneven Rails | Adjust or replace rails |
When replacing hooks or rails, ensure that you choose materials that are compatible with your shelf’s design and can support the weight of your mugs.
Now that you’ve finished your DIY mug display shelf, you can show off your collection. This project is more than just a place to store mugs. It shows off your creativity and skill.
Your new shelf reflects your personal style. We’re excited to see how it makes your home look better.
As you keep working on DIY projects, remember each one is a chance to learn. The skills you got from this shelf project will help you with others. We encourage you to keep trying new things and look forward to helping you with your next project.
With your mug display shelf, you’ve reached a DIY goal. We hope you enjoyed making it and are happy with how it turned out. Your success shows your hard work and dedication. We’re proud to have helped you along the way.
FAQ
What is the best type of wood for a mug display shelf?
How do I determine the ideal size for my mug display shelf?
What are the different types of mug hooks or rails available?
How do I ensure my mug display shelf is stable and secure?
Can I customize my mug display shelf with decorative elements?
How do I maintain and clean my mug display shelf?
What if my mug display shelf becomes wobbly or uneven over time?
Affiliate Disclosure
Some of the links in this article are affiliate links. If you click through and make a purchase, I may earn a small commission — at no additional cost to you.
This helps support my work so I can continue creating helpful woodworking tutorials and product reviews.I only recommend products and services that I have thoroughly researched and believe could provide real value to my readers.
Thank you for your support!