
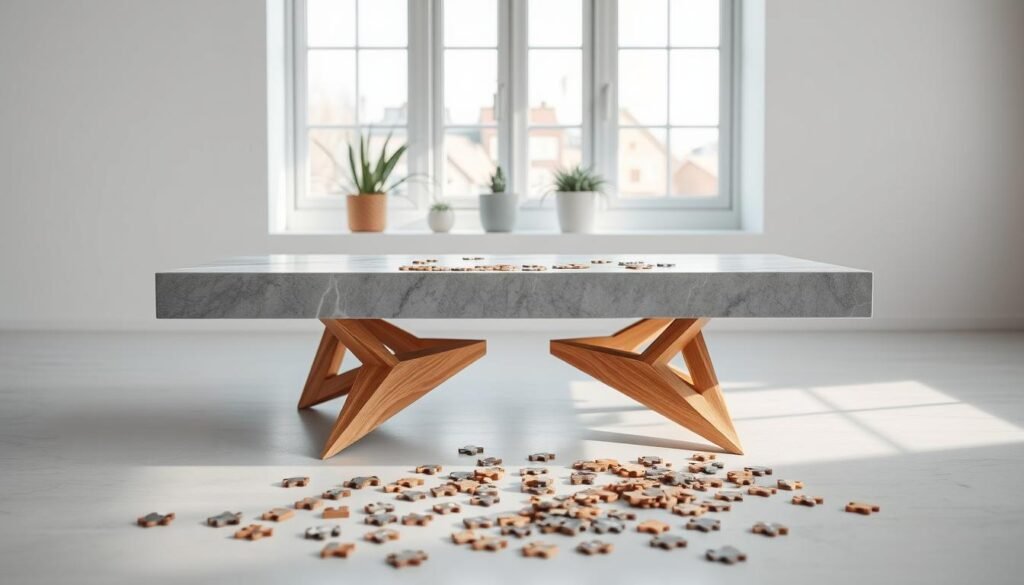
Imagine having a unique home design piece that sparks conversations and becomes the centerpiece of your living room. A puzzle coffee table is more than just a functional piece of furniture. It’s an interactive experience that brings people together.
As we guide you through this DIY project, we’ll share tips and tricks to make the process enjoyable and rewarding. You’ll learn how to create a beautiful interactive furniture piece that reflects your personal style.
Building a puzzle coffee table is a fun and creative project that requires some basic woodworking skills. With our guide, you’ll be able to create a stunning piece that adds a touch of personality to your home.
🛠️ Want the Look Without the Sawdust? Here’s Your Shortcut
There’s something rewarding about building a wooden piece with your own hands—but let’s face it, not everyone has the time, tools, or space for a full DIY project.
💡 That’s why I recommend Ted’s Woodworking Plans – a massive library of 16,000+ step-by-step plans for every kind of woodworking project you can imagine. From pet houses to holiday gifts, you’ll get:
✨ Easy-to-follow blueprints
🧰 Complete material & cut lists
🪚 Projects for all skill levels👉 Start your woodworking journey with Ted’s 16,000 plans »
💝 Ted’s Woodworking Plans also makes an amazing gift for parents, children, friends, boyfriends, girlfriends, brothers, and sisters.
🛒 Prefer to Buy Instead of Build?
No problem! If you love the look of handcrafted wood but would rather skip the tools, we’ve got you covered.
🌿 👉 Browse top-rated Puzzle coffee table and get inspired on Amazon »
Key Takeaways
- Create a unique conversation piece for your living room
- Develop your DIY skills with a fun and rewarding project
- Learn how to design and build interactive furniture
- Add a personal touch to your home decor
- Enjoy the process of creating something with your own hands
The Appeal of a Puzzle Coffee Table
A puzzle coffee table is more than furniture; it’s a brain teaser decor that challenges and delights. It combines function with fun, making it a great addition to any home.
Functional Art for Your Living Space
A puzzle coffee table is a functional art piece. It enhances your living room’s look while providing an interactive experience. It’s not just a coffee table; it’s a modern puzzle game table that invites you to play.
Conversation Starter and Entertainment Piece
Imagine having friends and family around a coffee table that’s also a puzzle. It’s a great conversation starter and a fun entertainment source. It’s perfect for social gatherings.
Storage Solutions with Style
Many puzzle coffee tables have hidden compartments. They offer a stylish way to store things. This feature adds to the table’s appeal, providing both style and practicality.
Planning Your DIY Puzzle Table Project
Before you start building your puzzle coffee table, it’s essential to plan your project carefully. A well-planned DIY project is the foundation of a beautiful and functional piece of furniture.
Determining Dimensions and Height
The first step in planning your puzzle coffee table is to determine its dimensions and height. This will depend on the space where you plan to place it and how you intend to use it.
Standard Coffee Table Measurements
Typically, a coffee table is between 16 and 18 inches high. The length and width can vary, but a common size is around 42 inches long and 24 inches wide.
Customizing for Your Space
These are just guidelines. You should measure your living room and consider the scale of your furniture. For instance, if you have a large sectional sofa, you might want a longer coffee table to anchor the space.
| Dimension | Standard Measurement | Custom Measurement |
|---|---|---|
| Height | 16-18 inches | Based on your seating |
| Length | 42 inches | Depends on room layout |
| Width | 24 inches | Consider the space around |
Choosing a Design Complexity Level
Another important aspect is deciding on the complexity of your puzzle mechanism. If you’re new to woodworking, you might want to start with a simpler design. As you gain more experience, you can take on more complex projects.
Creating Detailed Sketches and Plans
Once you’ve decided on the dimensions and complexity, create detailed sketches and plans. This will help you visualize the project and identify any issues before you start building. Don’t forget to include all the components, such as drawers or interactive elements, to ensure your puzzle coffee table with drawers is both functional and aesthetically pleasing.

By carefully planning your DIY puzzle table project, you’ll be able to create a unique home design that serves as a great interactive furniture piece. It will spark conversations and provide entertainment for family and friends.
Safety Precautions for Woodworking
When you’re making your hidden puzzle coffee table, safety comes first. Woodworking has dangers like sharp tools, loud noises, and flying debris.
Essential Safety Gear
Protective equipment is key. Always wear safety glasses, hearing protection, and a dust mask with power tools. Use a push stick or other safety tools to keep your hands safe from blades.
Workshop Setup for Safety
Make your workshop tidy and clear to avoid accidents. Good lighting and air, and a fire extinguisher nearby are important. A clean workspace helps you focus on your project, like your hidden puzzle coffee table.
Tool-Specific Safety Guidelines
Always read and follow the tool’s instructions. Keep your tools in good shape and never use a damaged one. Knowing safety in woodworking practices helps prevent injuries.
Tools and Materials Needed
Before we start building a puzzle coffee table, let’s get all the tools and materials ready. Having everything you need will make the project easier and more fun.
Essential Woodworking Tools
For woodworking, the right tools are key. You’ll need both power tools and hand tools to make your puzzle coffee table.
Power Tools vs. Hand Tools Options
Power tools like a table saw, drill press, and sander make cutting, drilling, and sanding wood easy. Hand tools, such as chisels, hand saws, and clamps, give you precision and control. It’s best to have both for the best results.
Materials Shopping List
Your shopping list will depend on your design and the wood you choose. You’ll need different types of wood for the table top, base, and puzzle parts. Also, remember to get wood glue, sandpaper, and any finishes you want.
Hardware for Puzzle Mechanisms
The puzzle parts need special hardware, like hinges, slides, and magnetic catches. Make sure to pick hardware that matches your design and is strong enough for daily use.

Selecting the Right Wood for Your Puzzle Coffee Table
Choosing the right wood for your puzzle coffee table is key. It affects both how long it lasts and how it looks. As you start this DIY project, think about a few things. This will help make sure your coffee table is both useful and beautiful.
Hardwoods vs. Softwoods for Durability
Hardwoods like oak, maple, and cherry are better for durability. They are denser and less likely to get damaged. Softwoods, such as pine or fir, might get scratches and dents easily. But, they can work well if you want a rustic or affordable look.

Contrasting Woods for Visual Appeal
Using different woods can make your puzzle coffee table more interesting. Mixing various wood types can create eye-catching patterns and designs. For instance, dark walnut and light maple together make a stunning contrast.
Budget-Friendly Alternatives
If you’re on a tight budget, think about using engineered wood or reclaimed wood. These options look and feel like solid hardwoods but cost less. They’re perfect for DIY projects when you’re watching your spending.
Building the Table Base and Frame
Building the base of your puzzle coffee table is key. It needs precision and detail. A strong base is vital for your table’s stability and life span.
Cutting the Base Pieces to Size
First, cut the wood for the base as your plan shows. Use a miter saw or circular saw for clean cuts. Make sure all pieces fit perfectly to avoid problems later.

Joinery Techniques for Strength
The joinery method you pick affects your table’s strength and life. We’ll look at two good options: mortise and tenon joints, and pocket hole alternatives.
Mortise and Tenon Joints
Mortise and tenon joints are a classic and strong way to join wood. They make a tight and solid connection by fitting a tenon into a mortise.
Pocket Hole Alternatives
Pocket hole joinery is also effective, great for beginners. It uses pocket holes and screws to connect the wood.
Ensuring Stability and Level Construction
To make sure your table base is stable and even, follow these steps:
| Step | Description | Tips |
|---|---|---|
| 1 | Assemble the base frame | Use clamps to hold pieces in place |
| 2 | Check for levelness | Use a level tool on a flat surface |
| 3 | Adjust as necessary | Make adjustments before final tightening |
By following these steps and choosing the right joinery, you’ll create a solid and even base for your puzzle coffee table.
Designing Interactive Puzzle Mechanisms
Creating the puzzle mechanism for your coffee table is the exciting part. It’s what makes your coffee table special, turning it into an interactive furniture piece. This feature engages and challenges those who use it.
Sliding Panel Systems
Sliding panel systems are a favorite among puzzle enthusiasts. They involve panels that slide to reveal hidden spots or messages. To make this work, you need to plan the size and ensure smooth movement. Using wooden or metal guides helps a lot.

Rotating Elements and Pivots
Adding rotating elements brings more complexity and fun to your coffee table. Pivots allow sections to rotate, showing new areas or hiding them. You can use hidden hinges or pivot pins for smooth rotation.
Push-to-Open Mechanisms
Push-to-open mechanisms cleverly hide compartments or drawers. Pressing a certain spot opens them. This can be done with spring-loaded mechanisms or hidden catches.
Combination Lock Features
Adding combination locks makes your coffee table even more challenging. You can use mechanical or electronic locks that need a specific code to open. Hiding clues around the table helps users solve the puzzle.
| Puzzle Mechanism | Description | Key Components |
|---|---|---|
| Sliding Panel Systems | Panels that slide to reveal hidden compartments | Wooden or metal guides, sliding panels |
| Rotating Elements | Sections that rotate to reveal new surfaces | Hidden hinges, pivot pins |
| Push-to-Open Mechanisms | Press to release hidden compartments | Spring-loaded mechanisms, hidden catches |
| Combination Lock Features | Requires a specific sequence to open | Mechanical or electronic locks |
By adding these puzzle mechanisms, you’ll make a unique and engaging interactive furniture piece. It will be the highlight of any room.
Creating Hidden Compartments and Secret Drawers
Building a puzzle coffee table is exciting, thanks to hidden storage spaces. These add both function and intrigue. They make your table a standout piece in your living room.
Measuring and Cutting Drawer Components
First, measure and cut your drawer parts carefully. Use a combination square for precise measurements and a miter saw for clean cuts. Accurate measurements are key for your hidden compartments to work well.
Installing Drawer Slides and Guides
After preparing your drawer parts, install the slides and guides. Pick high-quality slides that can handle the weight of your items. Make sure the slides are aligned and attached well to both the drawer and the table frame.
Designing False Bottoms and Hidden Spaces
Get creative with false bottoms and hidden spaces. Add a layer that looks like the bottom but hides a storage space. This can be done with a secondary bottom and a clever access mechanism.
Magnetic and Mechanical Locking Systems
For keeping your secrets safe, a good locking system is essential. Magnetic locks are sleek and modern, while mechanical locks offer a classic look. Choose one that fits your design and keeps your table looking great.
Adding these features makes your puzzle coffee table more than just a piece of furniture. It becomes a sophisticated and intriguing centerpiece. Hidden compartments and secret drawers will impress everyone, turning your DIY project into a masterpiece.

- Measure twice, cut once to ensure accuracy in your drawer components.
- Choose the right drawer slides for smooth operation.
- Be creative with your false bottoms and hidden spaces.
- Select a locking system that fits your design and security needs.
Crafting the Puzzle Coffee Table Top
Now, we’re at the final stages of our puzzle coffee table project. Crafting the table top is key, needing precision and detail. This is where your table starts to come together, blending function with art.
Preparing and Joining Wood for the Surface
To make a strong and good-looking table top, we must pick and prepare the wood carefully. First, choose wood that matches your design and budget. Then, cut it into the needed pieces and sand them smooth.
When joining the wood, align it carefully and fasten it securely. Use wood glue and dowels or biscuits for extra strength.

Incorporating Movable Puzzle Pieces
The movable puzzle pieces add fun and interaction to your coffee table. To add these, design and cut the puzzle elements with precision. You’ll need a detailed plan and tools like a jigsaw or CNC machine.
Creating Precise Fitting Tolerances
For smooth puzzle piece fitting, precise tolerances are key. Measure carefully and test the fit as you go. You might need to make adjustments for a perfect fit.
Edge Treatments for Puzzle Pieces
After cutting your puzzle pieces, treat the edges to prevent splintering and improve the finish. Sanding the edges and applying a finish can greatly enhance your table top’s quality.
Testing Movement and Functionality
After building the puzzle coffee table top, test how the pieces move and fit. Make sure they slide smoothly and fit well. This step is vital for a great user experience.
By following these steps, you’ll create a beautiful and functional puzzle coffee table top. It will be the highlight of your living room.
Sanding and Surface Preparation
Sanding and surface preparation are key steps for a great DIY project. They ensure a smooth finish and make the wood last longer. They also highlight the wood’s natural beauty.
Progressive Grit Sanding Techniques
We use a progressive grit sanding method for a smooth surface. Start with a coarse grit (120-150) to remove big flaws. Then, move to finer grits (180-220) for a smoother finish. Finish with a high-grit sandpaper (320-400) for a shiny surface.
- Begin with coarse grit to remove old finishes or imperfections.
- Switch to medium grit for initial smoothing.
- Finish with fine grit for a surface ready for finishing.
Filling Gaps and Wood Imperfections
Even with care, gaps or imperfections can appear. Use a wood filler that matches your wood type to fill these gaps. Let it dry, then sand it down to a smooth finish.
Tip: For a nearly invisible repair, mix the wood filler with a bit of sawdust from the same wood type you’re working with.
Final Smoothing for Finish Application
After filling and sanding, check your surface for any remaining flaws. A final sand with a very fine grit sandpaper or a sanding block will get your surface ready for finishing. Clean the surface with a tack cloth to remove dust or debris.
- Inspect the surface under good lighting.
- Sand with a fine grit sandpaper.
- Wipe down with a tack cloth.

By following these steps, you’ll get a beautifully prepared surface for your chosen finish. The secret to a professional look is in the details of your preparation.
Finishing Your Puzzle Coffee Table
Now that your puzzle coffee table is put together, it’s time to add a finish. This step protects the wood and highlights its natural beauty. The right finish makes your table look great and last longer.
Selecting Stains and Finishes
Choosing the right stain and finish depends on your wood type and desired look. For hardwoods like oak or maple, pick a stain that shows off the grain. Softwoods might look better with a lighter stain or clear finish.
| Finish Type | Durability | Aesthetic Appeal |
|---|---|---|
| Oil-based Polyurethane | High | Enhances wood grain |
| Water-based Polyurethane | Medium | Clear finish, less yellowing |
| Wax Finish | Low | Natural look, easy to apply |
Application Methods for Best Results
To get a professional finish, follow the right steps. Sand your table well to smooth it out. Then, apply your stain or finish with a clean cloth or foam brush, following the instructions.
Multiple Coat Techniques
For a strong finish, use thin coats instead of one thick one. This method avoids drips and unevenness. Let each coat dry before adding the next one.
Protective Topcoats for Durability
Lastly, add a protective topcoat to make your table last longer. Polyurethane or varnish creates a hard layer that resists spills and scratches. Always follow the application instructions for the best results.

We’ve covered how to make a unique puzzle coffee table, from planning to finishing touches. Now, it’s time to enjoy your creation with friends and family.
Building this puzzle coffee table adds a functional piece to your living room. It also brings a sense of accomplishment. The puzzle mechanism and hidden compartments will make your gatherings more fun and intriguing.
Admire your handiwork and remember, the joy and satisfaction of DIY projects are priceless. Your puzzle coffee table shows your creativity and skill. So, take pride in your work and enjoy the compliments.
FAQ
What is a puzzle coffee table with drawers, and how does it differ from a regular coffee table?
What skills do I need to build a puzzle coffee table?
What type of wood is best for building a puzzle coffee table?
Can I customize the design of my puzzle coffee table?
How long does it take to build a puzzle coffee table?
What safety precautions should I take when building a puzzle coffee table?
Can I use a puzzle coffee table as a storage unit?
Is a puzzle coffee table suitable for families with young children?
Can I build a puzzle coffee table with hidden compartments?
Affiliate Disclosure
Some of the links in this article are affiliate links. If you click through and make a purchase, I may earn a small commission — at no additional cost to you.
This helps support my work so I can continue creating helpful woodworking tutorials and product reviews.I only recommend products and services that I have thoroughly researched and believe could provide real value to my readers.
Thank you for your support!