
Welcome to our DIY tutorial on making a beautiful rustic storage solution for your home. We’re excited to help you build a unique piece of furniture. It will add warmth and character to any room.
In this guide, we’ll show you how to plan, build, and finish your own rustic furniture piece. Whether you’re a seasoned DIY enthusiast or just starting out, we’ve got you covered. We’ll give you all the info you need to do this project right.
📌📌Get Access to 16,000+ TEDS Woodworking Plans
👉👉 Browse our favorite Wooden Photo Frames on Amazon »
Key Takeaways
- Learn how to plan and design your DIY bookshelf
- Understand the materials and tools needed for the project
- Get step-by-step instructions for building and finishing your rustic furniture piece
- Discover tips for adding a personal touch to your bookshelf
- Explore ways to customize your storage solution to fit your home decor
The Charm of Rustic Bookshelves in Home Decor
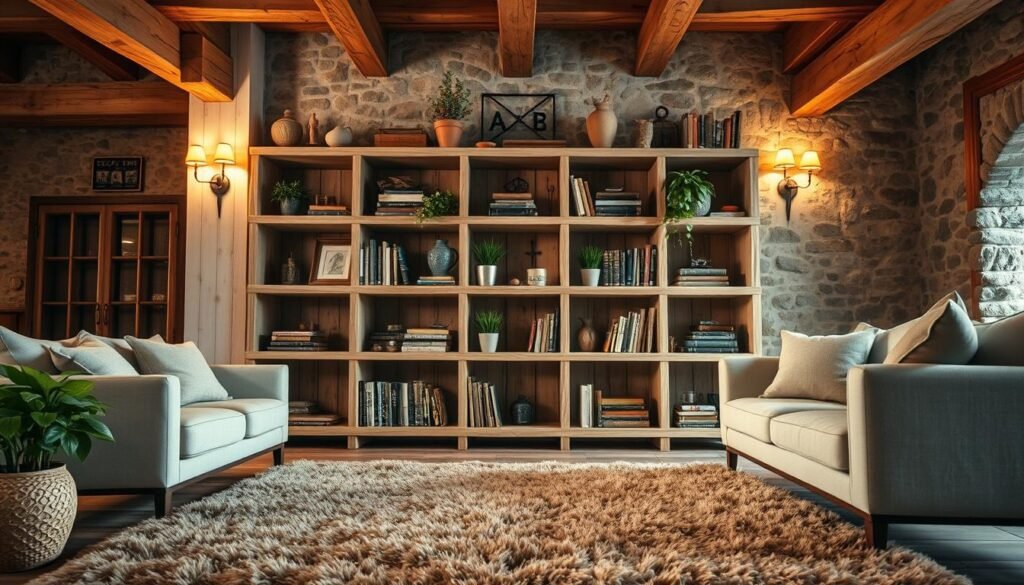
Rustic bookshelves add warmth to your home. They make any room cozy and full of character. This is why they’re a favorite for creating a welcoming space.
Why Rustic Style Remains Timeless
Rustic style is timeless because it’s a mix of natural beauty and functional simplicity. The use of reclaimed wood and traditional craftsmanship makes rustic bookshelves unique. They’re perfect for farmhouse style shelving, creating a warm, inviting space.
Benefits of Creating Your Own Rustic Furniture
Making your own rustic furniture, like a reclaimed wood bookcase, lets you customize it. You can pick the wood, design, and finish to match your decor. Plus, it’s a fun DIY project that adds a personal touch to your home.
| Benefits | Rustic Bookshelves | Modern Bookshelves |
|---|---|---|
| Aesthetic Appeal | Warm, cozy, and character-rich | Sleek, modern, and minimalist |
| Customization | Highly customizable with reclaimed wood and unique designs | Limited to modern materials and designs |
| DIY Potencial | Ideal for DIY projects with a personal touch | Less common for DIY due to complex modern designs |
Planning Your Rustic Bookshelf Project
Let’s start planning your rustic bookshelf project. It should fit your storage needs and match your home decor. A good plan is key to a successful DIY project.
Determining the Size and Location
First, decide on the size of your rustic bookshelf. Think about the space you have and how much storage you need. Measure the area where you’ll put the bookshelf, considering any obstacles.
Also, think about the height and width. You want it to fit well without taking up too much space.
Where you place the bookshelf is important too. It should be easy to reach but not in the way. Think about how it will fit with other furniture in the room.
| Consideration | Description | Tips |
|---|---|---|
| Space Available | Measure the width and height of the area | Use a tape measure for accurate dimensions |
| Storage Needs | Assess the number of books and items to store | Consider future storage needs as well |
| Accessibility | Ensure the location is convenient | Avoid placing it too high or too low |
Choosing a Design Style
Your rustic bookshelf should match your room’s style. Is it industrial or vintage? Pick a design that fits.
Think about the colors, materials, and overall look you want. A rustic bookshelf can be bold or blend in, depending on what you like.

📌📌Get Access to 16,000+ TEDS Woodworking Plans
👉👉 Browse our favorite Wooden Photo Frames on Amazon »
Materials Needed for Your Rustic Bookshelf
Building a great rustic bookshelf starts with the right materials. Choosing the right wood and hardware is key. This ensures your bookshelf is sturdy and looks good for years.
Wood Selection Guide
Choosing wood for your rustic bookshelf has many options. You can pick reclaimed wood for a unique look or distressed wood for a rustic feel. Solid hardwoods like oak or pine offer a natural look.
Here’s a comparison of different types of wood you can use:
| Wood Type | Appearance | Durability |
|---|---|---|
| Reclaimed Wood | Weathered, unique | High |
| Distressed Wood | Rustic, aged | Medium |
| Solid Hardwood | Natural, classic | High |
Hardware and Additional Supplies
You’ll also need various hardware and supplies for your rustic bookshelf. This includes screws, nails, wood glue, and decorative handles. Choose hardware that fits your bookshelf’s style.
Here’s a list of the hardware and supplies you’ll need:
- Screws and nails
- Wood glue
- Decorative handles
- Sandpaper
- Wood stain or finish
Essential Tools for Building a Rustic Bookshelf
The right tools are key for a successful DIY rustic bookshelf project. Whether you’re experienced or new, the right tools make the project fun and rewarding.
Basic Carpentry Tools
You’ll need basic carpentry tools to begin. These tools help you cut, assemble, and finish your bookshelf.
- Saw: A good quality saw is indispensable for cutting wood accurately.
- Drill: You’ll need a drill to make holes for screws and other hardware.
- Hammer: A hammer is necessary for tapping pieces into place and fitting parts together.
- Tape Measure: Accurate measurements are key, making a tape measure essential.
- Level: Ensuring your bookshelf is level is important for both looks and stability.
| Tool | Purpose |
|---|---|
| Saw | Cutting wood |
| Drill | Making holes for screws |
| Hammer | Assembling parts |
Optional Tools to Make the Job Easier
While basic tools are enough to start, some optional tools can make things easier and faster.
- Sander: A sander can help smooth out the wood, giving your bookshelf a professional finish.
- Clamps: Clamps are useful for holding pieces in place while the glue dries.
- Woodworking Jig: A jig can help you make precise cuts and repetitive tasks easier.
With these tools, you’ll be ready to take on your DIY rustic bookshelf project with confidence.
📌📌Get Access to 16,000+ TEDS Woodworking Plans
👉👉 Browse our favorite Wooden Photo Frames on Amazon »
Safety Precautions for DIY Woodworking
When you start DIY woodworking, safety is key. Working with power tools and wood can be dangerous if you’re not ready.
Proper Tool Handling
It’s important to handle tools safely. Always read the manual before using a new tool. Wear safety glasses and gloves as recommended. Keep your tools in good shape and store them safely when not in use.
- Use sharp tools; dull tools are more likely to cause accidents.
- Keep your workspace clean and clutter-free to avoid tripping hazards.
- Never use power tools when tired or distracted.
Workspace Safety Considerations
Your workspace is key to your safety in DIY woodworking. Make sure there’s good air flow to avoid dust and wood particles. Always have a fire extinguisher nearby, when working with flammable materials or finishes.
| Safety Measure | Importance | Action |
|---|---|---|
| Good Ventilation | High | Use exhaust fans or work near windows. |
| Fire Extinguisher | High | Keep it accessible and check it regularly. |
| Protective Gear | High | Wear safety glasses, gloves, and a dust mask. |
Preparing Your Wood for the Perfect Rustic Look
To get a perfect rustic look, start by preparing your wood. This step is key for your DIY project. It helps you create a distressed bookshelf or reclaimed wood bookcase with real character.
You may also like
Measuring and Cutting the Wood
Getting your measurements right is essential for a DIY project. Use a good tape measure and a sharp saw for cutting. This ensures clean cuts and saves wood. Always remember, measure twice, cut once to avoid mistakes.

📌📌Get Access to 16,000+ TEDS Woodworking Plans
👉👉 Browse our favorite Wooden Photo Frames on Amazon »
Distressing Techniques for Authentic Rustic Appeal
Distressing your wood brings out its rustic charm. You can use a hammer for dents, sandpaper for smooth edges, and chains for deep marks. The aim is to make your rustic look look aged and worn.
- Use a hammer and nails to create small holes and dents.
- Sandpaper can be used to distress edges and corners.
- For a more dramatic effect, try using a chain or an axe to create deeper marks.
Creating Weathered Wood Effects
To enhance your reclaimed wood bookcase, add weathered wood effects. Techniques like wire brushing can expose the grain. You can also use weathered wood stain for an aged look. These touches add to the rustic charm and give your bookshelf a story.
By following these steps, you’ll create a beautiful, rustic bookshelf. It will add warmth and character to any room.
Assembling the Rustic Bookshelf Frame
Building the frame of your rustic bookshelf is key. We’ll show you how to do it. You’ll make side panels and connect them to create a strong base for your shelves.
Building the Side Panels
Begin by arranging the wooden boards as planned. Make sure the edges line up and the corners are right. Use wood glue and 2-inch wood screws to hold the boards together.
Check for gaps or uneven spots as you build. Clamp the boards to keep them steady while the glue dries. After it’s dry, sand the panels to make them smooth.

Connecting the Framework
Now, join the side panels to make the bookshelf’s frame. Use wooden brackets or shelves supports to link the panels. Make sure they’re evenly spaced and aligned. Secure them with wood screws and tighten well.
Ensure the frame is square and level as you connect it. This is important for your bookshelf’s stability. Once it’s built, you can add the shelves, knowing your bookshelf is sturdy.
Installing the Shelves
Now that we have the frame ready, it’s time to install the shelves. This step turns the frame into a useful piece of furniture. It’s ready to hold your favorite books and decorations.
Measuring for Even Shelf Spacing
To make your bookshelf look balanced, measuring shelf spacing is important. First, figure out the total height of your bookshelf. Then, decide how many shelves you want.
Divide the total height by the number of spaces to find the right spacing. Use a tape measure and pencil to mark where the shelves will go.
Securing Shelves to the Frame
Securing the shelves is a key step that needs precision. Choose shelf brackets that fit your rustic style. Attach these brackets to the marked spots on the frame, making sure they’re level and tight.
Then, place the shelves on the brackets. Make sure they fit well and are evenly spaced.

📌📌Get Access to 16,000+ TEDS Woodworking Plans
👉👉 Browse our favorite Wooden Photo Frames on Amazon »
Testing Shelf Stability
After installing the shelves, test their stability. Put some weight on each shelf to see if they can hold it. Make sure they’re level and the brackets are tight.
This step is vital for the safety and durability of your rustic bookshelf.
Troubleshooting Common DIY Bookshelf Problems
DIY projects can sometimes go wrong, but don’t worry, we’ve got you covered! As you near the end of your rustic bookshelf, you might face a few issues. We’ll help you fix common problems in this section.
Fixing Uneven Shelves
Uneven shelves can be a real eyesore. First, check if the problem is with the shelf or the frame. Make sure the shelf is aligned right and the brackets are tight. If it’s not fixed, you might need to adjust the supports or level the bookshelf.
| Issue | Possible Cause | Solution |
|---|---|---|
| Uneven Shelves | Misaligned Shelf | Adjust Shelf Alignment |
| Uneven Shelves | Loose Brackets | Tighten Brackets |
Addressing Stability Issues
Stability issues can make your DIY bookshelf unsafe and less functional. If it wobbles, check the floor for unevenness. Make sure all legs are firmly grounded. Use adjustable feet or wall anchors for extra stability.

By fixing these common problems, your DIY bookshelf will be both beautiful and functional. Remember, troubleshooting is a normal part of the DIY process. With patience and the right guidance, you can overcome any challenges.
Finishing Your Rustic Bookshelf
Now that your rustic bookshelf is built, it’s time to add the final touches. These touches will highlight its natural beauty. The finishing process is key. It makes your bookshelf look better and keeps it safe from damage.
Sanding Techniques
Sanding is a key step before finishing. Start with coarse-grit sandpaper (about 80-100 grit) to smooth out any rough spots. Then, move to finer grits (120-150 grit) for an even smoother finish. Always sand with the grain to prevent scratches.
- Use a sanding block for flat surfaces.
- Sand in circular motions for rounded edges.
- Wipe away dust between grit changes.
Staining Options for Rustic Wood
Staining your bookshelf can make it look even more rustic. Pick a stain that matches the wood’s natural color. Think about the wood type and the look you want. Test the stain on a hidden area first to make sure it looks good.
- Select a stain that matches your desired color and wood type.
- Apply the stain with a clean cloth or brush.
- Wipe off excess stain to avoid pooling.
Applying Protective Finishes
Protecting your bookshelf is important to keep it safe from spills and scratches. You can use polyurethane, varnish, or wax. Apply thin coats, letting each coat dry before adding the next.

📌📌Get Access to 16,000+ TEDS Woodworking Plans
👉👉 Browse our favorite Wooden Photo Frames on Amazon »
By following these steps, you’ll make your rustic bookshelf look great and last longer. A well-finished bookshelf will be a beautiful addition to any home.
Conclusion
Finishing this DIY project is a big win. You should feel proud of what you’ve made. Your rustic bookshelf is not just useful but also makes your home look great. It shows off your skills and style, bringing warmth and character to any room.
As you fill your bookshelf with your favorite things, you’ll love the extra space and cozy feel it adds. We hope you’ll show off your bookshelf to friends and family. This will inspire them to try DIY projects and make their own special pieces.
With this bookshelf, you’ve made your living space better and learned new DIY skills. We’re glad you found this tutorial helpful and fun. We can’t wait to see what other creative projects you’ll do next.
🕰️ Want to Build a Beautiful Rustic Bookshelf ?
If you love woodworking and want to create something truly timeless, start with the right plan!
With TedsWoodworking, you get access to 16,000+ detailed woodworking plans —
Here’s what’s inside:
- 🪚 Full cut lists and diagrams
- ✅ Instant download, print-ready format
👉 Click here to unlock all TedsWoodworking plans »
😅 Not into DIY?
If you’d prefer to skip the tools and still own a Rustic Bookshelf, we’ve got you covered.
Check out our favorite ready-made Rustic Bookshelf on Amazon — full of character and quality craftsmanship.
👉 Shop beautiful cuckoo clocks on Amazon »
FAQ
What type of wood is best for a rustic bookshelf?
How do I achieve a distressed look on my bookshelf?
What are the essential tools needed for building a rustic bookshelf?
How do I ensure my bookshelf is stable and secure?
Can I customize the size and design of my rustic bookshelf?
What are some common mistakes to avoid when building a rustic bookshelf?
How do I maintain and care for my rustic bookshelf?
Can I use a rustic bookshelf in a modern home decor?
What are some additional features I can add to my rustic bookshelf?
Affiliate Disclosure
Some of the links in this article are affiliate links. If you click through and make a purchase, I may earn a small commission — at no additional cost to you.
This helps support my work so I can continue creating helpful woodworking tutorials and product reviews.I only recommend products and services that I have thoroughly researched and believe could provide real value to my readers.
Thank you for your support!