
Imagine the joy on a child’s face when they get a handcrafted toy made just for them.
At our workshop, we love making something special with our hands. Making wooden toy dogs is more than just a toy. It’s about making memories that last forever.
We’re here to help you make your own DIY wooden toys. Our guide will show you how to make a fun toy for your child. It will help spark their imagination and encourage play.
👉 Start your woodworking journey with Ted’s 16,000 plans »
💝 Ted’s Woodworking Plans also makes an amazing gift for parents, children, friends, boyfriends, girlfriends, brothers, and sisters.
🌿 👉 Browse top-rated wooden mirrors and get inspired on Amazon »
Key Takeaways
- Learn to craft a charming wooden toy dog
- Understand the benefits of handcrafted children’s toys
- Discover the joy of DIY wooden toys for kids
- Follow a simple, step-by-step guide to create your own wooden toy
- Enjoy quality time with your child while crafting together
The Charm of Wooden Toys in a Digital Age
In today’s digital world, wooden toys are as appealing as ever. Wooden toys, such as our wooden toy dogs, provide a hands-on experience. This experience is both timeless and great for kids’ growth.
Benefits of Wooden Toys for Child Development
Wooden toys are key in boosting kids’ motor skills and sparking their imagination. Unlike digital toys, they make kids think and act, helping them be creative and solve problems. For example, a wooden toy dog can be a main character in a child’s stories. This boosts their storytelling and emotional smarts.
Here’s a look at some key benefits:
| Benefit | Description |
|---|---|
| Motor Skills Development | Improves hand-eye coordination and fine motor skills through play. |
| Imaginative Play | Encourages creativity and imagination, letting kids tell their own stories. |
| Emotional Intelligence | Helps kids develop emotional smarts by playing nurturing roles. |
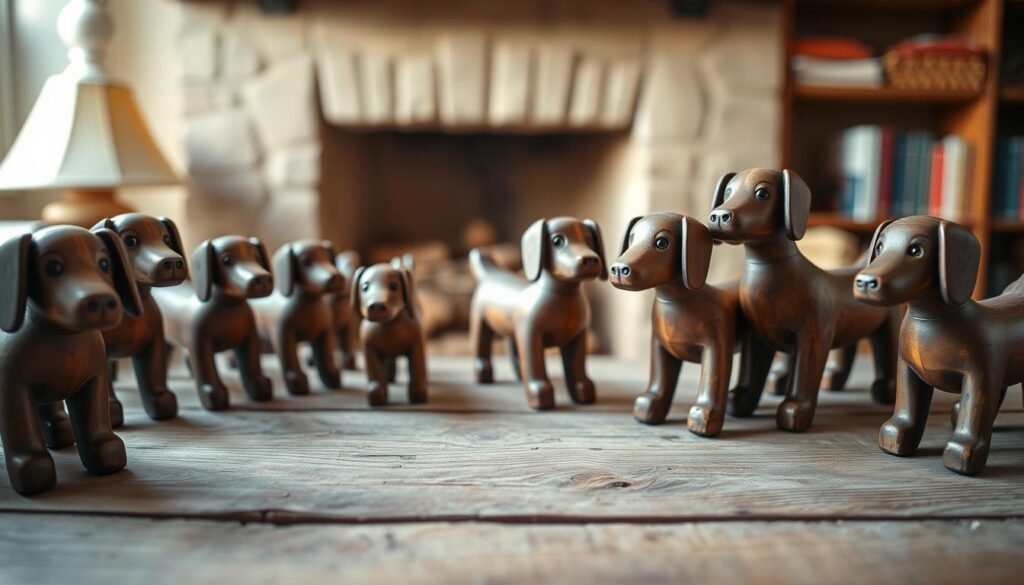
Why Wooden Dogs Captivate Children’s Imagination
Wooden dogs, with their simple yet charming designs, grab kids’ attention like few toys do. They become friends in make-believe play, letting kids try out different roles. Plus, wooden toys last long, making them family treasures for years.
Essential Materials for Crafting Your Toy Wooden Dog
Making a wooden toy dog for kids requires the right materials. You want it to be safe and fun for them. It should also last a long time.
Types of Wood Suitable for Children’s Toys
Not all wood is good for kids’ toys. Choose hardwoods like maple, beech, or birch. They are dense and don’t splinter easily. These woods are strong and can handle playtime well.
Stay away from softwoods like pine or cedar. They are too soft and may have harmful resins.
Tools and Supplies Checklist
Here’s what you need to start:
- Coping saw or jigsaw for cutting out the wooden shape
- Sandpaper for smoothing out the edges
- Wood glue for assembling the parts
- Non-toxic paint or finish to add color and protection
- Safety glasses and a dust mask for protecting yourself while working
Having the right tools makes crafting easier and more fun.
Where to Source Quality Materials
You can find quality materials at local stores, craft stores, or online. Look for suppliers that offer child-safe materials. Online sites like Amazon or eBay are good, but check reviews first.
For special items like non-toxic finishes, craft stores or online woodworker sites are best.

👉 Start your woodworking journey with Ted’s 16,000 plans »
💝 Ted’s Woodworking Plans also makes an amazing gift for parents, children, friends, boyfriends, girlfriends, brothers, and sisters.
🌿 👉 Browse top-rated wooden mirrors and get inspired on Amazon »
Safety First: Precautions When Working with Wood
Making wooden toys is fun and rewarding. But, we must keep our workspace safe. We want to make sure we and the kids who play with these toys are safe.
Workspace Setup for Safe Crafting
First, set up a safe workspace to prevent accidents. Make sure your area is well-ventilated, which is important when using power tools or applying finishes. Keep your space clean and organized to avoid tripping.
Use proper lighting to see what you’re doing. Also, consider using a dust collector to reduce sawdust.

Child-Safe Finishes and Materials
When choosing finishes and materials, safety is key. Pick non-toxic, child-safe finishes that don’t have harmful chemicals. Here’s a quick look at some common finishes:
| Finish Type | Toxicity | Durability |
|---|---|---|
| Water-based paint | Low | High |
| Oil-based stain | Moderate | High |
| Natural wax | Low | Moderate |
Always choose materials and finishes that are labeled as child-safe. This way, the toys you make are safe for kids to play with.
Designing Your Toy Wooden Dog: Templates and Patterns
Designing your toy wooden dog is where creativity meets craftsmanship. It lets you bring your unique vision to life. Whether you’re a beginner or an experienced crafter, the right template or pattern is key for success.
Simple Designs for Beginners
For beginners, simple designs are a great start. These templates have basic shapes and few details. They’re easy to cut and assemble. You can find free templates online or in crafting books for beginners.
Advanced Designs for Experienced Crafters
For those with more experience, advanced designs are better. These templates have detailed features and challenging cuts. You can make wooden toy dogs with sophisticated details, like articulated limbs or detailed facial expressions.
Creating Custom Templates
Creating a custom template is rewarding for those who want to be creative. You can draw inspiration from your favorite dog breed or a character from a story. Start by sketching your design on paper. Then, refine it using software or make adjustments as you prototype.
| Design Type | Skill Level | Features |
|---|---|---|
| Simple | Beginner | Basic shapes, minimal details |
| Advanced | Experienced | Intricate details, articulated limbs |
| Custom | Variable | Personalized design, unique features |

👉 Start your woodworking journey with Ted’s 16,000 plans »
💝 Ted’s Woodworking Plans also makes an amazing gift for parents, children, friends, boyfriends, girlfriends, brothers, and sisters.
🌿 👉 Browse top-rated wooden mirrors and get inspired on Amazon »
Step-by-Step Guide to Cutting and Shaping the Wood
Now we have our wooden material and design pattern. It’s time to start cutting and shaping our toy wooden dog. This step is key to bringing our project to life.
Tracing Your Pattern onto Wood
The first step is to trace the pattern onto the wood. This needs some care to ensure our cuts are precise.
Marking Techniques for Accuracy
Use a sharp pencil or a fine-tip marker to trace the pattern. This helps make precise cuts later.
Avoiding Common Tracing Mistakes
A common mistake is not pressing hard enough. This leads to faint lines that are hard to follow. Make sure to press firmly for a clear trace.
Cutting Techniques for Different Wooden Parts
Different parts of our wooden toy dog need different cutting techniques. Let’s look at how to handle these.
Using a Coping Saw for Curves
For curved parts, a coping saw is best. It makes smooth, precise cuts. Take your time and let the saw do the work.
Straight Cuts with Hand and Power Tools
For straight cuts, use hand saws or power tools like a circular saw. Power tools are quicker but need more caution.

Sanding for Smooth Edges and Surfaces
After cutting, sanding is key to smooth out edges and surfaces. This step is important for safety and looks.
Progression of Sandpaper Grits
Begin with coarse grit sandpaper (about 120) and move to finer grits (220 or higher) for a smooth finish.
Hand vs. Power Sanding Methods
Hand sanding offers control, while power sanding is quicker for big areas. Both have their uses.
Assembling Your Toy Wooden Dog: Joints and Connections
Now that you’ve cut out the wooden parts, it’s time to bring your toy dog to life. Assembling the parts needs careful attention and the right techniques. This ensures your toy is sturdy and durable.
Different Joinery Methods for Wooden Toys
There are several ways to join your wooden toy dog. Mortise and tenon joints are strong and traditional. Dovetail joints are great for corners. For a simpler method, butt joints with glue and nails work well.

👉 Start your woodworking journey with Ted’s 16,000 plans »
💝 Ted’s Woodworking Plans also makes an amazing gift for parents, children, friends, boyfriends, girlfriends, brothers, and sisters.
🌿 👉 Browse top-rated wooden mirrors and get inspired on Amazon »
Gluing Techniques for Strong Bonds
For a durable wooden toy dog, the gluing technique is key. Spread glue evenly on the surfaces to be joined. Clamp them tightly and let the glue dry as instructed. Use high-quality wood glue for a strong bond.
Tips for Secure Assembly
To assemble your toy securely, check that all parts fit well before gluing. Use clamps to hold the pieces while the glue dries. Also, keep your workspace stable and well-lit to avoid mistakes.
Adding Personality: Painting and Decorating Your Toy Wooden Dog
As you near the end of your wooden toy dog, adding personality with paint and decorations is key. This is your chance to let your creativity shine. It’s how you make your toy dog truly stand out.
Child-Safe Paints and Finishes
Painting your wooden toy dog safely is essential. We suggest using child-safe paints that are non-toxic and meet international safety standards. Choose paints labeled as “water-based” or “eco-friendly” for safer options. Always pick paints and finishes that are safe for children’s toys.
- Water-based acrylic paints
- Natural oil finishes like linseed oil
- Non-toxic varnishes
Creating Facial Features and Details
The face of your wooden toy dog will capture the heart of its new owner. You can create endearing facial features using various techniques.
Eyes and Nose Techniques
For the eyes and nose, use a fine brush to paint details or small, safe materials like beads or wooden dowels. Ensure any material you use is securely attached to prevent choking hazards.
- Painting: Use a fine brush to create expressive eyes and a nose.
- Beads or Dowels: Attach small beads or dowels for a more dimensional look.
Adding Texture for Fur
To give your wooden dog a furry texture, use textured paste or fabric. This adds visual appeal and makes the toy more engaging to touch.
Textured paint or paste applied in fur direction mimics real fur. Or, glue on fabric strips or yarn for a furry effect.
Personalization Ideas
Making a wooden toy dog allows for personalization. Think about the child’s preferences – bright colors or muted tones? Adding a name or special message makes it extra special.

- Add a name or initials
- Use colors that match the child’s favorite
- Create a themed dog, like a dalmatian or a golden retriever
Personalizing your wooden toy dog makes it unique. It also creates a special bond between the child and the toy.
Making Interactive Toy Wooden Dogs
Creating interactive wooden toy dogs can make playtime more fun for kids. You can add simple or complex parts that let the toy move and pose in different ways.
One easy way to make a wooden toy dog interactive is by adding moving parts. You can make a joint for the dog’s head or limbs to move. Use small metal or wooden dowels to create hinges.
Adding Moving Parts
Think about the child’s age when adding moving parts. For younger kids, make sure all parts are safe and won’t cause choking. Use a peg-and-hole system for joints that are snug but can move.
Pull-Along Designs with Wheels
Make your wooden toy dog interactive with a pull-along design and wheels. This adds fun mobility and encourages active play. Attach wheels to the base and add a handle for pulling.

👉 Start your woodworking journey with Ted’s 16,000 plans »
💝 Ted’s Woodworking Plans also makes an amazing gift for parents, children, friends, boyfriends, girlfriends, brothers, and sisters.
🌿 👉 Browse top-rated wooden mirrors and get inspired on Amazon »
Articulated Limbs for Posable Dogs
For a more challenging project, try a wooden toy dog with articulated limbs. This lets kids pose the dog in many ways, boosting their imagination. Use multiple small joints for balanced limbs.
| Feature | Benefit | Complexity Level |
|---|---|---|
| Moving Parts | Enhances play value | Easy to Medium |
| Pull-Along Design | Encourages active play | Medium |
| Articulated Limbs | Promotes imaginative play | High |
By adding these interactive features, you can make a wooden toy dog that’s not just fun but also offers a special play experience for kids.
Troubleshooting Common Issues When Making Wooden Toys
When you start making your wooden toy dog, you might run into some common problems. These can be fixed with the right techniques. Whether you’re experienced or new to woodworking, knowing how to solve these issues can save you time and stress.
Fixing Splits and Cracks
Splits and cracks happen when wood dries wrong or when you apply too much force. To fix them, use wood glue and clamp it until it’s dry. For bigger cracks, fill them with wood filler and sand it smooth.
Solutions for Wobbly Parts
Wobbly parts come from loose joints or uneven surfaces. To fix them, check your joining methods and make sure surfaces match up. You might need more glue or small dowels to strengthen the joint.
Addressing Paint and Finish Problems
Paint and finish issues, like uneven coverage or peeling, can be fixed. Make sure the surface is well-sanded before painting or finishing. If problems continue, try a primer or a different finish that sticks better to the wood.
| Issue | Solution |
|---|---|
| Splits and Cracks | Use wood glue and clamp; for larger cracks, use wood filler |
| Wobbly Parts | Check joinery, align surfaces, use additional glue or dowels |
| Paint and Finish Problems | Sand surface, use primer, choose appropriate finish |

By using these troubleshooting tips, you can overcome common problems and finish your wooden toy dog project. Remember, being patient and paying close attention to detail are essential for great results.
Caring for and Maintaining Your Handcrafted Wooden Toy Dogs
Looking after your handcrafted wooden toy dogs keeps them a beloved friend for years. The right care keeps them looking great and safe for kids to play with.
Cleaning Methods for Wooden Toys
It’s important to clean your wooden toy dogs often to get rid of dirt and germs. Use a soft, dry cloth to wipe them down. For a deeper clean, a slightly damp cloth works, but dry them right away to avoid damage.
Don’t use strong chemicals or soak them in water. This can ruin the finish or harm the wood.
If there are stubborn stains, a gentle wood cleaner can help. Always read the instructions and test it on a small area first.

Refinishing Tips for Long-Lasting Play
As time goes by, your wooden toy dogs might get worn out. Refinishing them can make them look new again and protect the wood. Begin by lightly sanding to remove old finish and even out the wood.
Then, apply a safe wood finish, following the directions on the bottle.
| Refinishing Step | Purpose | Tips |
|---|---|---|
| Sanding | Removes old finish and smooths wood | Use fine-grit sandpaper, sand with the grain |
| Applying Finish | Protects the wood and enhances appearance | Choose child-safe finishes, follow manufacturer’s instructions |
| Drying | Allows finish to cure properly | Ensure the toy is not used until the finish is fully dry |
By following these care and maintenance tips, your handcrafted wooden toy dogs will stay in top shape. They’ll bring joy to your family for many years.
Conclusion: The Timeless Joy of Handcrafted Wooden Toys
Making handcrafted wooden toys is more than a hobby. It’s a way to add joy and warmth to a child’s life. The process of designing and crafting wooden toy dogs is rewarding. It gives a sense of DIY satisfaction that’s hard to find elsewhere.
The joy of these toys is in their simplicity and the imaginative play they inspire. Unlike digital toys, they encourage children to use their creativity. For you, the joy is in seeing your creation make a child happy.
We encourage you to keep exploring your creativity. Try new designs and share your experiences with others. Whether you’re experienced or just starting, handcrafted wooden toys offer endless possibilities for joy. So, keep crafting and watch as your creations make children smile, creating memories that last a lifetime.
🛠️ Want the Look Without the Sawdust? Here’s Your Shortcut
There’s something rewarding about building a wooden piece with your own hands—but let’s face it, not everyone has the time, tools, or space for a full DIY project.
💡 That’s why I recommend Ted’s Woodworking Plans – a massive library of 16,000+ step-by-step plans for every kind of woodworking project you can imagine. From pet houses to holiday gifts, you’ll get:
✨ Easy-to-follow blueprints
🧰 Complete material & cut lists
🪚 Projects for all skill levels
👉 Start your woodworking journey with Ted’s 16,000 plans »
💝 Ted’s Woodworking Plans also makes an amazing gift for parents, children, friends, boyfriends, girlfriends, brothers, and sisters.
🛒 Prefer to Buy Instead of Build?
No problem! If you love the look of handcrafted wood but would rather skip the tools, we’ve got you covered.
🌿 👉 Browse top-rated wooden mirrors and get inspired on Amazon »
FAQ
What type of wood is best for making wooden toy dogs?
What safety precautions should I take when working with power tools?
How do I ensure the paint and finishes used on my wooden toy dog are child-safe?
Can I use a template to design my wooden toy dog?
How do I add moving parts to my wooden toy dog?
What is the best way to clean and maintain my handcrafted wooden toy dog?
How can I fix splits or cracks in my wooden toy dog?
Can I make articulated limbs for my wooden toy dog?
Affiliate Disclosure
Some of the links in this article are affiliate links. If you click through and make a purchase, I may earn a small commission — at no additional cost to you.
This helps support my work so I can continue creating helpful woodworking tutorials and product reviews.I only recommend products and services that I have thoroughly researched and believe could provide real value to my readers.
Thank you for your support!