
As a pet owner, you know how fast your furry friend’s toys can fill your home. It’s hard to keep them organized. But, with some creativity and basic woodworking skills, you can make a beautiful storage solution.
We’re here to help you build a durable storage unit for your pet’s toys. It will keep them tidy and easy to find. Our guide is simple, even if you’re new to DIY projects.
👉 👉Start your woodworking journey with Ted’s 16,000 plans »
💝 Ted’s Woodworking Plans also makes an amazing gift for parents, children, friends, boyfriends, girlfriends, brothers, and sisters.
🌿 👉 Browse top-rated wooden dog toy box and get inspired on Amazon »
By following our woodworking plan, you’ll make a useful storage unit. Plus, it will be a lovely piece of furniture that fits your home’s style.
Key Takeaways
- Learn how to build a functional storage unit for your pet’s toys
- Discover a simple woodworking plan to create a beautiful piece of furniture
- Keep your home organized and clutter-free with a durable storage solution
- Develop your DIY skills with a fun and rewarding project
- Create a lovely piece of furniture that complements your home decor
Why Your Pet Needs a Dedicated Toy Storage Solution
As a pet owner, you know the mess toys can make. Organizing your pet’s toys is more than keeping your home tidy. It makes your home safer and more fun for your pet.
Benefits of Organizing Pet Toys
Organizing your pet’s toys has many benefits. It lowers the risk of choking hazards and makes cleaning easier. It also helps toys last longer. A good storage keeps toys handy but out of the way, making playtime better.
Advantages of Wood as a Material for Pet Furniture
Wood is a great choice for pet furniture, like toy storage. It’s strong, safe for pets, and can match your home’s look. Plus, choosing wood that’s been reclaimed or sourced responsibly is good for the planet.
| Material | Durability | Pet-Friendliness | Aesthetic Appeal |
|---|---|---|---|
| Wood | High | Yes | High |
| Plastic | Medium | Variable | Low |
| Fabric | Low | Yes | Medium |
Choosing wood for your dog toy box does more than organize toys. It adds warmth to your home. A wooden storage solution is both useful and beautiful, perfect for any room.
Project Overview: What to Expect When Building a Wooden Dog Toy Box
In this project, we’ll show you how to make a wooden dog toy box. It’s both useful and looks good. Let’s see what you can expect from this project.

Skill Level Required
This project is for DIY fans with some woodworking skills. If you know basic tools and techniques, you can do it easily. Even beginners can follow our step-by-step guide.
Time Commitment
This project should take 5-7 hours, depending on your skill and tools. You can do it in smaller parts over the weekend.
Cost Estimate
The cost of materials will vary based on wood and hardware choices. On average, expect to spend $50-$100. It’s a budget-friendly DIY project.
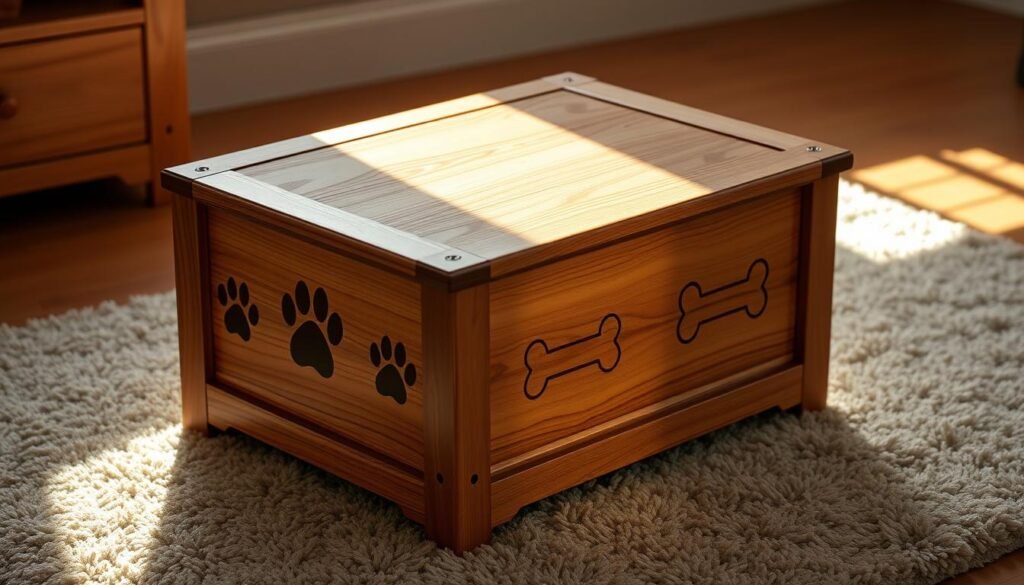
Final Dimensions and Capacity
The dog toy box will be 24 inches wide, 12 inches deep, and 12 inches tall. It has enough room for 2-3 cubic feet of toys.
Materials Needed for Your DIY Dog Toy Storage
Let’s explore the materials needed for a sturdy wooden toy box for your dog. It’s important to pick materials that are both durable and safe. This ensures your dog’s toys are well-protected.
Wood Selection Guide
Choosing the right wood is key for a durable and safe toy box. Hardwoods like oak or maple are great because they’re strong and don’t splinter easily. Softwoods, like pine, are too soft for this project.
For a rustic look, cedar or cypress are good choices. These woods resist pests and decay, making your project last longer.

👉 👉Start your woodworking journey with Ted’s 16,000 plans »
💝 Ted’s Woodworking Plans also makes an amazing gift for parents, children, friends, boyfriends, girlfriends, brothers, and sisters.
🌿 👉 Browse top-rated wooden dog toy box and get inspired on Amazon »
Hardware Components
You’ll need hinges, a latch or lock, and screws or nails for assembly. Make sure the hardware is strong enough for daily use.
- 2 hinges (2 inches each)
- 1 latch or lock
- 1 pound of 1.5-inch wood screws
- 1 pound of 1-inch wood nails
Finishing Supplies
For finishing, you’ll need sandpaper, pet-safe stain or sealant, and a clear coat. Always pick products that are safe for pets.
“Using pet-safe materials is not just a recommendation, it’s a necessity when building something your dog will be in contact with.”
Shopping List with Quantities
| Material | Quantity |
|---|---|
| 1-inch thick hardwood (oak or maple) | 2 sheets (4×4 feet each) |
| Hinges | 2 units |
| Latch or lock | 1 unit |
| Wood screws (1.5 inches) | 1 pound |
| Wood nails (1 inch) | 1 pound |
| Sandpaper | 5 sheets |
| Pet-safe stain or sealant | 1 can |
| Clear coat | 1 can |
With these materials, you’re ready to make a wooden toy box for dogs that’s both useful and safe.
Essential Tools for This Wooden Dog Toy Box Project
Building a wooden dog toy box needs specific tools for a smooth project. The right tools make the job easier and ensure your box is sturdy and well-made.
Power Tools
Power tools are key for cutting and shaping wood efficiently. You’ll need:
- A table saw or circular saw for straight cuts
- A drill press for precise drilling
- A jigsaw or bandsaw for curved cuts (if desired)
- A sander for smoothing wood surfaces
Hand Tools
Hand tools are important for detailed work and assembly. You’ll need:
- A hammer for tapping pieces into place
- Chisels for removing small wood amounts
- Hand saws for fine-tuning cuts
- Clamps for holding pieces together while gluing

Measuring and Marking Tools
Accuracy is vital when building a dog toy box. Make sure you have:
- A tape measure for measuring wood
- A square for ensuring corners are properly aligned
- A pencil and marker for marking cut lines
- A level to ensure your work surface is even
Optional Tools to Make the Job Easier
While not essential, these tools can make the project easier:
- A miter saw for precise angled cuts
- A router for decorative edges
- A drill with screwdriver bits for driving screws
With these tools, you’ll be ready to start your wooden dog toy box project confidently and precisely.
Safety Precautions for Pet Furniture Woodworking
When you work on pet furniture woodworking, safety is key. It keeps you and your pets safe. We’ll talk about the need for protective gear, following safety rules, and using safe materials.
Personal Protective Equipment
Wearing the right gear is vital when woodworking. This includes safety glasses, ear protection, and a dust mask. Always wear safety glasses to protect your eyes from flying debris. Earplugs or earmuffs help prevent hearing damage from loud tools. A dust mask keeps you from breathing in wood dust and particles.

Workshop Safety Guidelines
Keeping your workshop safe is essential. Make sure it’s well-ventilated and clean. Regularly clean your workshop to prevent the accumulation of dust and wood shavings, which can be a fire hazard. Also, check that all power tools are working right and follow the instructions for use.
Pet-Safe Material Considerations
When making pet furniture, think about your pets’ safety. Use non-toxic and safe materials. Avoid materials that can splinter or break into small pieces. Opt for pet-safe finishes and stains to keep your wooden dog toy box safe for your pets.
| Safety Measure | Description | Importance Level |
|---|---|---|
| Personal Protective Equipment | Safety glasses, hearing protection, dust mask | High |
| Workshop Safety | Well-ventilated, clutter-free, regular cleaning | High |
| Pet-Safe Materials | Non-toxic, durable materials | High |
Preparing Your Workspace and Materials
Before we start building the wooden dog toy box, let’s get our workspace ready. A well-prepared workspace makes the project more fun. It also helps us work efficiently and safely.
Setting Up Your Work Area
Begin by clearing a flat surface for your materials and tools. Make sure this area is well-lit and free from distractions. Cover your work surface with a protective layer to prevent damage from sawdust and wood shavings.
Measuring and Cutting the Wood
Now, we’ll measure and cut the wood as planned. Use a sharp pencil to mark the cut lines on the wood. Double-check your measurements before cutting to avoid wasting material.
Creating a Cutting Diagram
A cutting diagram helps us see how to use our wood wisely. Take a moment to plan your cuts. Think about the dimensions of the dog toy box and the pieces you need.
Initial Sanding of Cut Pieces
After cutting the wood, smooth out the edges with a sanding block. This step is key for a smooth fit and no splinters.
By following these steps, we’re ready to move on to assembling our wooden dog toy box. Remember, proper preparation of our workspace and materials leads to a better finished project.
👉 👉Start your woodworking journey with Ted’s 16,000 plans »
💝 Ted’s Woodworking Plans also makes an amazing gift for parents, children, friends, boyfriends, girlfriends, brothers, and sisters.
🌿 👉 Browse top-rated wooden dog toy box and get inspired on Amazon »
Step-by-Step Construction of the Wooden Dog Toy Box
We’ll guide you through making a strong wooden dog toy box. It’s fun and helps keep your dog’s toys tidy.
Building the Box Base
First, we build the base. Cut the wood to the right size. Make sure your cuts are precise for easy assembly. Then, glue and nail the pieces together for a solid base.
Assembling the Side Panels
Now, we put together the side panels. Align them carefully with the base. Use screws to hold them in place. Check that corners are square and panels are even.
Attaching the Front and Back Panels
Next, we add the front and back panels. This makes the box strong. Use wood glue and nails for a tight bond.
Installing the Bottom Panel
The bottom panel adds extra support. It keeps toys from falling out. Screw it in place, making sure it’s even with the sides.
Reinforcing the Structure
To make the box last, we reinforce it. Check all joints and corners. Add more nails or screws if needed. This is key for daily use.
By following these steps, you’ll create a beautiful wooden dog toy box. It will keep your pet’s toys organized and easy to find.
Creating and Installing a Safe, Functional Lid
A well-designed lid is not just useful for your dog toy box. It’s also a safety feature that’s very important. As you finish your wooden dog toy box, let’s make a lid that’s safe and easy to use.
Building a Basic Hinged Lid
To begin, attach the lid to the box with hinges. This makes the lid open and close smoothly. Make sure the hinges are strong and fit the size and weight of your lid.

Adding Safety Features to Prevent Slamming
To stop the lid from slamming, add a safety stay or soft-close hinge. This is key to avoid accidents and injuries to pets or family.
Installing Handles or Knobs
Adding a handle or knob makes opening and closing the lid easier. Pick a design that looks good with your dog toy box and is easy to hold.
Testing the Lid Functionality
After installing, test the lid many times. Make sure it opens and closes smoothly and safely. Look for any problems or things that need fixing.
| Lid Component | Function |
|---|---|
| Hinges | Allows the lid to open and close |
| Safety Stay/Soft-close Hinge | Prevents the lid from slamming shut |
| Handle/Knob | Facilitates easy opening and closing |
By following these steps, you’ll make a safe lid for pet storage that makes your dog toy box better. Remember, the secret to a great DIY project is paying attention to details and keeping safety in mind.
Finishing Touches for Your Pet’s Toy Storage
Now that your wooden dog toy box is built, it’s time to add the finishing touches. This step not only makes your pet’s toy storage look better. It also makes it safe and durable for daily use.
Final Sanding for Smooth Edges
Before applying any finish, give your dog toy box a thorough sanding. This is key to remove any splinters or rough edges that could harm your pet. Use a fine-grit sandpaper to smooth out all surfaces. Pay extra attention to areas where wood pieces are joined together.
Applying Pet-Safe Stains and Finishes
When staining and finishing, choose products that are safe for your pet. Go for non-toxic, water-based stains and finishes without harmful chemicals. Follow the manufacturer’s instructions for applying the stain. Let it dry completely before adding a finish.

👉 👉Start your woodworking journey with Ted’s 16,000 plans »
💝 Ted’s Woodworking Plans also makes an amazing gift for parents, children, friends, boyfriends, girlfriends, brothers, and sisters.
🌿 👉 Browse top-rated wooden dog toy box and get inspired on Amazon »
Adding Decorative Elements
If you want to add a personal touch, now is the time. You can add decorative hardware, engrave your pet’s name, or use a stencil for a fun design. Make sure any decorative elements you add are securely attached and won’t come loose over time.
Allowing Proper Drying Time
After applying the finish, let it dry completely as instructed by the manufacturer. This step is key to ensure the finish is durable and safe for your pet’s toys.
By following these steps, you’ll have a beautifully finished dog toy box. It will be both functional and safe for your pet.
Troubleshooting Common Issues When Building a Dog Toy Box
Don’t worry if your dog toy box project hits a snag – we’ve got solutions for common problems. Even with careful planning, issues like misaligned joints, warped wood, and lid fitting problems can arise.
Fixing Misaligned Joints
If your joints aren’t aligning properly, check that your measurements are accurate and your cuts are precise. Double-check your cutting diagram and ensure that your wood is properly aligned during assembly. Here are some common mistakes to watch out for:
- Inaccurate measurements
- Improperly aligned wood during cutting
- Inconsistent joint sizes
Addressing Warped Wood Problems
Warped wood can be a challenge. To minimize warping, store your wood properly before starting the project, and consider using wood that’s been kiln-dried. If you encounter warping, try the following:
- Clamp the warped wood to a flat surface
- Apply moisture to the concave side
- Use a wood straightening technique
Solutions for Lid Fitting Issues
A lid that doesn’t fit can be frustrating. Check that the lid’s dimensions match your box’s opening, and adjust the lid’s size if necessary. Ensure hinges are properly aligned and securely attached.
Repairing Minor Mistakes
Minor mistakes can often be repaired with wood glue or filler. For more significant errors, consider re-cutting the affected piece or seeking advice from a woodworking expert.

Conclusion: Enjoying and Maintaining Your Handcrafted Pet Storage Solution
Now that you’ve made your wooden dog toy box, it’s time to enjoy it! Keeping your handcrafted pet storage in good shape is key. It makes sure it stays useful and fun in your home.
To keep your dog toy box looking good, just wipe it down with a damp cloth. Don’t let harsh chemicals or very hot or cold temperatures get to it. You can also use a pet-safe wood finish to protect the wood and keep it looking nice.
By following these easy tips, your handcrafted pet storage will last for many years. Your pet will love the neat and organized space. And you’ll feel happy knowing you made something special for them.
It’s not hard to take care of your dog toy box. With a bit of effort, it will keep being a great place for your pet’s toys. Seeing your pet happy with their storage is a joy in itself.
🛠️ Want the Look Without the Sawdust? Here’s Your Shortcut
There’s something rewarding about building a wooden piece with your own hands—but let’s face it, not everyone has the time, tools, or space for a full DIY project.
💡 That’s why I recommend Ted’s Woodworking Plans – a massive library of 16,000+ step-by-step plans for every kind of woodworking project you can imagine. From pet houses to holiday gifts, you’ll get:
✨ Easy-to-follow blueprints
🧰 Complete material & cut lists
🪚 Projects for all skill levels
👉 👉Start your woodworking journey with Ted’s 16,000 plans »
💝 Ted’s Woodworking Plans also makes an amazing gift for parents, children, friends, boyfriends, girlfriends, brothers, and sisters.
🛒 Prefer to Buy Instead of Build?
No problem! If you love the look of handcrafted wood but would rather skip the tools, we’ve got you covered.
🌿 👉 Browse top-rated wooden dog toy box and get inspired on Amazon »
FAQ
What type of wood is best for building a dog toy box?
How do I ensure the dog toy box is safe for my pet?
Can I customize the size of the dog toy box to fit my needs?
What are the benefits of using a wooden dog toy box over other materials?
How do I maintain and clean the wooden dog toy box?
Can I add decorative elements to the dog toy box?
What is the average cost of building a wooden dog toy box?
Do I need advanced woodworking skills to build a dog toy box?
Can I use a dog toy box woodworking plan for other pet storage projects?
What are some alternative names or keywords for a wooden dog toy box?
Affiliate Disclosure
Some of the links in this article are affiliate links. If you click through and make a purchase, I may earn a small commission — at no additional cost to you.
This helps support my work so I can continue creating helpful woodworking tutorials and product reviews.I only recommend products and services that I have thoroughly researched and believe could provide real value to my readers.
Thank you for your support!