
Imagine having a workspace that sparks creativity and inspires productivity. A custom woodworking table top can be the perfect addition to your home workshop or office.
Creating a DIY wood table design that suits your needs can be a rewarding experience. With a custom table top, you can elevate your workspace, making it more functional and aesthetically pleasing.
We’ll guide you through the process of creating a beautiful and durable custom table top that reflects your personal style. Whether you’re a seasoned woodworker or a beginner, our step-by-step guide will help you bring your vision to life.
👉👉 Start your woodworking journey with Ted’s 16,000 plans »
🌿 👉 Browse top-rated Woodworking Table Top and get inspired on Amazon »
Key Takeaways
- Create a custom workspace that inspires productivity
- Design a table top that suits your specific needs
- Learn the essential steps to create a beautiful and durable table top
- Enhance your home workshop or office with a unique piece of furniture
- Develop your woodworking skills with a rewarding DIY project
The Benefits of a Custom Woodworking Table Top
A custom woodworking table top is more than furniture. It shows off your craftsmanship and personal touch. By making your own table top, you’re not just creating something useful. You’re making a piece that shows your style and meets your needs.
Personalization and Unique Design Elements
One big plus of a custom table top is how you can make it your own. You can pick the wood, design, and size you want. This means you have full control over what your table looks like.
For example, you can pick a wood that fits your workspace or a design that boosts your productivity. This level of customization isn’t easy to find in store-bought tables.
Superior Quality and Durability
A handmade table top is built to last. It’s made with care and the best materials. This means it can handle daily use better than tables made in big factories.
| Feature | Custom Table Top | Store-Bought Table Top |
|---|---|---|
| Material Quality | High-quality, selected materials | Often lower-grade materials |
| Craftsmanship | Careful, detailed craftsmanship | Mass production techniques |
| Customization | Tailored to your specifications | Limited to available designs |
Cost-Effectiveness Compared to Store-Bought Options
Even though a custom table top might cost more upfront, it’s often cheaper in the long run. A well-made, handmade table can last for decades with the right care. This means you won’t need to replace it as often.
Also, by picking the materials and design yourself, you can save money. You avoid paying for things you don’t need. This way, you get a table that’s truly yours, and it’s more affordable.
Planning Your Custom Table Top Project
Before starting your dream table, planning is key. A good plan helps you through the project. It makes sure your table is both useful and looks great.
Determining the Purpose and Function
First, decide what your table will be for. Will it be for dining, work, or as a coffee table? Knowing this helps pick the right size, material, and design.
For example, a dining table needs more space and a strong finish. A coffee table might be smaller and more decorative.
Measuring and Sizing Considerations
After deciding its purpose, measure the space. Think about the room’s layout and any furniture. Also, consider how many people it will seat or how much space you need.
A table that’s too big can make the room feel cramped. One that’s too small might not be useful.
Creating Sketches and Design Plans
With your measurements and purpose in mind, start sketching. Don’t worry about your drawing skills. Just focus on getting your ideas down. Think about the style, material, and any extra features you want, like drawers or a lower shelf.
| Design Element | Considerations |
|---|---|
| Size | Measure the space, consider the number of users |
| Material | Durability, aesthetic appeal, budget |
| Style | Modern, traditional, rustic, minimalist |
By following these steps, you’re on your way to a custom table top that fits your needs perfectly. Remember, a good plan is the secret to success!

👉👉 Start your woodworking journey with Ted’s 16,000 plans »
🌿 👉 Browse top-rated Woodworking Table Top and get inspired on Amazon »
Essential Tools and Materials for Your Woodworking Table Top
Before starting your custom table top, let’s look at the tools and materials you’ll need. The right tools make woodworking easier and give your project a professional look.
Must-Have Tools for the Job
You’ll need some key tools for a great table top. A table saw is for straight cuts, a jointer for flat boards, and a planer for the right size. A router helps with fancy edges, and clamps keep things in place when gluing.

👉👉 Start your woodworking journey with Ted’s 16,000 plans »
🌿 👉 Browse top-rated Woodworking Table Top and get inspired on Amazon »
Selecting Quality Hardware and Fasteners
Quality is key when picking hardware and fasteners. For your table top, you’ll need screws, nails, or dowels. Choose durable materials that fit your project’s needs. Stainless steel or brass fasteners add elegance and strength.
Additional Supplies and Safety Equipment
Remember, you’ll also need extra supplies and safety gear. Safety glasses, ear protection, and a dust mask are essential. You’ll also need sandpaper, wood glue, and a finish to protect and beautify your wood.
With these tools and materials, you’re ready to start your woodworking project. You’ll be able to create a stunning custom table top with confidence.
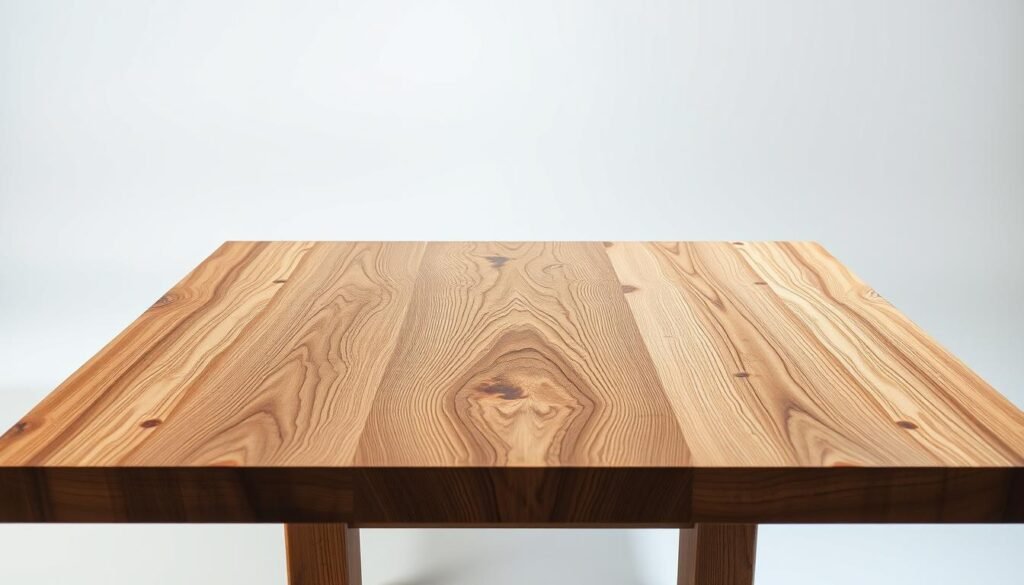
Choosing the Perfect Wood for Your Table Top
Choosing the right wood for your table top is key. It affects both how long it lasts and how it looks. The wood you pick depends on what you plan to use it for, your budget, and your style.
Hardwood vs. Softwood Options
The debate between hardwood and softwood is ongoing in woodworking. Hardwoods like oak and maple are strong and durable. They’re great for projects needing stability. Softwoods like pine and fir are cheaper and can look beautiful, perfect for a rustic look.
Exploring Reclaimed Wood Possibilities
Reclaimed wood adds history and character to your table top. It comes from old buildings and barns. Using it reduces waste and adds depth to your project.
Understanding Wood Grain Patterns and Characteristics
The wood grain affects your table top’s look. Different woods have unique grain patterns. Knowing these helps you pick the right wood for your design.
By thinking about these points and looking at different woods, you can make a good choice. Whether you want the strength of hardwoods, the charm of reclaimed wood, or the patterns of different grains, there’s a wood for your table top.

👉👉 Start your woodworking journey with Ted’s 16,000 plans »
🌿 👉 Browse top-rated Woodworking Table Top and get inspired on Amazon »
Preparing Your Lumber for the Woodworking Table Top
Before you start building your handmade table top, it’s key to prepare your lumber right. This step is often missed, but it’s vital for a beautiful and strong table top.
Milling and Dimensioning Rough Lumber
Milling your lumber to the right size is the first step. This means removing any flaws and cutting it to size. Proper milling makes sure your table top is flat and even.
To mill your lumber well, you’ll need a jointer and a planer. The jointer flattens one side of the board. The planer makes sure the other side is parallel and the board is the right thickness.

👉👉 Start your woodworking journey with Ted’s 16,000 plans »
🌿 👉 Browse top-rated Woodworking Table Top and get inspired on Amazon »
Acclimating Wood to Your Workshop Environment
Acclimating your wood to your workshop is key to avoid warping or shrinking later. Wood changes with humidity and temperature.
To acclimate your wood, keep it in your workshop for a few days before starting. This lets the wood get used to the environment, lowering the chance of problems later.
Selecting and Arranging Boards for Visual Appeal
When picking and arranging boards for your table top, think about how they look together. You want the grain and color to match well.
Here’s a simple guide to arrange your boards well:
| Board Position | Grain Direction | Color Tone |
|---|---|---|
| 1 | Alternating | Light |
| 2 | Alternating | Dark |
| 3 | Matching | Medium |
By following these steps, you can make a stunning handmade table top. It will be both strong and look great.
Step-by-Step Construction of Your Woodworking Table Top
Creating your dream woodworking table top is a rewarding project. It needs focus, the right tools, and patience. We’ll show you how to make it happen.
Edge Gluing Boards Together
The first step is to edge glue the boards. This means applying glue to the edges and clamping them until it dries. Make sure the edges are clean and dry, and clamp evenly.
Tips for successful edge gluing:
- Use a high-quality wood glue that’s suitable for your project’s needs.
- Apply even pressure to avoid gaps or unevenness.
- Use cauls or clamping blocks to distribute pressure and prevent damage to the boards.
Clamping Techniques for Proper Alignment
Clamping right is key for a flat surface. You can use bar clamps, pipe clamps, or F-style clamps. The goal is to apply even pressure all over.

👉👉 Start your woodworking journey with Ted’s 16,000 plans »
🌿 👉 Browse top-rated Woodworking Table Top and get inspired on Amazon »
Flattening and Squaring the Assembly
After the glue dries, you’ll need to flatten and square the assembly. This step is vital for a level and useful table top.
Using Hand Planes
Hand planes are great for flattening and squaring wood. They give you precise control and can fix small issues.
Router Sled Method
A router sled is a powerful tool for large surfaces. It has a router on a sled that moves over the surface, making it flat.
Drum Sander Approach
A drum sander is also effective for flattening and smoothing. It’s good for removing old finishes or fixing big problems.
By following these steps and using the right techniques, you’ll make a beautiful, functional woodworking table top. It will last you for many years.
Joinery Techniques for a Sturdy Table Top
To make a table top strong and lasting, knowing joinery techniques is key. The joinery method you pick affects the table’s durability and look.

👉👉 Start your woodworking journey with Ted’s 16,000 plans »
🌿 👉 Browse top-rated Woodworking Table Top and get inspired on Amazon »
Biscuit Joinery Methods
Biscuit joinery is a favorite for making table tops. It uses small, oval wood pieces (biscuits) in slots to join boards. This method ensures good alignment and strengthens the table top.
To do biscuit joinery, you need a biscuit joiner. It makes the slots for the biscuits.
Dowel and Domino Joinery Options
Dowel and domino joinery are strong ways to join table top parts. Dowels are rods in holes for joining. Domino joinery uses a tool for mortises and tenons.
Both methods make strong joints and fit many table top designs.
Traditional Breadboard Ends
Traditional breadboard ends add strength and beauty to your table top. They use dowels or other methods to attach to the table top. This prevents warping and adds a decorative touch.
Learning and using these joinery techniques helps make a sturdy, beautiful table top that will last.
Table Top Finishing Techniques for a Professional Look
Getting a professional finish on your woodworking table top is key. It makes your project stand out. The finishing process has several steps that affect the table top’s look and durability.
Sanding Progression for Smooth Results
Sanding is the base for a smooth finish. Start with coarse grit sandpaper (120-150) and move to finer grits (220-240) for a smooth surface. Proper sanding techniques are vital to avoid scratches and unevenness.
- Begin sanding with the wood grain, not against it.
- Use a sanding block for flat areas to maintain even pressure.
- Inspect your work under good lighting to catch any imperfections.
Staining Options and Application Methods
Staining can make your table top more beautiful by adding color and depth. There are many staining options, like oil-based and water-based stains. Choosing the right stain depends on the wood type and desired finish.
- Prepare your surface by sanding and cleaning.
- Apply the stain evenly, following the manufacturer’s instructions.
- Wipe off excess stain to prevent pooling and uneven color.
Protective Topcoats and Their Properties
A protective topcoat is essential for protecting your table top from spills, scratches, and wear. Different topcoats have unique properties.
Oil-Based Finishes
Oil-based finishes create a hard, durable surface. They dry slowly but give a rich, warm glow.
Water-Based Polyurethanes
Water-based polyurethanes dry quickly and are easy to clean up. They offer a clear, durable finish.
Traditional Shellac and Lacquer
Shellac and lacquer are traditional finishes that give a high-gloss look. They need multiple coats and can be tricky to apply.

By mastering these finishing techniques, you can create a professional-looking table top that will last for years.
👉👉 Start your woodworking journey with Ted’s 16,000 plans »
🌿 👉 Browse top-rated Woodworking Table Top and get inspired on Amazon »
Troubleshooting Common Woodworking Table Top Problems
Woodworking projects can sometimes run into trouble. But don’t worry, we’ve got you covered. We’ll look at some common issues you might face when making your diy wood table design.
Dealing with Wood Movement and Warping
Wood movement and warping can be tough. To prevent warping, make sure your table top is well-clamped during gluing. Use high-quality wood glue and let the wood adjust to your workshop’s environment.
Fixing Glue Joint Failures
If your glue joints fail, don’t worry. Check if it’s because of bad clamping or glue use. Re-glue the joint, ensuring it’s aligned right and clamped well. For extra strength, think about using biscuits or dowels.
Addressing Finishing Imperfections
Finishing imperfections can be annoying. For small issues, lightly sand and reapply the finish. For bigger problems, you might need to strip the finish and start again. Always work in a well-ventilated area and follow safety rules.

👉👉 Start your woodworking journey with Ted’s 16,000 plans »
🌿 👉 Browse top-rated Woodworking Table Top and get inspired on Amazon »
By tackling these common problems, your woodworking table top will look great. Remember, practice makes perfect, and troubleshooting is part of the journey.
Conclusion
We’ve shown you how to design and build a custom woodworking table top. This includes planning, picking materials, building, and finishing. By doing this, you can make a unique piece that makes your workspace better and shows off your style.
Creating a custom table top is more than just making furniture. It’s about making something with your own hands that makes you happy. Your new table top will make you feel proud and give you a solid base for more projects.
Whether you’re experienced or new to woodworking, we urge you to try this project. You’ll get to make something special. Your custom table top will be a great addition to your space and will last for many years with the right care.
🛠️ Want the Look Without the Sawdust? Here’s Your Shortcut
There’s something rewarding about building a wooden piece with your own hands—but let’s face it, not everyone has the time, tools, or space for a full DIY project.
💡 That’s why I recommend Ted’s Woodworking Plans – a massive library of 16,000+ step-by-step plans for every kind of woodworking project you can imagine. From pet houses to holiday gifts, you’ll get:
✨ Easy-to-follow blueprints
🧰 Complete material & cut lists
🪚 Projects for all skill levels
👉👉 Start your woodworking journey with Ted’s 16,000 plans »
🛒 Prefer to Buy Instead of Build?
No problem! If you love the look of handcrafted wood but would rather skip the tools, we’ve got you covered.
🌿 👉 Browse top-rated Woodworking Table Top and get inspired on Amazon »
FAQ
🔍What is the best wood to use for a woodworking table top?
🔍How do I prevent warping in my woodworking table top?
🔍What is the ideal thickness for a woodworking table top?
🔍Can I use a DIY wood table design for a commercial project?
🔍How do I achieve a smooth finish on my woodworking table top?
🔍What are the benefits of using reclaimed wood for my table top?
🔍How do I build a sturdy table top using joinery techniques?
🔍What safety equipment should I use when working on a woodworking table top project?
Affiliate Disclosure
Some of the links in this article are affiliate links. If you click through and make a purchase, I may earn a small commission — at no additional cost to you.
This helps support my work so I can continue creating helpful woodworking tutorials and product reviews.I only recommend products and services that I have thoroughly researched and believe could provide real value to my readers.
Thank you for your support!